Theatre Programming Quick Guide
If you are used to programming other theatre-style consoles, you will be more familiar with using a keypad/syntax style interface, rather than the Titan touchscreen. But fear not because you can program a theatre show on Titan using keypad syntax and this is how you do it.
- Labelled buttons on the console are shown like this: Enter.
- For commands with a + you hold down the first button while pressing the second. For example Clear + All means hold down Clear then press All.
- The @ button is the one next to the numeric keypad, not the ones near the wheels.
- The Cue button is labelled Connect or Connect/Cue on some consoles.
- The Through button is labelled Thro on some consoles.
- The And and Through buttons are not provided as fixed buttons on some consoles, softkey And and Through options are provided instead.
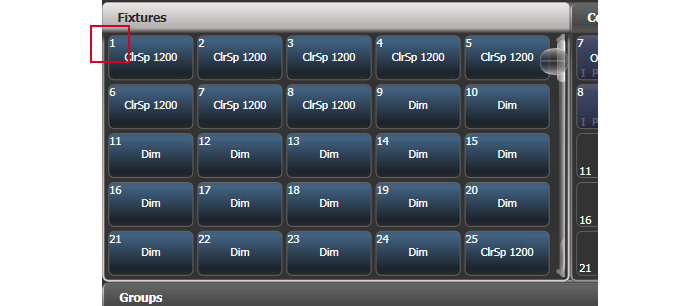
Each Fixture (or dimmer channel) has a User Number (which is equivalent to the Channel Number on other consoles), shown in the top left corner of the fixture button. This is the number n shown in the keypad commands below. You can change this number using the Set Legend softkey, see section Changing the Patch. Groups also have a User Number.
- Commands can be joined together, until you press Enter which executes the command. So you can for example select fixtures and then set an intensity level on them in the same command.
- Once fixtures have been selected you can continue to make changes to them until you press Clear or select different fixtures.
- Intensity values are normally set as a 2-digit percentage (so "50" for 50%) but you can change this to single-digit mode in the Formatting tab of the User Settings
Selecting Fixtures to be controlled
| Keypresses | Action |
|---|---|
| n Enter | Select fixture n for control |
| n Through m Enter | Select fixtures n through m for control |
| Group n Enter | Select fixture group n for control |
| n Through m And p | Select fixtures n through m and p for control |
| n Through m And p Through q | Select fixtures n through m and p through q for control |
| n Through m Not p | Select fixtures n through m, but miss out fixture p |
- If fixtures have cells or subfixtures (for example, pixel bars) you can individually select cells using the "dot" notation, for example n . 1 Through 4 Enter would select the first 4 cells of fixture n. See Celled Fixtures.
Setting Fixture intensity levels
| Keypresses | Action |
|---|---|
| @ v Enter | Set the currently selected fixtures to v% (see note above about 2-digit %) |
| @ @ | Set the currently selected fixtures to 100% |
| n @ v Enter | Set fixture n to v% |
| n @ @ | Set fixture n to 100% |
| n Through m @ v Enter | Set fixtures n - m to v% |
| n And m And p @ v Enter | Set fixtures n, m, p to v% |
| Group n @ v Enter | Set fixtures in group n to v% |
Setting Other Attributes of Intelligent Fixtures
| Keypresses | Action |
|---|---|
| @ b / v | Set gel colour v from library b to selected fixtures. (1=Library L, 2=Library R, 3=Library G) |
| Gobo (Turn Wheels) | Set gobo values of selected fixtures as shown above the wheels. |
| Gobo Wheel @ Gobo 1 | Set gobo values of selected fixtures as shown on the softkeys. (This uses the Wheel @ button next to each wheel) |
- For setting gel colours, if the console does not have a hardware / button you need to use an external qwerty keyboard or the touch keyboard. See Selecting gel colours.
Clear functions
| Keypresses | Action |
|---|---|
| Clear | Snap clear the programmer - this will clear the programmer, returning edited intensity/HTP channels back to programmed state and deselecting fixtures (similar to Sneak on ETC but only acting on intensity channels) |
| Release + Clear | Release the programmer - this will clear the programmer, release edited channels (HTP and LTP) back to programmed state and deselect fixtures (like Sneak on ETC) |
| t Clear | Clear edited channels fading over time t |
| Clear + All | Deselect all fixtures, but keep edited values in the programmer |
- The Clear function can be changed to operate in a 2-step mode where the first press deselects fixtures, then the 2nd press clears edited values, or the other way around. See Action Precedence option in the Clear tab of User Settings.
While you hold down Clear, other functions are available on the softkeys, allowing you to clear the edited values from only selected fixtures, or to clear values using a mask. See Clear button hold down options
Programming Cues
Titan can have multiple cue lists. To start a cue list press then select Create Cue List from the touch screen. Then press a Select button above the fader where you want to store the cue list.
When programming, Titan uses a concept called "the Programmer". This keeps track of the dimmers/fixture attributes which you have manually changed (or changed with a palette) since you last pressed Clear.
The Record Mode softkey lets you choose the following ways of programming changes:
Record by Channel will record the individual attributes of fixtures which are in the programmer. So if you have a fixture where you have only changed the pan/tilt, only the pan/tilt will be recorded and the other attributes will not be affected by the cue. This is best for cues which are used to modify other cues (for example a colour-changing cue).
Record by Fixture will record the complete state of fixtures which have any changed attributes in the programmer. So if you have a fixture where you have only changed the pan/tilt, all the other attributes of the fixture will be recorded as well. This is best for cues where you want to be sure that the fixture looks like it was when you programmed it, regardless of its previous state.
Record by Stage will ignore the programmer and record everything which has its intensity set above zero.
Note this means that if you put up another playback, that won't get recorded unless you are using "Record by Stage" mode, since the playback isn't in the programmer (see Creating a Cue). You can use the Include function to get a playback into the programmer for recording elsewhere.
In addition to the above, if you have Tracking Mode enabled for the Cue List (the default setting) then the console will not record dimmers/attributes unless they have changed from the previous cue in the Cue List. This is the normal operation of theatrical lighting consoles and makes editing cues easier, since you only have the change the cue where the attribute was originally set.
| Keypresses | Action |
|---|---|
| Create Cue List fader select | Start recording a new cue list on this fader |
| fader select fader select | Record the next cue onto the end of the cue list on this fader |
| Cue n Enter | Record cue n (will prompt for merge/overwrite if it exists already) |
| Time t Enter | Set fade time into programmer (does not affect stored cues; will save with the next cue you record) |
| View fader select | Show the list of cues on screen, click on individual times in the grid to edit them |
Copy, Move and Delete commands
| Keypresses | Action |
|---|---|
| Copy Cue n @ Cue m Enter | Copy cue n to new cue m |
| Copy Cue n @ Enter | Copy cue n onto the end of the cue list |
| Delete Cue n Enter Enter | Delete cue n (2nd Enter confirms) |
For the copy commands, you can use Move in place of Copyto move cues. For consoles which don't have a Move button you can press (Avo and Copy) together to get Move.
You can select multiple cues using Through, And and Not. For example to copy cues 3, 4 ,5 ,7, 10 into a new block of cues starting at cue 20 you could do
Copy fader select **3** Through **7** Not **6** And **10** @ **20** Enter
Block and Follow-On cues
Use the Cue List window to set Block or Follow-On cues (using View fader select).
To make a Block cue (changes from previous cues do not track), in the Tracking column click the cell for the cue you want to change and select Block from the softkeys.
To make a Follow-On or linked cue so they automatically run after each other, click on the "Link" cell (which normally shows "Wait For Go". Then select from the softkeys Link After Previous Cue or Link With Previous Cue. For Link After, set the "Delay Out" time to set how long the cue will remain before the next cue starts.
Running Cues
Push up the fader of the cue list to make it active. Titan calls this the connected cue list and the control buttons such as Go will operate on this cue list.
| Keypresses | Action |
|---|---|
| Cue fader select | If another cue list is active, connect this cue list as the current list |
| Go | Run next cue with programmed times |
| Cue n Go | Go cue n with programmed times |
| t Go | Next cue go with fade time t |
| n Cue t Go | Jump to cue n with fade time t |
- If you want moving fixtures to automatically position themselves ready for the next cue, enable the Move In Dark option, see Move In Dark. This option is Off by default.
Updating Cues
You can update a single cue with the contents of the programmer, or add the same changes to a range of cues.
| Keypresses | Action |
|---|---|
| Cue n Enter Enter | Update cue n by merging the contents of the programmer and track forwards (will add the cue if it does not already exist). |
| Cue n @ @ | Update cue n only by merging the contents of the programmer, no forward tracking. |
| Cue n Time t Enter | Set fade time of cue n to t seconds |
| Cue n Through m Merge | Merge the contents of the programmer into cues n to m inclusive. (Will add any whole number cues which are missing in that range) |
| Update Cue n Through m Update | Updates cues n to m inclusive with the contents of the programmer (Will not add any cues, or any attributes which were not originally in the cue - see note below about Add Channels option) |
| Update Cue n Through m Update | Updates cues n to m inclusive with the contents of the programmer (Will not add any whole number cues which are missing, but will add attributes which were not originally in the cue) |
- For the Update commands you can decide whether or not you want to add attributes which do not already exist in the cues using the Add Channels option. If this is set to On, then new attributes will be added to the cue, otherwise only pre-existing attributes will be updated. The Record Update command overrides this option to "On".
Updating the current live cue
Often you need to make changes to a cue while the cue is active in a running show. Press Clear before you make your changes in the programmer, to be sure that the programmer does not contain any unwanted previous changes.
| Keypresses | Action |
|---|---|
| Cue Cue | Update current live cue by merging the contents of the programmer and track forwards. |
| Cue @ @ | Update live cue only by merging the contents of the programmer, no forward tracking. |
| Update Cue Cue | Update currently existing values in live cue with the contents of the programmer and track forwards (for tracked values, will go back through cues to find the most recent hard value and update that). |
| Update Cue @ @ | Update currently existing values in the live cue only, don't track forwards (for tracked values, will go back through cues to find the most recent hard value and update that). |
| Update Cue Cue | Update live cue with the contents of the programmer and track forwards (will add attributes which were not originally in the cue, and go back through cues to update tracked values at the source cue) |
| Time t Enter Cue Cue | Set fade in time of current cue (You can also edit this in the Cue List Window). |
Advanced Time options
| Keypresses | Action |
|---|---|
| Time t1 And t2 Enter | Add fade-in time t1 and fade-out time t2 to programmer, ready to record. |
| Time t1 And t2 Enter Cue Cue | Set fade-in time t1 and fade-out time t2 of currently active cue. |
| Time Fixture t Enter | Set fade-in time t of currently selected fixtures, ready to record. |
| Time t1 @ t2 Enter | Add fade-in time t1 and delay time t2 to programmer, ready to record. |
| Time Fixture t1 @ t2 Enter Cue Cue | Set fade-in time t1 and delay time t2 of currently selected fixtures. |
Effects/Shapes
You can't select Effects/Shapes from the keypad on Titan, but it's still easy:
Select fixtures for control
At the top level menu press Shapes and Effects, Shape Generator, Create
Select the type of shape Dimmer, Pan/Tilt etc
Select a shape from the softkeys or from the Shapes window which appears
Set the Speed, Size, Spread using the wheels
Shapes will record into cues, and will track through subsequent cues until you stop them. You can stop tracked shapes in the Cue List View window using the T/B switch in the View Shape column, see Shape Tracking in Cue Lists.
Macros
You can record a sequence of keypresses as a Macro, so that the console can automatically replay your actions. See Macros.
You can include macros in Cue Lists by clicking on the Macros column in the Cue List View window.