Sapphire Touch
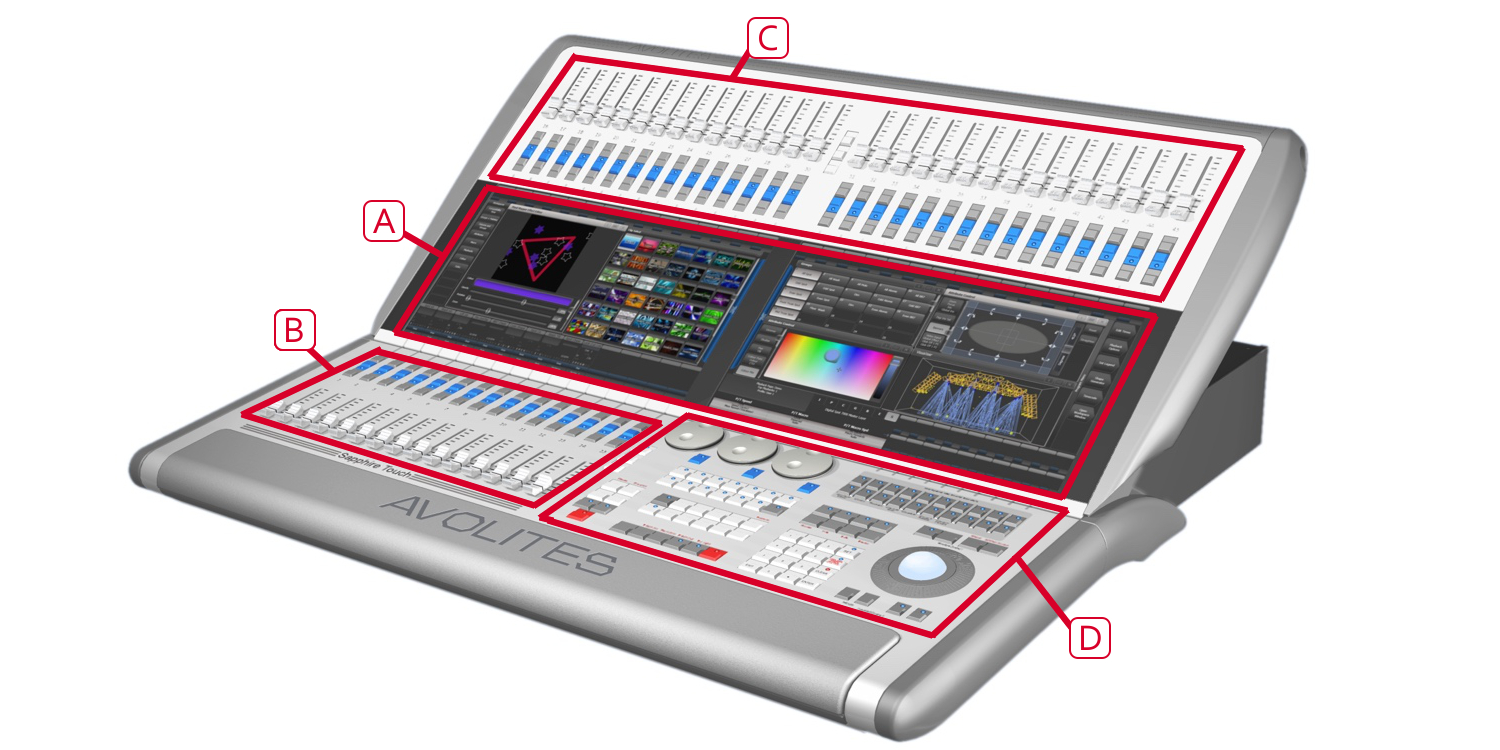 The Sapphire Touch has four main control
areas:
A The two Touch screens contain fixture, palette and group select buttons. They also show legends for the playback faders and shows the current menu page and softkey buttons on the top right of the right hand screen.
B The Playback faders select and control cues and programs
C The Preset playbacks are used for patching fixtures or for additional playbacks.
D The Programming and setup controls configure and program the console, within which the macro/executor buttons allow storage of frequent key sequences, screen layouts, groups or programs.
The Main Controls
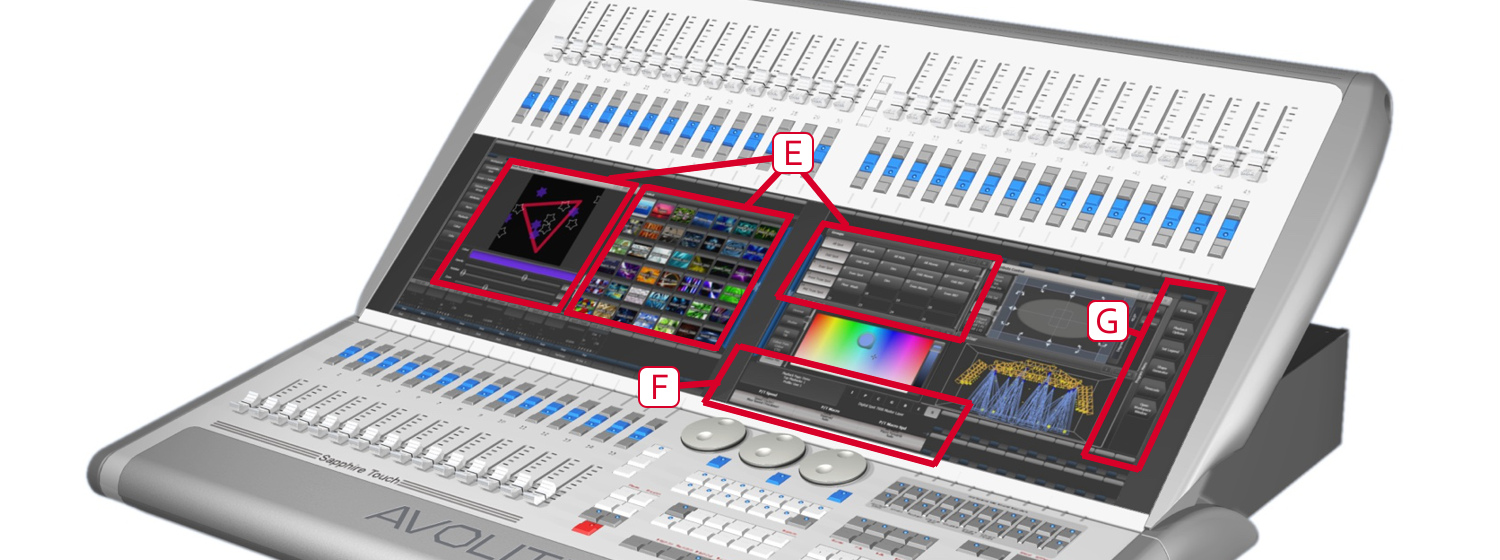
E The Workspace windows on the touch screens contain touch buttons for fixtures, palettes, groups, playbacks, macros and more. You can also set fixture attributes and show information windows.
F The System display area of the touch screen is the nerve centre of the console and shows you what is going on. This part of the display shows various screens of information depending on what you are currently doing.
G The Menu Softkeys (labelled A - G) are used to select control options. The options for each key change depending on what the console is doing. Softkey commands are shown in the manual like this: Edit Times
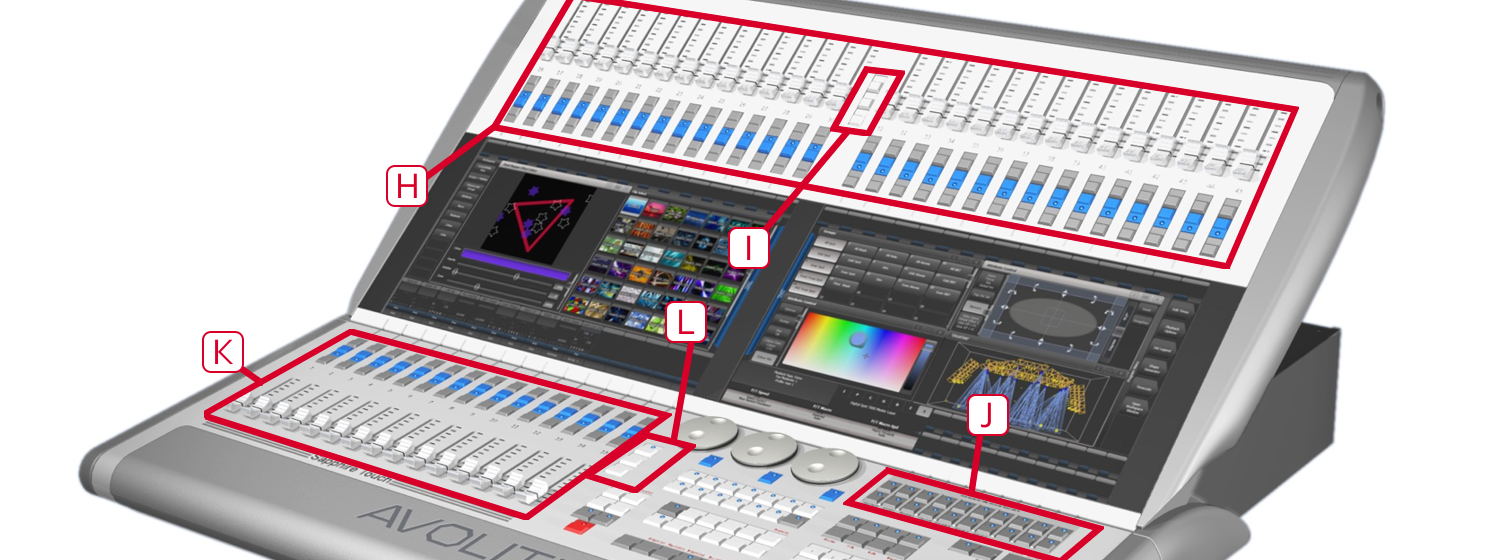
H The Preset Faders at the top are used to patch fixtures, and store and play back cues or chases. (I) The Preset Page Select buttons in the centre of the faders let you change to a different page.
J The Macro Buttons store frequently used sequences of keypresses which can be replayed with a single button press. Playbacks can also be stored here. The display immediately above the buttons shows legends for the buttons.
K The Playback faders are used to store and play back cues or chases.
L The Playback Page Select buttons let you change to a different page of playbacks. The touch screen above the faders shows information about each playback.
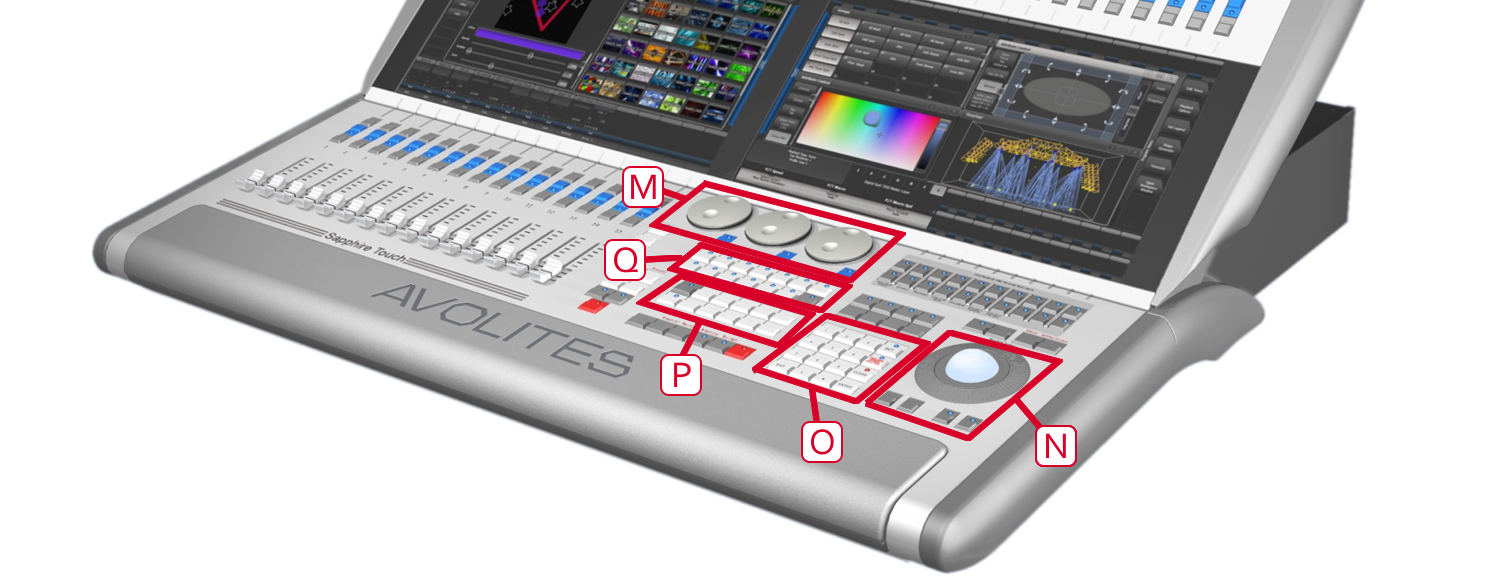
M The Control wheels are used to set control values (attributes) for the fixtures, and to set chase speeds and fades. The touch screen above the wheels shows information about the attributes being controlled.
N The trackball controls pan and tilt of fixtures, and can also be used to control the mouse pointer for the screens.
O The Numeric keypad and other control buttons are used to enter values and change controls on the console.
P The Function buttons are used to carry out functions such as storing cues, copying, patching, saving to disk, etc.
Q The Attribute select buttons are used to select which attributes of a fixture (e.g. colour, gobo, pan, focus) are going to be controlled using the Control wheels. The buttons have lights on to show you which attributes are active. The Red button just below allows you to locate fixtures, which sets them to a known start position while programming.

The Wrist Rest across the front of the console lifts to reveal a handy storage tray. On the left hand end R is a USB socket for saving shows and power/disk indicator lights. Near the right hand side S is the power switch.
The Back Panel
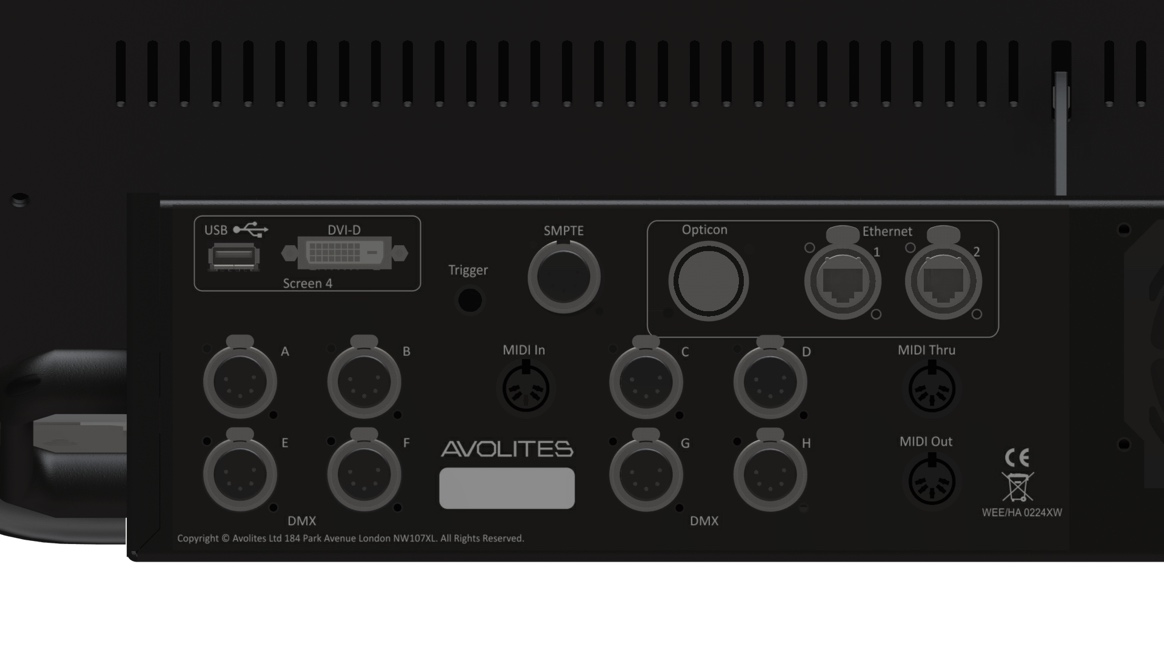 All the connections required for the
console are found on the back panel.
On the left hand side are connectors for eight DMX512 outputs, MIDI, Ethernet, and a DVI/USB connection for an external touch screen.
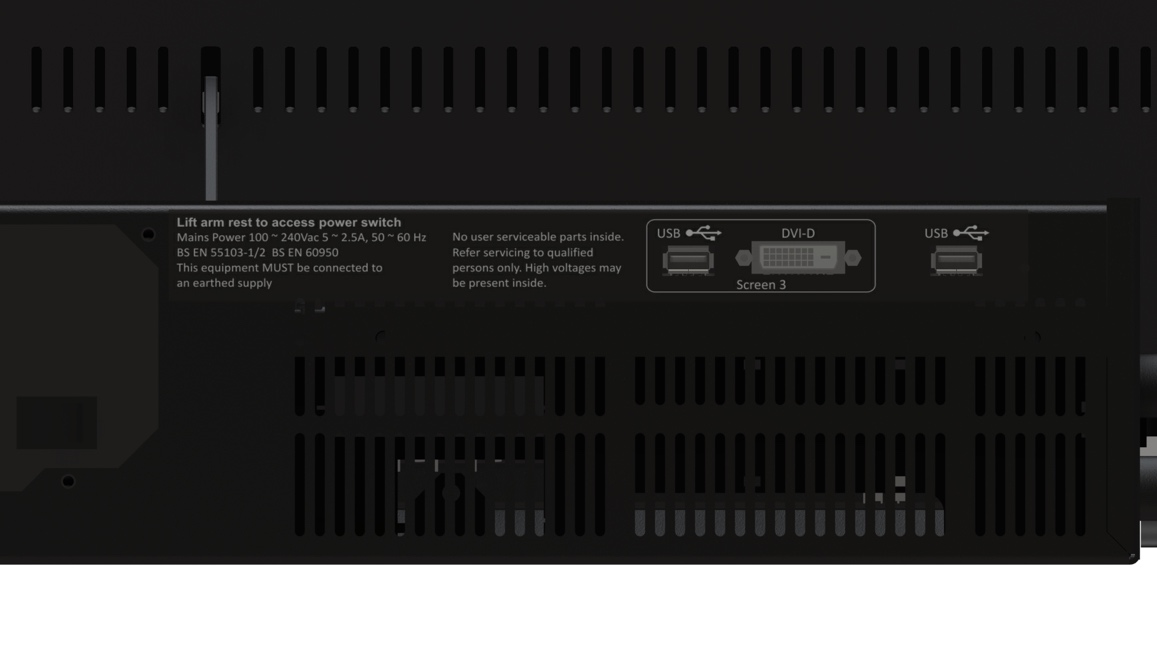
On the right hand side are DVI/USB connections for another external touch screen (screen 3) and a general purpose USB connector.
Power is connected in the middle of the rear panel.