Setting up the Remote
The console needs to be connected to a network with WiFi. As with all networks used for lighting we would recommend that you use an isolated network which is not connected to the internet or other IT equipment.
At its simplest this can just be a WiFi Access Point plugged into the console.
You should position your Access Point so that you have line of sight to it when you are using the remote.
You will need to set suitable IP addresses on the console and on the Access Point - read more about Networking the Console.
Connecting the mobile device
Both Android and Apple devices will show warnings when you connect to a network which does not have an internet connection. Apple devices will show a continuous spinning icon next to the network name which can be ignored. Android devices will ask you if you really want to connect - select "Always Connect".
If your network does not have DHCP enabled (which automatically gives addresses to network devices) you will need to manually set an IP address on the mobile device which needs to be in the same IP range as the console (see Networking the Console). For Android devices you need to set a Network Prefix Length instead of the subnet mask - 255.0.0.0 is 8, 255.255.0.0 is 16 or 255.255.255.0 is 24.
Selecting the console connection
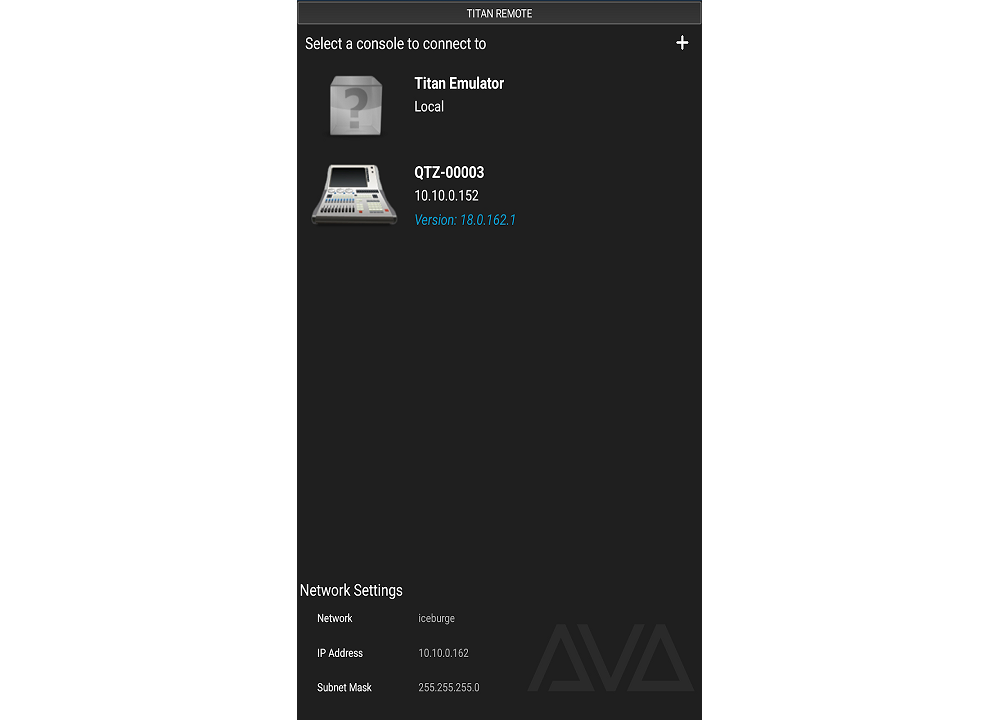
Once you have your mobile device connected to the network, open the Titan Remote app and a list of connected consoles should be shown. At the bottom of the screen, details of your network connection are shown which can be useful when troubleshooting.

The Titan Emulator can be used to test or demonstrate the remote when no real console is connected.
In some network situations your console might not be found by the discovery messages. If your console does not show up in the list, you can enter its IP address manually by clicking the + button in the top right hand corner of the screen. The console will then be shown in the list. To remove manually added consoles from the list, swipe left then select the Delete button.