Fixture Personality Options
All of the options below can also be set from the Patch View window.
Swap Pan and Tilt
This allows you to make the pan channel control tilt and the tilt control pan. This can be useful for fixtures rigged in strange orientations.
Press Patch.
Press Edit Fixtures.
Press Swap Pan and Tilt.
Select the fixtures to be pan-tilt swapped. Press Pan and Tilt ... to select either Swapped or Normal for the selected fixtures.
Press Exit when finished.
Invert Attributes
This option inverts individual attributes of fixtures. Useful if you have a fixture which pans right when the rest pan left, saving a trip up the rig to set fixture options, but you can invert any attribute.
Press Patch.
Press Edit Fixtures.
Press Invert Attribute.
Select fixture(s) to be changed.
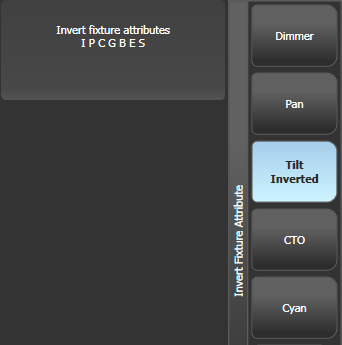
Select the attribute to invert from the softkeys. The display shows
Inverted when the attribute is inverted.Press Exit to finish.

You can change the invert on multiple fixtures by selecting more than one, but the "Inverted" display will not show if there is a mixture of inverted and non-inverted fixtures in the selection.
Some attributes cannot be inverted.
Invert can also be set from the Attribute Behaviour tab of the Patch View window.
Attribute Limits
You can set upper and lower limits for any attribute. This can be useful for example to limit the pan/tilt movement of a fixture, or if a fixture has a combined dimmer/strobe function and you only want the dimmer part of the operation.
Attribute limits are set either from the Edit Fixtures menu or using the Attribute Behaviour tab of the Patch View window.
Press Patch.
Press Edit Fixtures.
Press Set Limits.
Select the fixtures to be set.
Use the softkeys to select which attributes are to be set, then select upper or lower limit.
Input a percentage value for the limit value, or press Set To Current Value. To remove a limit press Remove Limit.
Press Exit when finished.
From the Attribute Behaviour tab, use the context buttons to set Attribute Limits.
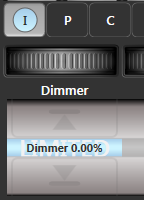
It is still possible to put values into the programmer outside the limits. A "limited" watermark will appear on the wheel view behind an attribute when it is being limited.

Fixture Offset
You can set an offset to any attribute of any fixture. The normal use for this is to correct pan/tilt positions when fixtures are rigged in a different orientation to how they were programmed. The offset is applied to channels just before final output.
There are 4 ways to set an offset:
Select fixture, Locate, then adjust attributes to the desired locate value. Then press , Locate, Update Offset. This does not change the actual locate value but sets the difference between the locate position and your set position as the offset. This is an easy visual way to set the offset.
You can also set offsets using palettes. Select fixture, apply palette, adjust fixture to desired values then press ,
Palette, Update Offset. Again this does not change the palette, but sets the difference between the palette and the position you changed it to as the offset value.In the Patch View window, in the Patched Fixtures list there are cells for Pan or Tilt offset
In the Patch View window, in the Attribute Behaviour tab you can select Offset from the context menu buttons. This lets you view or adjust offsets set by the first two methods.
Fixture / Attribute curves
Curves set how an attribute behaves over the full range of values. They are most often used for dimmer attributes to set the way the dimmer level follows a slider, but can be applied to any attribute.
Curves are set either from the Edit Fixtures menu or using the context buttons on the Attribute Behaviour tab of the Patch View window.
Press Patch, Edit Fixtures.
Press Set Curve.
Select the fixtures to be set.
Use the softkeys to select which attributes are to be set.
Use the softkeys to select the type of curve required. The normal setting is Linear.
Press Exit when finished.
See the curves section for details of the different curves available.
Freeze Fixtures or Attributes
This option allows you to freeze individual attributes of a fixture, or to freeze the whole fixture. Attributes or fixtures which are frozen are not affected by playbacks or by the programmer.
Press Patch, Edit Fixtures.
Press Freeze Fixture or Attribute.
Select the fixtures to be frozen/unfrozen.
Use the softkeys to select which attributes are frozen, or to freeze the whole fixture. Frozen attributes are indicated on the softkey.
Press Exit when finished.
Freeze can also be set from the Attribute Behaviour tab of the Patch View window.
A "Frozen" watermark is shown on the wheel display when an attribute is frozen.
Editing the Personality
Sometimes you may want to modify the way a fixture behaves, or you may find a fixture personality contains errors and needs editing. You can edit personalities directly on the console.
Press Patch, Edit Fixtures, .
Press Edit Personality.
The softkeys show a list of all fixture types patched in your show. Select the fixture type to be edited.
Personality Builder will open allowing you to edit the personality.
When you save changes, your show will be updated with the edited personality. Your changes are also saved to the fixture library on the console.
Edited personalities will be saved in the User/Custom personality folder at D:\Personalities (if using Titan Mobile, Titan Go or a simulator, the folder is at \Documents\Titan\Personalities). Personalities in this folder are searched and loaded before those in the library and are not overwritten when a new fixture library is installed.
A separate user guide for Personality Builder is available from the Avolites website.
If you find a problem in a fixture personality provided by Avolites, please let us know using the bug report form in the Personality section of the website.