Layouts
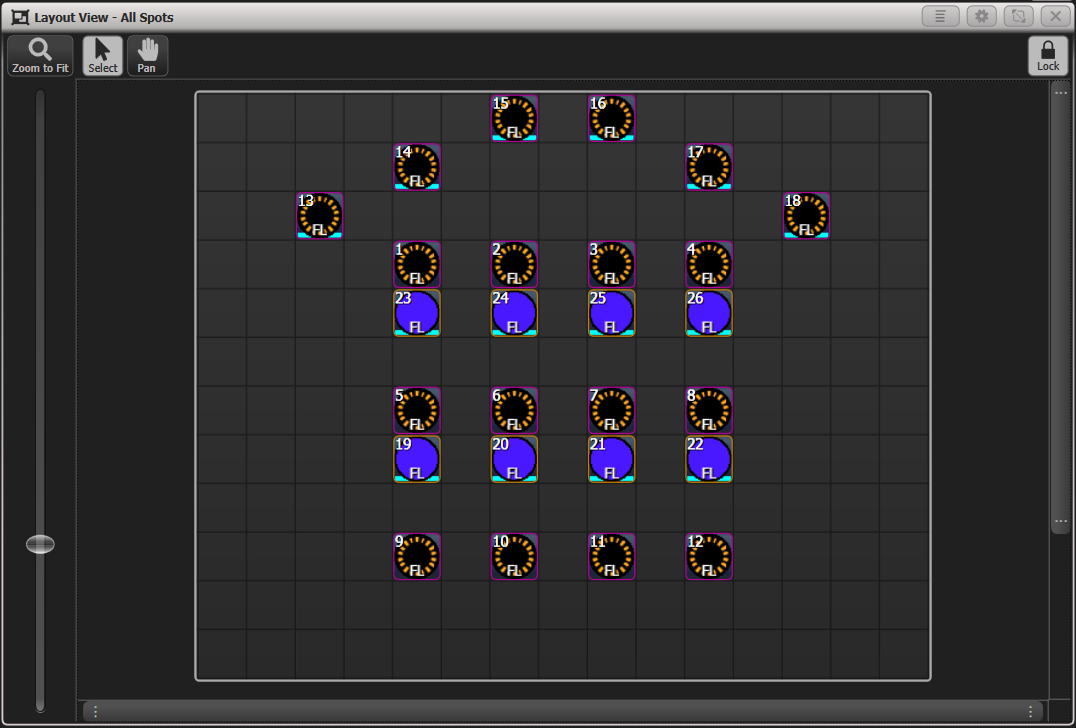
Bei Anwählen von Fixtures ist es hilfreich, wenn diese wie in einem Plan dargestellt werden. Das Fenster Layouts erlaubt es, mehrere verschiedene solche Darstellungen anzulegen, in denen jeweils einzelne oder alle Geräte angezeigt werden. Man kann auch einen Plan als Grafik importieren, auf dem die Geräte angezeigt werden. Die Fixtures können selektiert werden, und die Helligkeit, das aktuelle Gobo und die Farbe werden angezeigt (soweit die Geräte über diese Attribute verfügen).
Auch Playbacks, Macros und Gruppen könne in Layouts integriert werden, so dass man einen schnellen Zugriff hat ohne Fenster wechseln zu müssen.
Anlegen eines Layouts
Es können beliebig viele Layouts erzeugt und auf den Buttons im Fenster Layouts gespeichert werden.
- Wählen Sie die Geräte, die in dem Layout enthalten sein sollen (kann auch später erfolgen oder geändert werden).
- Drücken Sie 2x die Taste Open/View und wählen Sie Layouts.
- Klicken Sie auf einen leeren Button im Fenster Layouts.
- Geben Sie eine passende Legende ein (Bezeichnung, Skizze).
- Klicken Sie erneut auf den Button oder drücken Sie auf Record Layout.
- Das Layout wurde gespeichert. Klickt man auf den Button, so wird das Layout geöffnet.
Wurden die Fixtures gleich als Gruppe angewählt, so wird das Gruppenlayout direkt in das neue Layout übernommen. Siehe Fixtures aus Gruppenlayouts per Record hinzufügen im nächsten Abschnitt.
Haben Sie nur einen Bildschirm, so empfiehlt es sich, für den Layout-Editor einen Workspace anzulegen, so dass man beim Kopieren der Geräte einfach die Fenster wechseln kann.
Gerätedarstellung
In dem Layout wird jedes Gerät durch ein quadratisches 'Element' dargestellt, wobei das eingestellte Fixture-Halo angezeigt wird (farbiger Rand).
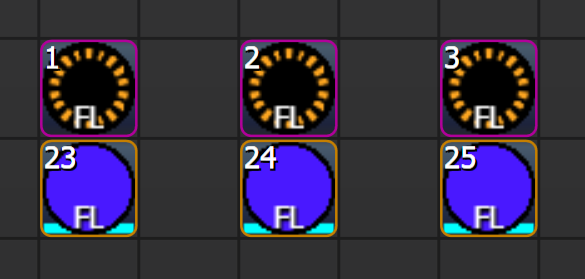
- In der linken oberen Ecke steht die Gerätenummer, unten in der Mitte der aktuelle Pegel.
- Mittig wird die Farbe und das aktuelle Gobo angezeigt (wenn dies in der Personality korrekt angelegt ist). Dies lässt sich mit der Einstellung Show Fixture Mimics im Tab 'Elements' der Layout View-Optionen de- oder aktivieren (klicken Sie dazu auf den Kontextbutton Options).
- Geräte im Programmer werden mit einer Leiste in Cyan unten angezeigt.
- Geräte mit laufenden Effekten werden mit einer Tilde ( ~ ) oben rechts angezeigt.
- Läuft gerade ein Dimmereffekt, so wird der Pegel gelb angezeigt.
- Die Vorderseite der Fixtures wird durch einen Pfeil angegeben.
Einfache Dimmer werden normalerweise weiß angezeigt. Dies lässt sich ändern, um z.b. die Farbe des verwendeten Filters anzuzeigen: wählen Sie das Gerät aus und schalten Sie die Funktion der Encoder mit der unteren Menütaste auf Wheels=Visualiser um, wählen die Attributbank Colour, und stellen mit den Encodern die gewünschte Farbe ein.
Funktionen der Layout-Anzeige
Der Layout-View (die Anzeige) kann durch Klicken auf das rechts oben gesperrt werden.
- Zum Positionieren der einzelnen Elemente muss das Layout entsperrt sein. Dann können die Elemente angeklickt und gezogen werden, oder man verwendet die Encoder. Geräte können so nicht zum Programmieren angewählt werden.
- Um dagegen Fixtures zum Programmieren und Steuern anzuwählen, muss das Layout gesperrt sein. So können Geräte ausgewählt, aber nicht verschoben werden. Playbacks sowie Macros und Gruppen funktionieren ebenfalls nur im gesperrten Modus.
Mit dem Schieberegler links kann man in das Layout hinein- bzw. daraus herauszoomen. Mit einem Klick auf Zoom to Fit wird das Layout formatfüllend dargestellt.
Mit den Buttons und kann man entweder per Auswahlbox mehrere Elemente anwählen oder per Hand-Werkzeug die komplette Ansicht verschieben ('pannen').
Elemente zum Layout hinzufügen
Es gibt mehrere Wege, Elemente zu einem Layout hinzuzufügen. Zum Löschen wiederum drückt man die Taste Delete und klickt auf das zu löschende Element im Layout.
Fixtures per Copy hinzufügen
Drücken Sie die Taste Copy, wählen Sie die gewünschten Geräte aus, und klicken Sie im layout auf die Stelle, an der die Geräte eingefügt werden sollen.
- Die Geräte werden alle nebeneinander in einer Zeile angeordnet. Die Positionierung lässt sich später ändern.
Fixtures aus Gruppenlayouts per Record hinzufügen
Werden die Geräte nicht einzeln, sondern gleich als Gruppe angewählt, und wurde für die Gruppe bereits die Geräteanordnung (also das Gruppenlayout) editiert, siehe Gruppenlayout, so wird dieses auch in das Layout übertragen.
Wählen Sie dazu Gerätegruppen aus, drücken , und klicken auf einen Layout-Button im Fenster Layouts. Wählen Sie eine der Menüoptionen:
- Replace alle vorhandenen Elemente werden aus dem Layout gelöscht und die Elemente der ausgewählten Gruppen neu eingefügt.
- Merge die Elemente der Gruppen werden zu den bereits vorhandenen hinzugefügt.
- Update Fixture Positions from Programmer die selektierten Geräte werden anhand des Gruppenlayouts neu positioniert.
Eingefügt wird immer von oben links an beginnend. Enthalten die Gruppen kein Gruppenlayout oder wurden die Fixtures einzeln angewählt, so werden diese nebeneinander in einer Zeile ind das Layout eingefügt.
Playbacks, Gruppen und Macros hinzufügen
Buttons für Playbacks, Gruppen und Macros können ebenfalls in eine Layout eingefügt werden, so dass man damit arbeiten kann, ohne laufend Fenster wechseln zu müssen.
Drücken Sie die Taste Copy, wählen das Playback, die Gruppe oder das Macro aus, und klicken im Layout an die gewünschte Stelle. Es können auch mehrere Elemente gleichzeitig ausgewählt und eingefügt werden.

- Ist das Layout entsperrt, so kann man Elemente löschen, indem man auf Delete drückt und die zu löschenden Elemente im Layout auswählt. Die originalen Objekte (Playbacks, Fixtures etc.) werden damit nicht gelöscht. Ist das Layout dagegen gesperrt, so werden beim Löschen der Layout-Elemente auch die originalen Objekte gelöscht.
Anordnen der Elemente in einem Layout
Die Elemente eines Layouts können sowohl manuell als auch unter Zuhilfenahme einiger Werkzeuge angeordnet werden.
Elemente manuell anordnen
Wählen Sie ein oder mehrere Elemente aus und ziehen Sie diese im Layout auf die gewünschte Position. Dabei folgen die Elemente immer dem Raster.
Ebenso kann man die Elemente mit den Encodern verschieben und drehen. Die Steuerung mit den Encodern kann man deaktivieren: klicken Sie auf die Kontext-Option Position & Angle (womit diese wechselt auf No Wheel Control).
Positioniert man Elemente mit den Encodern, so kann man sie auch gegen das Raster verschieben. Dazu dient die Kontext-Option Wheels Move Full Pixel / Wheels Move Sub Pixel. Sind Elemente einmal vom Raster getrennt, so behalten sie ihre Verschiebung aus dem Raster, bis sie entweder mit den Encodern wieder genau am Raster ausgerichtet wurden oder die Kontext-Funktion Snap Selected Elements to Grid verwendet wurde.
Solange die Option Wheels Move Full Pixel aktiviert ist, erfolgt das Drehen von Objekten in 45°-Schritten, anderenfalls kann stufenlos gedreht werden. Sind mehrere Elemente ausgewählt, so kann man mit der Option Wheels Rotate Individual Elements / Wheels Rotate Selection einstellen, ob jedes Element individuell oder aber alle um das gemeinsame Zentrum gedreht werden sollen.
Elemente in Formen anordnen
Elemente können automatisch als Rechteck, Oval/Kreis, oder als Dreieck angeordnet werden.
- Klicken Sie auf Arrange Elements im Kontextbereich.
- Wählen Sie die Option Shape.
- Legen Sie im Menü mit All Elements / Selected Elements fest, ob alle Elemente des Layouts oder nur die angewählten Elemente entsprechend angeordnet werden sollen.
- Wählen Sie im Menü mit Shape= die gewünschte Form der Anordnung.
- Geben Sie die Anzahl von Zeilen und Spalten des Rasters vor, wie groß die Anordnung sein soll. Dazu dienen die Menütasten Width= (Breite) und Height= (Höhe).
- Bestimmen Sie mit Arrange in Rows / Arrange in Columns, in welcher Reihenfolge die Geräte/Elemente angeordnet werden (erst von links nach rechts und dann von oben nach unten, oder umgekehrt).
- Klicken Sie zum Abschluss auf OK.
Anordnen von Geräten aus dem Visualiser
Wurden Fixtures bereits im internen Capture-Visualiser positioniert, , so kann diese Positionierung auch in Layouts verwendet werden.
- Klicken Sie auf Arrange Elements im Kontextbereich.
- Wählen Sie die Option From Capture.
- Legen Sie im Menü mit All Elements / Selected Elements fest, ob alle Elemente des Layouts oder nur die angewählten Elemente entsprechend angeordnet werden sollen.
- Wählen Sie im Menü mit Projection= die gewünschte Perspektive (Top, Front, Side) der Anordnung.
- Wenn erforderlich stellen Sie mit Scale= die Skalierung ein, z.B. so, dass die Geräte nicht überlappend angezeigt werden.
- Klicken Sie auf Apply, um eine Vorschau des Ergebnisses zu sehen.
- Ist alles wie gewünscht, so drücken Sie auf Apply and Exit um die Positionierung zu übernehmen.
Rasteroptionen
Das angezeigte Raster kann vergrößert werden, um mehr Geräte platzieren zu können. Ebenso kann es komplett ausgeblendet werden.
Um den Rasterbereich zu vergrößern oder zu verkleinern, klicken und ziehen Sie die Anfasser in den Ecken des Rasters auf die gewünschte Größe. Das Layout muss dazu entsperrt sein. Mit der Kontext-Option Crop Grid kann das Raster genau auf die passende Größe gebracht werden, um alle vorhandenen Elemente anzuzeigen.
Um das Raster ein- oder auszublenden, öffnen Sie die Optionen des Layouts über den Kontext-Button Options. Auf der Seite Layout kann mit dem Schalter Show Grid das Raster ein- und ausgeblendet werden.
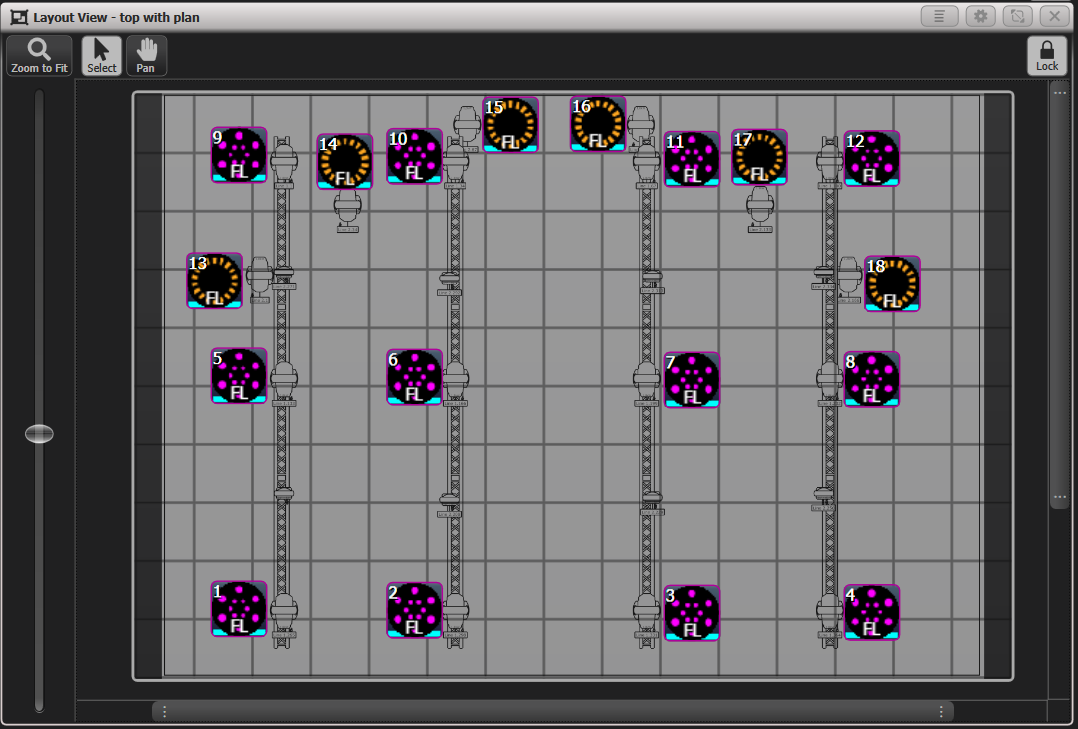
Einen Plan als Hintergrund eines Layouts laden
Optional kann ein Plan - oder ein sonstiges Bild - als Hintergrund eines Layouts geladen werden.
- Speichern Sie den Plan als Grafik (png, bmp, jpg - nicht als PDF).
- Öffnen Sie die Optionen des Layouts über den Kontext-Button Optionsund dort die Seite Layout.
- Klicken Sie auf 'Background Image', um den Dateibrowser zu öffnen.
- Wählen Sie das gewünschte Bild.
Mit Scaling Mode lässt sich festlegen, wie das Bild skaliert werden soll:
- None (keine Skalierung)
- Letterbox (Skalierung, so dass Höhe und Breite passt, mit schwarzen Rändern wenn zu klein)
- Fill (Skalierung, so dass Höhe und Breite passt; was zu groß ist, wird abgeschnitten)
- Stretch (Verzerrung, so dass alles angezeigt wird, aber das Seitenverhältnis gestaucht/gestreckt wird)
Die Helligkeit/Transparenz des Hintergrundbildes kann mit Background Image Opacity eingestellt werden (numerisch eingeben oder mit Encoder A; 0% = voll transparent, 100% = keine Transparenz, volle Helligkeit).
Umschalten zwischen Layouts
Zum Wechseln zwischen Layouts klicken Sie entweder auf ein anderes Layout im Fenster Layouts, oder Sie verwenden die Kontext-Funktion Open Layout und wählen das gewünschte Layout mit den Menütasten