Patching New Fixtures or Dimmers
Fixture Select Buttons and Handles
To control intelligent fixtures or dimmer channels, they must each be patched to a button (sometimes referred to as a "handle"). You can patch onto touch buttons in the Fixtures window, to a fader handle or to a Macro/Executor button. If the handle you patch to has a fader, the fader will control intensity.
If the Fixtures window is not shown, press View/Open then
Fixture or press View/Open then Open Workspace Window thenFixtures.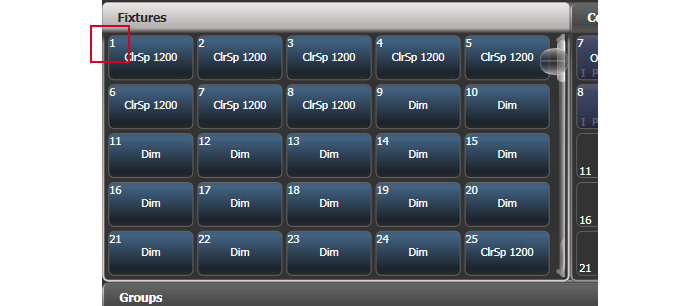
Fixture buttons can be shown either in pages with Page buttons, or you can use the scroll bar on the right to show different pages. Use the
Pages Show/Hide button on the right of the screen to select between page buttons and scrolling mode. You can change the fixture page at any time.You can allocate fixtures and dimmers to Groups, which allows you to quickly select a set of fixtures with one button. Groups are described in the next chapter.
Once you have patched fixtures or dimmers, the Patch View screen shows you an overview of what is patched where and lets you edit the patch.
Patching Dimmers
Each fixture button can control single or multiple dimmer channels. You allocate a button using the Patch menu (described below) or the Patch View window.
Press Patch, then Dimmers.
- DMX Line= shows you which of the DMX output lines you are patching onto. Enter a new number to change the line. Address = shows the DMX address about to be patched. You can change this by typing in the new address on the numeric keypad and pressing Enter.

To patch a single dimmer, press a Fixture touch button, a Macro/Executor button or the blue Select button of a fader handle. To patch a sequence of dimmers each to its own button, press Quantity and set the number of dimmers then press the first select button. Alternatively, run your finger or draw a selection box round the touch buttons, or for physical buttons hold down the first button in the range and press the last button in the range. The range of dimmers will be patched to sequential DMX addresses.
A fixture button turns dark blue and shows fixture details when it is patched. If you patch to a fader handle the select button will light up dimly.
Repeat from step 2 for other dimmers.
When setting the DMX address using Address=, you can set the DMX line (universe) as well by entering {line}.{DMX}, for example 2.56 will set DMX address 56 on DMX line 2.
To see how DMX channels are patched, press View/Open then Patch to show the Patch View window.
- User Number = xx allows you to set a user-defined number for each dimmer or fixture patched, to help you identify them later. You can also edit the User Number from the Repatch Fixture menu.
You can patch multiple dimmer channels to a single handle. This can be useful if, for example, you want to control all the lights for one area together. To do this, just press the same Fixture Select button again when patching the new dimmer channel. You can tell the dimmer channel has patched OK because the DMX address will increase by 1.
If you need to remove a dimmer from multiple dimmers on a single handle without losing programming, make a copy of the handle then repatch the copy to the individual dimmer address.
Patching Moving Light Fixtures
Moving light fixtures are more complicated to patch than dimmers because they have more attributes to control, such as pan, tilt and colour, whereas a dimmer channel just has intensity.
Avolites consoles use a "personality" system to control fixtures. This means you don't have to know how each fixture works, you just tell Titan what you want to do and it will send the right control commands. The console has built-in personalities for most types of fixture, which tell it what attributes are available and how to control them. If the console does not have the personality for your fixture, you can download further personalities from the Avolites website, create your own using the Personality Builder application installed on the console, or Avolites can create one for you. See the personalities section for details of how to find personalities.
You can patch either using the Patch menu (described below) or the Patch View window.
Press Patch.
Press Fixtures.
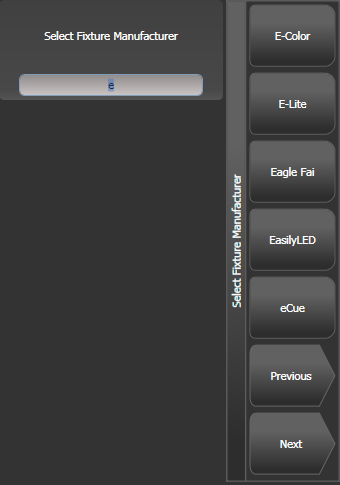
Select the correct fixture manufacturer from the softkeys (Previous and Next page through the list of manufacturers). Or use Quick Search and type the first few letters of the manufacturer's name on the keyboard to find the one you want.
Select correct fixture from the softkeys (F and G show other pages). You can use Quick Search here as well.
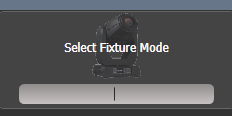
Select the correct fixture operating mode from the softkeys.
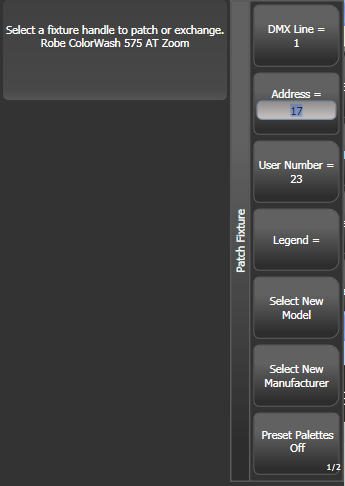
- Address = shows the first free DMX address. Type the new address on the numeric keypad if you want a different one. DMX line=xx lets you patch to a different DMX line, or you can enter the address asline.address, e.g. 2.45 would set address 45 on line 2.
Patch the fixture by pressing a Fixture touch button, a Macro/Executor button or the blue Select button of a fader handle (not the main playback faders).
A fixture touch button turns dark blue and shows fixture details when it is patched. If you patch to a fader handle the select button will light up dimly.
Repeat from 7 to patch more of the same fixture type. The DMX address automatically updates so you can just keep patching by pressing Select buttons.
To patch multiples of the same fixture, use the Quantity option. Or you can run your finger or draw a selection box round the touch buttons, or for physical buttons hold down the first button in the range and press the last button in the range. The fixtures will be patched to sequential blocks of DMX addresses.
- Options, Offset allows you to leave gaps in the DMX channels between fixtures when patching multiple fixtures, which is useful if you are planning a show which may involve exchanging fixtures. The Offset number is the size of the block which will be allocated to the fixture, for example if you want to allow 32 channels for each fixture you would set Offset to 32.
You cannot patch more than one fixture onto a handle. If the handle is already used, the patch will fail.
If you are patching a fixture which uses a separate dimmer channel, such as a VL5, you can patch the dimmer channel onto the same handle as the moving light part of the fixture so you can control it all together. This is called a Pending Dimmer (in the Patch View window this is indicated with a flash symbol behind the user number).
- Options, Preset Palettes sets whether the console will create default colour, gobo and position palettes for the new fixture. These are created in the Position, Colour and Beam workspace windows.. This option is turned off by default but can give you a useful starting point.
- Options, AutoGroups sets whether the console will automatically create groups from the fixtures you patch. If Enabled, a group is created for all fixtures of the same type, and another if you patch a quantity of fixtures.
To show the DMX address for fixtures, press View/Open then
Patch. To show patch details for a single fixture pressView/Open then the fixture select button. On touch buttons the DMX address is displayed on the top right of the button in the format \{DMX line\}\.\{Address\} (this display can be disabled using the context menu).If a patch goes over the capacity of a DMX line, the console will patch at the beginning of the next line. For example if you try to patch a moving head fixture at channel 1.510, it will actually be patched at 2.1.
The console will show a picture of the fixture you select in the prompt area to help you check you have got the right one (if provided in the fixture personality; some fixtures do not include this information)
Capture Visualiser Auto Patch
If you want to use Capture Visualiser, start it by pressing
View/Open then Open Workspace Window then Visualiser. Some consoles also have a dedicated Visualiser button. Capture will open in a workspace window with an automatic representation of your patch.You will see the fixtures you have patched laid out on screen in handle number order. You can then use the Visualiser controls to reposition the fixtures if you wish.
You can turn off Auto Patch in the Capture Visualiser Settings window (Stage tab).
Fixture modes which will work with Auto Patch show a Capture icon in the button. If the icon is not shown, that fixture mode isn't supported in the integrated Capture.

- If you are using the console linked to the full version of Capture (Nexum or above) on an external computer, then changes to the patch on the console will automatically sync to the Capture show. Also changes you make in Capture will sync back to the console.
Patching Fixtures with Multiple Cells (sub-fixtures)
Some fixtures have multiple cells of control within a single fixture (for example an RGB LED batten). To avoid having to patch every cell as a single fixture, you can patch the whole fixture as one "super fixture" and each cell will then appear as a "sub-fixture". This is very useful when laying out fixtures for use with the Pixel Mapper as it allows you to move and rotate the fixture as a single fixture, but keep individual control over the cells.
If you access the fixture using the handle it is patched on, all cells of the fixture will be controlled together. To access the sub-fixtures independently, use the Attribute Editor window or you can press
Unfold then the select button of the fixture. In the Fixtures workspace, the current page of fixtures will be replaced by select buttons for each individual fixture cell. If patched on a fader then the cells will start at fader 1. You can also select sub-fixtures from the numeric keypad. See the [fixture control section](/docs/12.0/controlling-fixtures/using-the-select-buttons-and-wheels#fixtures-with-multiple-cells-subfixtures) for more details of working with fixture cells.To go back to normal, press Unfold then Exit Unfold.
The Sub fixtures feature has to be defined in the fixture's personality. If sub-fixtures does not work on your fixture you may need to obtain the latest fixture personality from Avolites.
Patching Active Fixtures / Media Servers
For Ai media servers see the Synergy section which allows you to connect to Ai for control of the setup and media playback.
Other media servers which support CITP can be patched using the Active Fixtures command on the Patch menu. This allows the console to retrieve thumbnail images of the media clips to display in the Attribute Editor when you are selecting the clip to play.
Once the media server is connected to the network, selecting Active Fixtures then CITP Media Servers will display a list of the available display layers on the connected server(s). Each layer can then be patched to a fixture button for control.
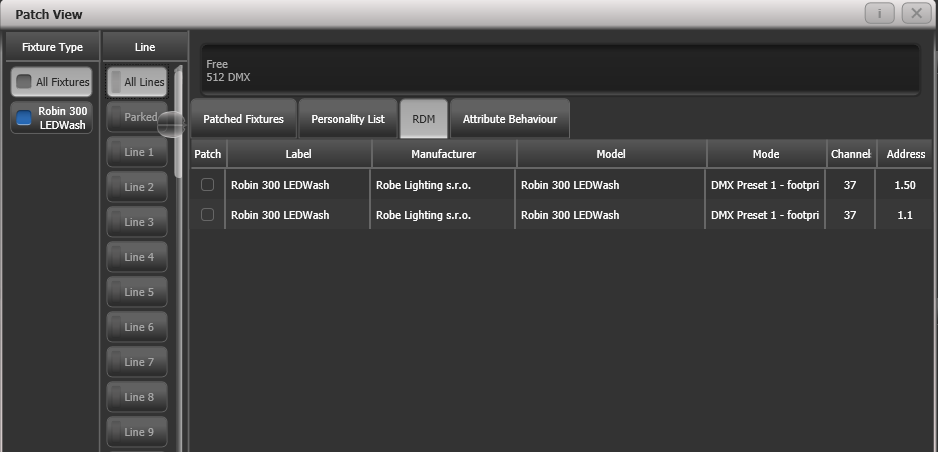
Patching by RDM
RDM (Remote Device Management) is a system which allows the console to interrogate the lighting rig to find out what's there. It can then patch itself to match the existing DMX addresses. You can also remotely change modes and other settings on the fixture.
The fixtures need to be connected to the console by an RDM-enabled Art-Net node, the XLR connectors do not support RDM. Obviously the fixtures must be equipped with RDM for this to work; many fixtures are not. Also if you have DMX buffers or splitters in your rig, they must be RDM enabled or they will block the information being sent back to the console.
Press View/Open then Patch to open the Patch View window then select the RDM tab. All devices which support RDM will be listed here. Click the Full Discover context menu button to rescan the rig for RDM devices.
Select one or more fixtures in the grid and click the Patch context menu button to patch the devices.
Click on the Mode or Address cells in the grid to change these settings remotely.
Click on the Identify button (at the right hand end of the screen, you might need to scroll to see it) to turn the fixture on so you can see where it is in the rig.
Click on the RDM Quick Patch context menu button to automatically patch all RDM devices.
Finding a Lost Fixture
Sometimes a fixture may be rigged with the wrong DMX address set, or connected to the wrong DMX line.
The Find Fixture function allows you to find the start address of the fixture by scrolling a "locate" state through all possible DMX addresses. When the fixture responds with its Locate state, you know its DMX address and might hopefully avoid a trip up the rig to look at it..
Press Patch, Fixture and select the type of fixture you are looking for
Press Options, then Find Fixture to enable the Find Fixture mode.
Turn Wheel B to go through all possible DMX addresses. Wheel A sets DMX lines.
When the fixture responds with its Locate state, you have found the correct DMX address.
Turn off Find Fixture mode and (if not already occupied) patch the fixture. The DMX address/Line will be automatically set to match the Find Fixture settings.
- Wheel C (DMX Slot) jumps through DMX addresses using the fixture channel count (for example if a fixture uses 16 channels, it will jump through in 16's).