Connecting up and Titan basics
This section covers how to connect the console up, and the basic things you need to know about operating Titan.
Radio transmitters may affect the operation of the console and we recommend that they are not placed on, above or behind the console. If you are wearing one it is best placed in a back pocket or behind you when attached to a belt.
Connecting mains power
You can safely connect the console to any voltage from 80 to 260V. If your console is not fitted with an internal UPS (uninterruptible power supply) we recommend that you should power the console via an external UPS (available from computer suppliers). If a UPS is not used, when the sound engineer pulls out the wrong plug and kills power to the console you can lose data (up to the last Autosave) and the console may want to check its disk on startup which can cause delays. The UPS will protect you from most power problems and give you chance to shut down the console normally.
If an internal UPS is fitted (Diamond 9, Sapphire Touch, Arena, optional on other consoles), on power loss a warning dialog will pop up on the screen and the current show will be autosaved. Except on D9, the toolbar on the screen will also turn orange and display how long you've got before the console shuts down.
![]()
- When the UPS battery runs low and the console is about to shut down, the toolbar turns red.
- If any console or TNP in your session is running from UPS, an error will appear in the event log.
Diamond 9 and Arena only: The Network Switch inside the console has an independent UPS system which allows the network switch to continue to run while the console is power cycled. When the console is shut down the network switch will continue to run for about 5 minutes, or until mains power is removed. This is important when a backup console is running the show through the network switch in the console, as it allows the main console to be power cycled without losing the network link to the stage.
Starting up and shutting down
The console runs a Windows-based operating system internally, so you need to make sure it is shut down properly rather than just turning off its power.
Start up the console by pressing and releasing the Power switch on the face or front edge of the console (lift up the wrist rest on the Sapphire Touch). The console display(s) should come alive. The console takes up to 1 min 30 seconds to start up.
Shut down the console by pressing and releasing the Power switch again. The console will perform a controlled shutdown. Wait until the Power light has gone off (about 30 seconds) before you disconnect power from the console.
If the console has a switch on the power module on the back, do not use this to turn off the console as this does not close down the software properly and you will lose any changes to your show.
Forced Shutdown
To carry out a Forced Shutdown of the console, if the normal shut down does not work, hold down the power switch for 5 seconds. You will lose any changes to your show since the last save.
On consoles with a built-in UPS, you cannot just pull out the power to shut down the console if it is not possible to shutdown the console by any of the above means. In this case having disconnected the mains power you should press the Battery Disconnect switch on the rear panel.
Diamond and Arena only: Battery Disconnect will also shut down the internal network switch so be careful if you are running a backup console via the switch. When you shut down the console normally, the network switch will stay on for about 5 minutes then power off. There is no harm in leaving it to do this.
Connecting up Titan Mobile and T1/T2
Do not connect the Titan Mobile panel or the T1/T2 dongle to your PC for the first time until you have installed the Titan PC Suite software, which you do simply by running the installer file. This will make sure the drivers for the panel are installed.
PC specifications: From Titan v14, your PC should be running Windows 10 64-bit (other versions may not work correctly and we can't provide you with support). Some users have successfully used Virtual Machines to run Titan, but we don't provide support for them.
We recommend i5 processor with 4GB RAM as a minimum. Please see https://avolites.com/titan-pc-system-requirements for the full specification.
For best usability, your PC should have a touch screen. If not you can use the mouse to select touch buttons.
Titan Mobile: Having installed the Titan PC Suite software, connect the USB cable for the panel (older Titan Mobile panels have two USB connectors -- you only need to connect port A, nearest the DC socket). If your PC asks you for drivers, select 'Install the Software Automatically'. If you have an older Titan Mobile panel without the built-in AvoKey you also need to attach an AvoKey to a free USB port to license the software.
Power is normally supplied down the USB connection and the external DC power socket is not used, but if your PC has a lot of other USB devices plugged in, or in the case of some laptops, an external DC power supply may be needed. The required power supply is: 9-12 volt 800mA DC. Connector: 2.5mm hole, outside diameter 5.5mm, length 9.5mm, wired centre pin positive. Example Part number: DCPP2
The Titan Mobile panel has a built-in AvoKey so you can install the Titan software on multiple computers, but it will only run when the Titan Mobile panel is connected. The AvoKey license is pre-activated at the factory. See licensing for more details.
T1/T2: The T1/T2 USB devices give you a full lighting control system that will output one or two universes of DMX or Art-Net. The software to run it is called Titan Go. Both devices have a built-in AvoKey so you can run Titan on any computer as long as the T1/T2 device is connected. The AvoKey license is pre-activated at the factory.
If you are using an older cabled version of the Titan 1 dongle, you will need to attach an AvoKey to a free USB port to license the software.
The Titan Go software should automatically detect whether the Titan Mobile panel is connected, and hide the virtual hardware buttons which are shown when you use it with T1/T2 devices - this can be manually overridden using the User Setting Virtual Hardware in the Display tab.
To avoid unwanted interruptions to your show when using Titan on a normal PC with T1/T2 or Titan Mobile, please check the following Windows settings.
Disable Windows USB Power Saving (open Device Manager and go into Properties for the T1/T2 device)
Set your PC, screen and disk drives to remain active continuously (open "Power and Sleep" settings and change all settings to "Never")
Disable automatic Windows Updates (open "Windows Update", select "Advanced Options", set "Restart this device" to "Off". Also you can set "Pause Until" to a future date to prevent updates being installed.)
Disable Disk Indexing (select "This PC" in folder view, right click on system drive, select Properties, untick "Allow files on this drive to have contents indexed" at the bottom)
Disable Windows Firewall (if you are not on an internet-connected network) or ensure that all the Titan applications are listed in the Firewall exceptions.
Titan Healthcheck
When the Titan software starts up, it runs a small utility called Titan Healthcheck which checks the file system and the installed firmware and software for anything that might cause you problems. If any problems are found, a warning screen is displayed which offers the option to fix the problems.
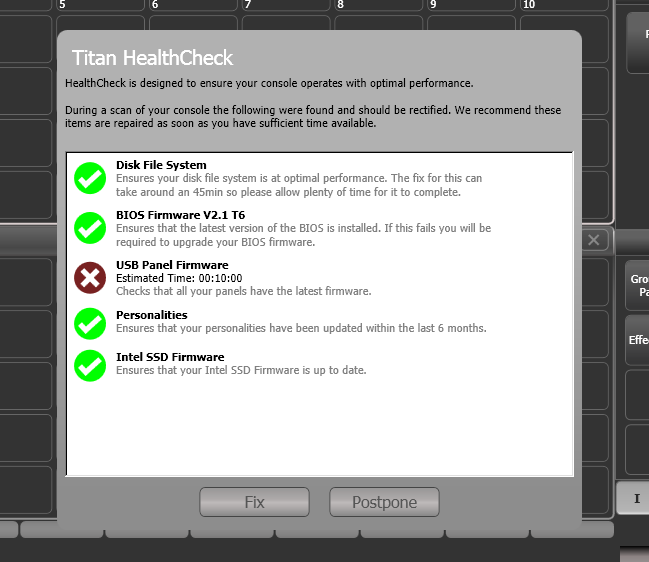
Only run fixes if you have plenty of time as some fixes can take up to an hour to complete.
Connecting DMX Lines
The console communicates with lighting fixtures using the DMX512 system. The console itself can output 16 universes of DMX (each 512 control channels). If you need to output more universes, it is recommended to network the console to one or more Avolites TitanNet processing nodes. This off-loads the DMX processing, allowing the console to control up to 64 universes of DMX in total. See the DMX output section for more information.
The console has DMX outputs on 5-pin XLR for direct connection to fixtures and dimmers, and can send DMX over Ethernet and wireless Ethernet systems to allow connection to remote DMX Ethernet nodes, media servers, and so on.
When you patch a dimmer or fixture you tell Titan which of the DMX universes it is on. Each universe can be configured to come out of one or more of the standard DMX outputs on the back of the console, and/or over an Ethernet protocol.
The Diamond 9 and Arena include a built-in Ethernet switch and have an optical network connection.
By default on a new show, the XLRs on the console are automatically connected to DMX lines starting at line 1, however if you are loading a show from a different model of console or the simulator, check the DMX Settings option to confirm how the DMX outputs are set up.
The 5-pin XLR sockets on the console are wired like this:
| Pin # | Use |
|---|---|
| Pin 1 | Earth |
| Pin 2 | Data - |
| Pin 3 | Data + |
| Pin 4 | Not used |
| Pin 5 | Not used |
Each DMX line should pass through all the fixtures to be connected on that line one after the other and have a DMX terminator fitted at the end (120 ohm resistor between pins 2 and 3). You should not split the DMX lines using passive splitters (Y-splits) as this can corrupt the data.
Connecting a Monitor
You can connect an additional monitor to the console (2 monitors on Diamond 9 and Sapphire Touch). This gives you extra screen space for workspace windows which can be handy for showing Visualiser or additional buttons. Touch monitors are very useful to give additional control surfaces. We advise you use a monitor compatible with Windows Touch to avoid problems with touchscreen drivers.
Titan PC Suite (Titan Mobile, Titan Go, Titan Simulator) will also support 2 additional monitors if the PC you are using has the facility.
An external monitor is disabled by default and will show a 'disabled' message. To enable, switch to System menu (press Avo + Disk) and select Display Setup then press External Display Disconnected. The option will change to External Display Connected and the display will be enabled.
If you need to change the monitor resolution or settings on a console, touch 'Tools' at the very top of the screen and select 'Control Panel', then 'External Monitor', then select the option to match the resolution of your monitor.
The External Displays section gives more information about setting up an external monitor.
Other Connections
You can connect a USB keyboard and mouse to the console. If you are using an external non-touch monitor on a console without a built-in keyboard/touchpad you will need a mouse to access the buttons on it, or on the Sapphire Touch you can use the trackball in mouse mode.
You may need to use a small USB hub to connect additional devices if the console does not have enough USB sockets itself.
All consoles provide MIDI connections which can be used to trigger playbacks or connect MIDI timecode to the console for timecode-controlled cue lists. Except for Pearl Expert, a SMPTE input is provided on the rear panel to allow the console to be linked to a timecode source. MIDI cannot be used with the T1 dongle, but can be used with T2 if you attach a USB-MIDI device.
You can connect the console to a LAN (local area network) using the EtherCON or RJ45 network socket(s) on the rear. This allows you to operate many more universes of DMX using DMX network protocols, and also allows backup and multi-user consoles to be connected to each other.
One or two 3-pin XLR sockets for desk lamps are provided on the rear of the console. Suitable lamps are available from Avolites. The lamps are 12 volt DC, wired from pins 1 (negative) and 2 (positive) of the XLR (not all desk lamps are wired like this and may require rewiring to work).
- You can set the brightness of the desk lamps from the System menu (press Avo + Disk).
Connecting Console Wings
"Wings" are additional control surfaces which can be connected to the console to provide more faders and buttons. They connect to the console by USB.
The Pearl Expert Touch Wing can only be used with the Pearl Expert console and should be connected before the console is powered up.