Fixture Groups
Using Fixture Groups
You can create groups of fixtures or dimmer channels, which can then be quickly selected together by pressing a single button or typing the group number. You can, for example, make a group for each type of fixture, then also group by stage left / stage right, etc.
If you have a lot of fixtures, clever use of groups will greatly increase your programming speed.
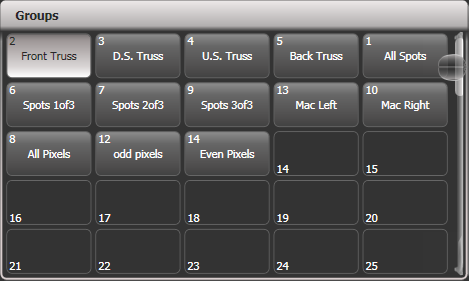
Groups can be stored in the Groups window, on fader handles or on Macro/Executor buttons.
If you assign a group to a handle with a fader, the fader becomes an intensity master for the group. You can also set different functions for the buttons using Key Profiles.
Record a Group
Video showing how to record a group
If the Groups window is not visible, you can show it by pressing
View/Open, Group (above numeric keys).Select the fixtures/dimmers you want in the group (the order in which you select them will also be stored in the group).
Press Group (top right of the numeric keys) then Record Group. You can also press then Group.
Use softkey A to enter a number for the group, or B Provide a legend to set a legend.
Touch an empty button in the Groups window, or press the grey button of a fader handle where you want to store the group (not the main playback faders), or press C Store to store as a numbered group.
Press Clear then repeat from 1 to store other groups.
- You can also press Avo and Group to go directly to the Record Group menu, or on the screen touch the button twice to use Quick Record - on the first touch the button will turn red with a +, on the second touch the group will be recorded.

To select all the fixtures/dimmers in a group, just press the button for the group.
The order in which you originally selected the fixtures when creating the group is also stored. This takes effect when you use the last fixture - next fixture functions described in the next section, and when you use Shapes, Fan mode and Fixture Overlap functions. You can change this later, see the next section.
You can override the selection order while recalling a group by
holding down the group button and using the softkey options.
You can also recall a group by its number:
Press Group.
Type in the number of the group you want to recall.
Press Recall Group.
The Group button also gives you facilities on the softkeys to edit and delete groups.
You can use Select If to deselect a group of fixtures from a selection. This can be useful to select a subset of fixtures from a group. For example if you have a group for the outside edges of a 5x5 matrix, and a group which selects odd and even pixels from the matrix, you can select the outside edge, then use Select If with the odd/even group to remove the alternate pixels round the edge.
Deleting Fixtures from Groups
To remove fixtures from a group:
Press Group.
Press the button for the group you want to change. All fixtures currently in the group will be selected.
Deselect the fixtures you want to remove from the group.
Press Exit.
The group will now only contain the fixtures which remained selected.
Auto Groups
When patching multiple fixtures, the console automatically creates groups for you. A fixture type group is created which contains all fixtures of the same type (for example, All Robe Pointe). Another group is created each time you patch a quantity of fixtures (for example, 4 BB4.) This function can be turned off using Auto Groups in the User Settings.
Fixture Order and Fixture Layout in Groups
Fixtures in a group are stored with a selection order, which is used with Shapes, Fan, and Overlap. You can also store a 2D position layout for fixtures, giving the actual physical location of fixtures for use with Shapes or Pixel Mapper effects or when selecting fixtures using patterns.
Fixture Order
To change the numerical fixture order:
Press Group.
Select the group you want to edit.
Press Fixture Order.
The fixtures in the group will be shown numbered in the fixtures window.

To change the order, select Auto Increment to On, then select the fixtures in the order you want. If you press a fixture twice, it will show an X indicating that it is not part of the sequence.
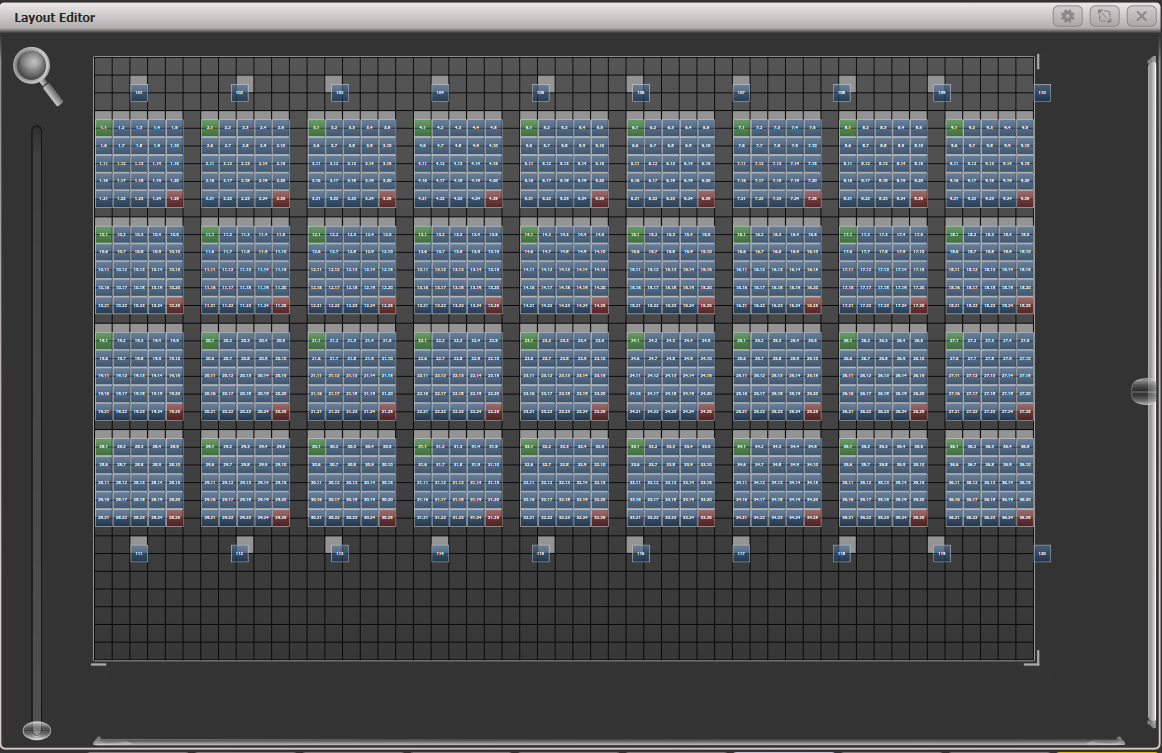
Fixture Layout
To change the 2D fixture layout:
Press Group
Select the group you want to edit.
Press Edit Layout. The Layout Editor window will open.
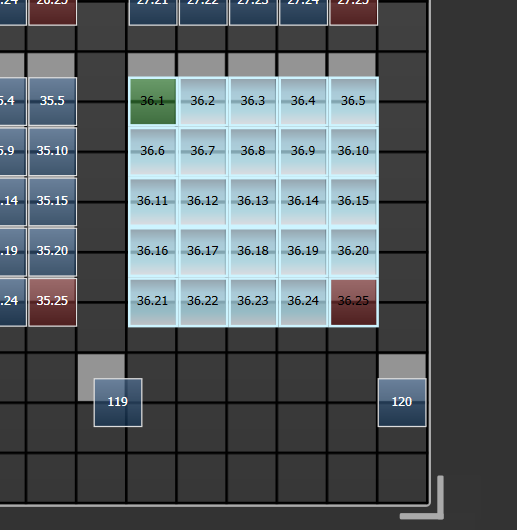
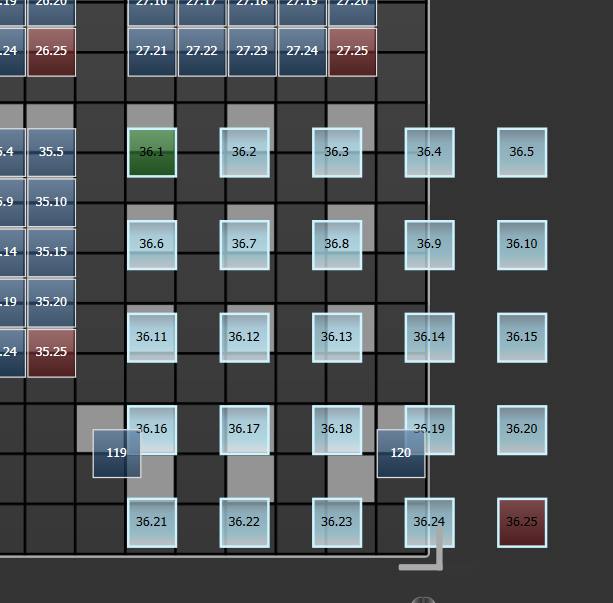
Initially fixtures will be all in a row. You can reposition the fixtures anywhere on the screen by dragging them. Or press a fixture to select then use the wheels to move it around the grid. You can resize the grid by dragging the bottom or right sides.
Multi-celled fixtures appear showing all the cells but when moved or rotated, move as a block. Depending on the fixture personality, sometimes the cells may not match the actual physical layout of the cells on the fixture.
The Arrange Fixtures context command will automatically place the fixtures in a rectangular block, you specify the number of rows (Height) and columns (Width).
The X-coordinate of the fixture layout is the same as the Fixture Order. Changing one will cause the other to change.
When setting the grid size, think about leaving space between fixtures to more accurately match the real world layout, and make sure you have enough cells in the grid for all the cells of the fixtures you need to fit in.
It is possible to accidentally overlay one fixture on another, making the bottom fixture hidden. To access overlaid fixtures, drag off the fixture which is hiding it, or select the hidden fixture and use the wheels to move it somewhere visible.
You can use the Fan button to evenly spread fixtures in the layout.
To move or rotate fixtures, select and drag, or use the wheels. You can click on the "up" and "down" areas in the wheel display to nudge the values up and down - 1 pixel for position and 45 degrees for rotate. If you press the @ button for the wheel, a window opens allowing you to type in the values numerically.
If you click the context menu button Position and Angle it will change to Scale which allows you to spread out or compress the cells in a multi-cell fixture. This is useful to get cells located correctly if you have some fixtures with large cell spacing and some with small spacing.
- The Layout Editor is described in more detail with examples in the Pixel Mapper section. There are also some features to help with Synergy/Ai mapping.
You can temporarily randomize the fixture order when selecting fixtures using a group by holding down the group button and pressing Random Order which appears as a softkey option while the button is held.