Playback controls
Back up the show
At regular intervals while you are programming, and when you have finished programming (or you've run out of time) and it's show time, the most important thing is to save the show. It is important to also back up the show by saving it to a USB drive, enabling you to swap to a different console if there are problems.
Label the console
When you are running your show you will need to know where everything is. Use the Legend functions to set on-screen labels, or you can't beat the low tech method of marker pen and tape.
Grand Master fader and assignable masters
If the console is fitted with a Grand Master Fader, this controls the intensity of all output from the console. Normally you would set this at full, and use it if you need to quickly fade out all the lights.
The Grand Master fader is disabled by default. It can be enabled in the user settings if required.
The Pearl Expert has additional master faders: Swop and Flash masters control intensity of the swop/flash buttons; Preset master controls intensity of the preset faders; Playback master controls intensity of all playbacks.
Any playback fader on the console can be assigned to act as a master fader, which allow you to set the overall intensity of various areas of the console. Different types of master fader are available:
Grand Master controls the intensity of all output from the console.
Swop and Flash masters control intensity of the swop/flash buttons
Preset master controls intensity of the preset faders
Playback master controls intensity of all playbacks.
To assign master faders, go to System mode and select Assign Mastering, or press then Create Master.
By default, master faders are set to have a transparent lock, which makes the master fader remain in position even when the playback page is changed. If you don\'t want this to happen you can change it by pressing Playback Options from the root menu then press the Swop/Select button of the master.
On the Arena console, the rotary encoders on the Mini Screen are very useful as speed masters or group masters - press the encoder to select it as a master. Press the Display button below the encoders to show legends for the encoders on the screen if they are not already shown (there are 4 display modes to cycle through).
If you assign a master to a handle with an LED, the LED will flash if the fader is at zero... just as a reminder to help you work out why no lights are coming on.
Speed and Size Masters
Video covering Speed and Size Master
Playbacks can be assigned to a Speed Master and/or a Size Master which allow you to control the speed and size of shapes or effects stored in a cue (or in the case of chases, to modify the speed of the chase).
There are eight possible Speed Masters and four Size Masters which allow you to separately control the parameters of different playbacks, if you need to.
A playback is assigned to a Speed/Size Master by pressing Effects then Speed Source or Size Source in the Playback Options. The following speed sources are available:
Free Run (default - no Speed Master. Effect runs at programmed speed)
BPM 1-4 (override the local speed with a fixed value from the master)
Rate 1-4 (proportionally modify the local speed using the master)
LocalClock - the playback is set to Tap Tempo mode and all other speed settings are ignored. Using Key Profiles you can assign one of the playback buttons to Tap Tempo mode, and then set the effect speed by tapping the button. Effects will synchronise to the tap.
There is also a Rate Grand Master which, if used, proportionally controls the four Rate Masters (BPM Masters are not affected).
To use Speed or Size Masters you will need to assign some handles on the console to act as the Master faders. Switch the console to System mode and select Assign Mastering. Special key profile options are available for Speed Masters, BPM Masters default to Tap Tempo.
Speed or Size masters can have various scales, 0-100%, 0-200% and so on. A 0-200% scale would allow you to slow down and speed up the speed to double the programmed setting. Scales are set in normal (non-system) mode by selecting Playback Options then press the Select button of the master.
BPM master options
BPM masters can have multipliers or dividers set which allows you to vary how the tapped speed relates to the effect speed. To modify the options, press Playback Options at the top level menu then press the blue button of the BPM master.
Normally the BPM master fader sets the BPM, and the multiplier is shown below. Tapping the blue button will also set the BPM or you can enter BPM on the keypad and press the blue button of the master to set it.

BPM master with BPM master with BPM on fader multiplier on fader
The BPM On Fader/Multiplier on Fader option sets the master so that the fader now controls the multiplier and the BPM is set by tapping.
The Multiplier Scale option now allows you to set the range of multipliers/dividers which can be set on the fader -- from x2-/2 to x32-/32.
The Keep Multiplier On Tap/Reset Multiplier On Tap option sets whether the multiplier should be reset to "x1" when a new speed is tapped.
In the Times tab of User Settings, there is an option "Compensate for Rate Grand Master" which comes into play if you have assigned a Rate Grand Master set to less than 100%. If the option is On (default), a tapped tempo will come out at the speed you tapped and will not be scaled by the Rate Grand Master. If the option is Off, when you tap a tempo, it would then be scaled down by the Rate Grand Master.
Connect wheels to Rate/BPM masters
You can adjust Rate and BPM masters from the wheels by pressing Connect followed by the blue button of the master. For a Rate master this adjusts the rate, for a BPM master you can also adjust "Edge Sync" which allows you to nudge the synchronisation forwards or backwards.
While a wheel is connected you can touch up or down in the wheel display area to nudge the value up or down. Pressing the @ button for the wheel opens a softkey menu where you can input a numerical value or Release the speed and multiplier to default values.
Using Key Profiles you can set one of the buttons of the master to act as the "Connect" button.
Group Masters
You can assign a fader to control the master intensity of each fixture group. To do this you simply save (or move) the group button to a handle with a fader.
The blue button will then select fixtures in the group and holding the blue button gives you softkey options to filter the selection according to a pattern.
Press Playback Options and then the blue select button above the fader to set the fader mode to the following:
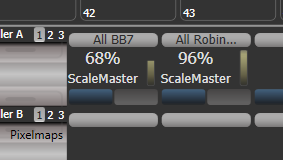
Scale master (proportional control). Scale masters can be set to variable scales of 100%, 200%, 400%, 600% and 1000%. The higher settings allow you to increase an intensity above its recorded level.
HTP (override level if higher than current output)
Limit (sets hard limit)
Take Over (place fixture and its intensity in programmer when level matched)
Disabled (ignore fader)
If the playback fader has a display area on the screen, the level and mode of the master will be shown.
When a group master is set to disabled or moved to a handle without a fader, it will become locked at the current fader level. Re-enable or move back to a fader to adjust the level.
Using Key Profiles, you can set different behaviour for the buttons of a group master -- the blue and grey buttons if it is on a fader handle, or the touch button if it's on screen.
Flash Fixtures -- flashes the dimmer level of fixtures in the group to the level set by the group master fader, while the button is held
Timed Flash -- as above, but fade in and out using fade times set using the "Edit Times" option for the group master
Flash Master -- flashes the group master fader to full
Timed Flash Master -- as above, but fade in and out using fade times
Swop fixtures -- like Flash Fixtures, but turn off all other fixtures that aren't in the group
If a Flash Master is configured, this will also master the group flash.
You can release all masters by pressing Release then Release All Masters. This can be useful if something is being controlled by a master but you are not sure where it is.
Scene Master
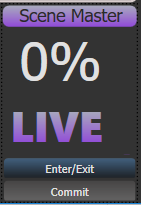
The Scene Master allows you to preset an output state by firing a number of playbacks or making live changes, using the visualiser to see the effects but without anything happening on stage. When you are ready for the new state, you fade the Scene Master fader to the other end of its travel and the new state is output.
You assign a fader to be Scene Master from the Assign Mastering menu in System mode. The Scene Master is set to Live mode by default which means that all changes are immediately output as usual.
To enter preset mode, press the blue button of the Scene Master. The display above the master will show "Preset" and the background turns purple.
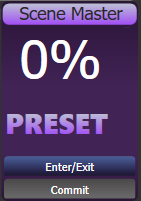
Now any changes you make -- firing playbacks, stepping cue lists, applying palettes and so on -- will only be shown on the visualiser. Everything you change for the preset will also turn purple on its display.
When you fade the Scene Master the state you preset will be faded to the output. If times are programmed for cues or palettes they will also run. Once the fader has reached the end of the travel, the new state is "committed" to the output, or you can press the grey button to manually commit the new state.
Normally the Scene Master will auto-reverse so you can just keep presetting new states, moving the fader alternately up and down. You can also set it to require you to move it back to zero each time. Press
Playback Options then the Select button of the master. The options are:- Auto Commit and Invert Commits the changes once the fader has reached the end of travel. You can then preset a new state and fade the fader the other way to output it.
- Auto Commit You always have to fade from 0 to 100% to output the new state. The changes are committed at 100% and you then have to lower the fader to 0% to preset the next state.
- Manual Commit The new state does not commit at 100% and if you move the fader back to 0 the output state will go back to what it was before. You need to manually commit the changes using the grey button (the button can be changed using Key Profiles).
A Scene Master can also be set on executor buttons or touch buttons in the Playbacks workspace. In this case, hold Avo (or Release) and press the button to enter or exit preset mode, and press the button on its own to commit the preset to the output, You can view the state of the Master by opening the Static Playbacks workspace.
You can assign the buttons to do different things using Key Profiles -- the options are Exit scene mode, Enter scene mode, Commit changes, Commit changes and exit scene mode, Enter or Exit scene mode, Enter or commit scene mode.
Flash and swop buttons
The Flash and Swop buttons on a playback fader may be used at any time to flash and solo cues and chases. The Flash button adds the playback into the current output, the Swop button turns off all other output. The Flash button can also be set to Timed Flash which will use the pre-programmed timings of the cue when flashing -- for normal flash mode the timings are ignored.
You can reallocate the functions of the Flash and Swop/Select buttons on the console using Key Profiles. A useful alternative function is Preload which allows you to pre-position the attributes of the fixtures before you raise the playback fader, which is handy for avoiding unwanted movements (any fixtures which are already active in another playback will not change when you use Preload). You can also allocate Go and Stop buttons for cue lists and chases. To quickly change the key profile, hold Avo Shift and press Edit Key Profile. The Sapphire Touch also has a configurable Black button for each fader.
![]()
The screen relating to each playback fader shows the allocated function of the blue and grey buttons.
Playback priority
You can set playbacks to high priority if you do not want them to be overridden by other playbacks using the same fixtures. For example, if you have a couple of fixtures acting as a spotlight, but they are also programmed into some colour washes, you probably want the spotlight cue to take priority over the colour washes.
Preset playbacks (Tiger Touch only)
On the Tiger Touch, as well as the 10 playback faders across the bottom of the console, there are 10 further playbacks on the top right of the console. These are not affected by the playback page buttons and so are useful for memories you use a lot, such as par can washes, basic stage illumination or smoke machines.
You can switch to different pages for the preset playbacks using a factory-preloaded macro in two of the Macro/Executor buttons. This macro is loaded with the Personality Library, if you do not see the page macros you need to update the library.
Locking a playback onto the same handle on every page
Sometimes you might want to keep a playback accessible on a handle no matter which page you are on. The Handle Paging option in the
Playback Options menu lets you do that without having to copy the playback onto multiple pages.- Locked ensures the playback always appears on that handle no matter what page is selected. Any other playbacks programmed on that handle on other pages will not be accessible.
- Transparent Lock means the playback will appear on the current page only if the handle is empty on that page. If the handle is in use on the new page, then that playback will appear instead of the locked one. This can be useful if you only need the locked playback to appear on certain pages but wish to reuse the handle on other pages.
You can also lock Palettes stored on the grey handle buttons, and macros stored on the macro/executor buttons which is useful with the Macro page change buttons.
Lock options are also available for master faders.
Viewing active playbacks
The Active Playbacks window shows details of which playbacks are active. This provides an easy way to see what is currently running.
The top line of the button shows the page number and tells you where on the desk the playback is stored. The second line shows the legend, and the third line shows which attributes are affected by the playback.
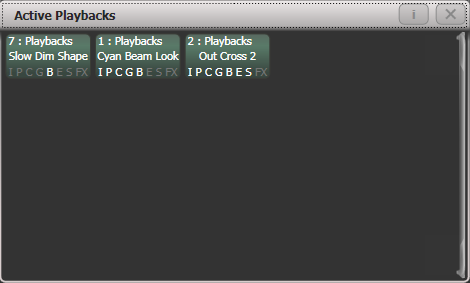
Click on a playback to instantly kill it. You can also press Playback Options followed by the playback in this window to change parameters of the playback.
Blind mode
If you want to program palettes or cues using the visualiser without affecting the look on the stage, you can set the console to Blind mode. Just press the Blind button (on consoles which don't have a dedicated button, hold down the Avo button and select Blind).
To preview a playback, you need to set the playback into Blind mode -- hold the Blind button and press the playback select button. Repeat this to restore the playback to Live mode. You can also set Blind mode in Playback Options.
You can convert Blind output to Live output with a fade. This is useful to set up a live state in blind mode then output it without having to save to a playback. It also allows you to select multiple palettes then fade to them all at once. (Scene Master is probably an easier way of doing this however).
To convert blind to live, type a number to set fade time then press the
Blind button.If any attribute fade times have been set in the programmer, these will be used instead of the fade time you type.
Busking with palettes
If you have not had as much programming time as you would have liked, you might need to make up some additional effects during the show. This is sometimes called "busking", and is where the fun starts!
You can create instant variations by recalling palette values to modify your existing cues. Palette values can have fade times saved with them, or you can set a fade at show time for added effect.
Select some fixtures which are already in use on stage.
Type "2" (or any time, in seconds) on the numeric keypad.
Touch a Palette button to recall a palette.
The selected fixtures will change to the new palette over a time of 2 seconds.
If the palette contains programmed times, you can change the Key Profile of the palette button to set whether the programmed times will be used or not. (Press Avo Shift+Key Profiles, then Palettes to set the key profile). Options are Palette is fired ignoring its times or
Palette is fired with its times. You can also set whether the palette will take precedence over a flashed cue or not. A time entered manually as above will always override a programmed time.When a fade time is entered on the numeric keypad, you can also change the Fixture Overlap using the Overlap softkey. This allows you to create "roll" or "peel" effects when using a series of fixtures. With overlap=100%, all fixtures change at the same time. If overlap=50%, the second fixture will not start its fade until the first fixture is half way (50%) through fading. The order of the fixtures is set by the order in which you selected them.
The palette fade time remains active while the Palette Fade menu is open. Press Exit to leave the menu and return to instant palette recall.
If you apply a palette as a "Quick Palette" (i.e. without selecting any fixtures) then it will be overridden by the next cue (so if you fade to green using a Quick Palette, then fire a cue which sets those fixtures blue, they will go blue). If you apply a palette after selecting fixtures, it will go into the programmer and override any subsequent cues until you press Clear.
When programming your palettes, group all the colour palettes in one area of the console, position palettes in another area, and so on. This helps you to find them when the show is running and the pressure is on.
If you are lighting a band, make position palettes for every person on stage so you can spotlight them for those unplanned solos.
You can use the Off function when programming to set some cues to only affect position, and other cues to set colours, gobos, add shapes, and so on. By combining two or more cues you can produce a much wider range of effects than if all your cues set all the attributes. However, for this to work well you need to make sure you know what attribute is going to be affected by each cue; as if you fire two "colour only" cues then nothing is going to light up.