Selecting Fixtures
When you are programming a show, and sometimes when you are running a show, you need to manually control the fixtures and dimmers to set the intensity, position, colour, etc. To do this you first select the fixtures you want to change. The following section tells you how you can set the attributes of those fixtures to get the look you want on stage.
Selecting Fixtures and Dimmers for Control
To select which fixtures or dimmer channels you want to control, you use the Fixture Select buttons. You can select fixtures or dimmers individually, or several at once. You can also put fixtures into Groups which allow you to quickly select different combinations of fixtures.
If the fixture is patched on a fader handle, press the Select button to select the fixture.
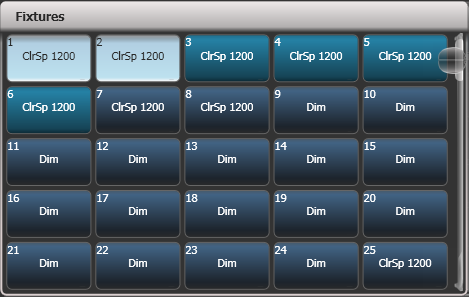
- Press the Select buttons for the fixtures you want. Touch buttons will light up pale blue when selected, physical buttons will light brightly.
- To select a range of fixtures, slide your finger across the touch buttons to draw a selection box. For fixtures patched on faders, hold down the Select button for the first fixture then press the Select button for the last fixture.
Here are some other useful things to know:
Press Locate to light up the selected fixtures in open white and move them to a central position. Locate options are described in detail in the next section.
You can deselect a fixture by pressing the select button again.
In the top bar of the screen, the console will show you which fixtures are currently selected.
Press Clear (right of numeric keys) to deselect all fixtures and remove all changes from the programmer. See the next section for more Clear options.
Once you have changed any attribute, pressing a Select button will deselect all fixtures and start the selection process again. All changes you made to fixtures (since you last pressed Clear) stay in the programmer. Once a fixture has been changed, Fixture buttons show a darker blue. The picture above shows the first two fixtures selected, with the next three in the programmer and the others unselected.
You can select fixtures on another page by touching one of the page buttons to the left of the fixture buttons, if you have \'Pages\' set to Show (using the context button). Otherwise you can use the scroll slider to show more buttons. On fader handles, Page buttons are provided to change pages -- on the Pearl Expert these are above the numeric keypad, on other consoles they are next to the faders.
Using Key Profiles you can set the fixture touch button to latch mode so that it turns the fixture's dimmer channel on (like putting a preset fader to full).
Setting Fixtures to a Start Position (Locate)
The Locate button is used to put the fixture into a known position with light coming out, so that you can start programming it.
A quick press of the button will move all selected fixtures to a central position and reset all the attributes so that you get a white light. However you sometimes might not want to move the fixture, or may want to keep some other attributes unchanged. By holding down the Locate button rather than a quick press, you get some more options:
You can mask off some of the Locate settings (such as only turning the fixture on, but not changing its position or colour) by holding down Locate and pressing Set Mask to Exclude All. Then (still holding Locate) turn on the Attributes you want to change using the Attribute buttons. Only the lit attributes will be changed by Locate. Pressing the Options/Attribute Options button will clear the mask.
Option Auto Reset Mask sets the mask to be automatically reset to include everything each time Locate is pressed, or you can toggle the option to Remember Mask which will keep the mask setting you used last time.
Option Clear/Don't Clear Located Attributes sets whether the attributes changed by the Locate function will be saved into any cues you store. If the option is set to "Clear" then the Located attributes will not be stored in the Programmer unless you modify them using the wheels. This is useful if for example you want to program a cue which sets the position of fixtures, but does not turn them on. The Locate button will light up the fixtures for programming, but the lit state will not be stored in any cues you save.
To quickly locate without changing pan/tilt, hold Locate and press the Pan/Tilt (or Position) button, then release Locate.
To quickly locate pan/tilt only, hold Locate, press Options (Attribute Options on some consoles), then press Position (Pan/Tilt on some consoles), then release Locate.
Changing the Locate State
You can change the default locate state of each fixture in a show by recording a new Locate State. This can be shared (you set the values for one fixture, and then it applies to all fixtures of the same type) or individual (you can set different values for each individual fixture). To store, set up the desired locate state on the fixture(s) you want to change, then press , then Locate. Select Shared or Individual from the softkeys. Press or Locate a second time to confirm.
Clearing the fixture selection and the programmer
The Clear button (on the right of the numeric keypad) is used to remove all changes from the programmer and deselect all fixtures.
Normally a quick press of the Clear button clears the fixture selection and also clears from the programmer all the fixture changes you've made. However you can change this so that the button operates in two stages when some fixtures are selected, and also there are some changes in the programmer - a first press of the button will clear only the fixture selection, then a second press will clear the contents of the programmer, or the other way round. See Action Precedence below in the Clear Options menu.
Clear button hold-down options
If you hold down the Clear button, then more options are available on the softkeys. These will take effect when you release the Clear button.
The Set Mask options let you choose which attribute groups are to be cleared (for example, you could leave the pan/tilt in the programmer but clear everything else). The top Set Mask button lets you choose which attributes will be cleared - or you can use the attribute group buttons to set the mask. Set Mask to Clear Nothing disables all attributes from being cleared to give you a clean slate to start with and Set Mask to Clear All enables all attributes to be cleared.
You can also clear all the mask attributes by pressing the Options/Attribute Options button will clear the mask.
The Time mask option allows you to clear or retain the fade/delay times in the programmer for all attributes (clearing individual attributes will also clear times for that attribute, for example setting a P mask will clear position times).
When you release the Clear button the attributes selected in the mask will be cleared and the mask will reset to Clear All - you can change the Auto Reset Mask option as described below so that the mask is remembered next time you press Clear.
Hold Clear and press All to deselect all fixtures, but leave the changes in the programmer.
- Clear Options opens a submenu showing some further options (described below).
- Clear All Fixtures/Selected Fixtures sets whether all fixtures will be cleared from the programmer, or if only currently selected fixtures will be cleared. This is useful if you want to clear specific fixtures.
- Individual Attributes gives you a list of attributes currently in the Programmer - press the appropriate softkey to clear that attribute. This lets you clear individual attributes rather than the whole group, for example you could clear Pan but leave Tilt. You can press the attribute buttons to filter what's shown in the list.
- Clear All Programmers will clear all programmers that are currently active on the console, including Multi-user programmers from other users, and the Titan Remote programmer.
Clear options menu
The options in the "Clear Options" submenu are as follows. These options are stored with your user profile and can also be set in the Clear tab of the User Settings.
- Auto Reset Mask sets the mask to be automatically reset to clear everything each time Clear is pressed, or you can toggle the option to Remember Mask which will keep the mask setting you used last time.
Leave/Zero Preset Fader Levels is used to set whether latched fixtures are cleared (the fixture key profile can be set to "Latch" mode, which turns on the fixture dimmer channel when the fixture button is touched.)
- Freeze current values sets what happens to LTP (non-intensity) channels you have modified. If set to Freeze Current Values the channels remain as you set them. If set to Release To Playback Values the channels will go back to how they are set in the current playback. For example: you have an active playback making some lights green, then you select the lights and change them to red. If you press Clear with this option set to Freeze then the lights remain red. If the option is Release the lights will go back to green.
- Clear/Maintain Cue Times - determines whether or not to clear the cue time information from the programmer (this will not affect fixture attribute times in the programmer).
- Clear/Maintain Rate Settings - sets whether rate settings will be cleared from the programmer.
- Clear Direction - sets whether direction will be cleared from the programmer.
- Action Precedence - Sets a two-stage action for presses of the Clear button:
Selection With Programmer: (default) Any press of the button clears both the fixture selection and all fixture changes in the programmer
Selection Then Programmer: If any fixtures are selected, fixture selection is cleared on button press. If no fixtures are selected then the programmer is cleared.
Programmer Then Selection: If there are any changes in the programmer, then the programmer is cleared on button press. If there's nothing in the programmer then fixture selection is cleared.
If you type a number then press Clear, HTP values in the programmer will fade out over that time, for example 5 Clear would fade over 5 seconds. This can be very useful if you are trying to be subtle when making changes during a show.
Directly removing attributes from fixtures
You can use the Channel Grid window to selectively view and remove attributes from fixtures.
If you type a number then press Clear, HTP values in the programmer will fade out over that time, for example 5 Clear would fade over 5 seconds. This can be very useful if you are trying to be subtle when making changes during a show.
Fixtures with Multiple Cells/Sub-Fixtures
If a fixture has multiple cells of control (for example an RGB LED batten) and its personality supports it, you can select and control the fixture either as a whole or as independent cells. This is particularly useful when using Shapes or the Pixel Mapper.
If you select the fixture using the handle it is patched on, all cells of the fixture will be controlled together.
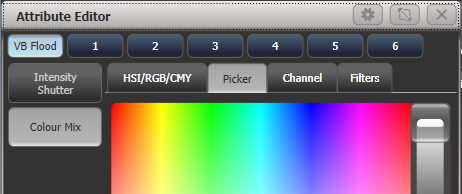
You can use the buttons which appear at the top of the attribute editor window to select the main fixture, or individual cells for control (double press Open/View to open the Attribute Editor window from the window select buttons).
You can also use Unfold to expand the cells onto individual select buttons. In the Fixtures workspace, the current page of fixtures will be replaced by select buttons for each individual fixture cell. On fader handles, the unfolded fixture cells will start at handle 1.
There are two ways to unfold fixture cells:
Press Unfold then select range of fixtures. The cells will immediately appear on the handles.
Select fixtures, press Unfold, then press Selected Fixtures. This method allows for non-consecutive fixtures to be unfolded.
To go back to normal, press Unfold then Exit Unfold.
You can also use the numeric keypad to quickly select cells. The syntax is as follows: (THRO is called Through on some consoles)
| Keypresses | Selection |
|---|---|
| . | All sub-fixtures of selection |
| n . | All sub-fixtures of fixture n |
| . THRO . j | Sub-fixtures 1 - j of all selected fixtures |
| n . THRO | All sub-fixtures of fixture n through last consecutive of that type |
| n THRO . j | Shorthand for above |
| n . THRO i | Sub-fixtures 1 - i of fixture n |
| . m | Sub-fixture m of all selected fixtures |
| n . THRO i . j | Sub-fixtures 1 - j of fixtures n - i |
| . m THRO | Sub-fixtures m through last of all selected fixtures |
| n . m | Sub-fixture m of fixture n |
| . m THRO . j | Sub-fixtures m - j of all selected fixtures |
| n . m THRO | Sub-fixtures m through last of fixture n |
| . m THRO j | Shorthand for above |
| n . m THRO i | Sub-fixtures m - i of fixture n |
| n THRO i . | All sub-fixtures of fixtures n - i |
| n . m THRO i . | Sub-fixture m through last of fixtures n - i |
| n THRO i . j | Sub-fixture j of fixtures n - i |
| n . m THRO i . j | Sub-fixtures m - j of fixtures n - i |
| n THRO . j | Sub-fixture 1 - j of fixture n |
| n . m THRO . j | Sub-fixtures m - j of fixture n |
- Fixture cell selection state will be saved with a group, this provides a quick way to select cells / sub-fixtures without having to use the Attribute Editor or Unfold.
Selecting Fixtures and Dimmers by number (Channel)
In some situations, for example when programming lots of dimmers, it can be easier to type in the dimmer channels you want to program. The Channel menu allows you to do this for dimmers or fixtures. To access the Channel menu, press the Fixture button on the top left of the numeric keypad. You can also simply start typing numbers on the keypad, when you press Through, And or @ then the Channel menu will be shown.
Through, And and @ are provided as softkey functions or (depending on console) are buttons adjacent to the numeric keypad.
Fixtures may be selected by User Number, Handle Number or DMX Address, as set by the option on Softkey A.
When using the Channel menu it is helpful to latch it by pressing Menu Latch.
To select a fixture, type the number and press Enter.
To select more than one fixture, press the And softkey between each number. For example 1 And 2 And 5 Enter will select 1, 2, 5.
To select a range of fixtures, press Through. For example 1 Through 8 Enter will select 1-8. If you miss out the last number it will select all remaining fixtures of the same type.
To miss out fixtures in a range, use Not, for example 1 Through 4 Not 3 Enter will select 1, 2, and 4.
The @ softkey sets a dimmer level to the selected fixtures, for example 1 Through 8 @ 5 Enter will set 1-8 at 50%. (You can choose whether 50% is entered as "5" or "50" in the User Settings - When you press @ there are softkey options for Full, Off and +/- (increase or decrease brightness).
You can work with Groups using the Group button, for example Group 1 And Group 2 Not 5 Enter will select all fixtures in group 1 and group 2 except for fixture 5.
You can use Locate instead of Enter, to select fixtures and locate them. For example 1 Through 4 Locate will select fixtures 1 to 4 and locate them.

When entering a command, the command line is shown on the display. You can go back using the grey Back button and you can abandon the line using the grey @ button.
The AND, THRO and @ functions are also provided on the grey buttons either above or below the numeric keypad, as printed on the legend next to the buttons.
Selecting Fixtures using a Pattern
When programming you will often want to select patterns of fixtures from within a Fixture Group or a range of manually selected fixtures. Rather than having to individually select and deselect fixtures, Titan has an easy way of selecting patterns of fixtures within a range.
- Select some fixtures.
- Press the All button (labelled Odd/Even on some consoles).
- Select a pattern from the softkeys. Your selection is modified so
you will only be controlling, say, the odd fixtures.
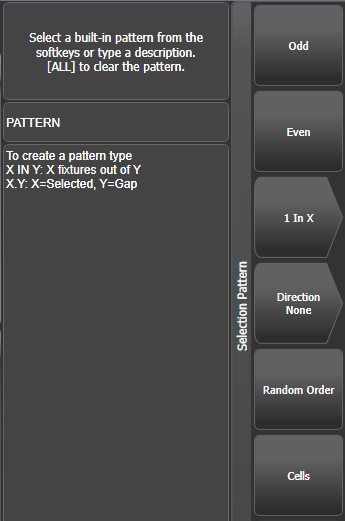
- Press the Fix +1 or Fix -1 button to change the selection to the next stage of the pattern (Next and Prev on some consoles).
- To end the pattern selection, press All twice.
The Direction option allows you to set the fixture selection order to go in a specific direction (using the group layout). This is useful for selecting symmetrical pairs of fixtures and for quickly creating cues using Fixture Overlap.
Direction will return to "None" when you press Clear. You can change this by setting Clear / Maintain Direction in the Clear Options menu (hold the Clear button down to see this option).
For example, if you are programming a chase using 16 fixtures and you want every 4^th^ fixture to do the same thing, you just select the 16 fixtures, then press All, then 1 in x, then 1 in 4. You will see that the 1^st^, 5^th^, 9^th^ and 13^th^ fixtures are now selected, and you can create the look for those fixtures. Then press Fix +1, and the 2^nd^, 6^th^, 10^th^ and 14^th^ fixtures will be selected ready for programming. After you have programmed the fourth set of fixtures, the pattern will go back to the first position again, until you press All twice to end.
You can enter your own patterns using the numeric keypad and softkeys, for example "2" In "6" Enter.
You can also get to these options by holding down a group selection button for the fixtures.
Selecting Fixtures which are in a Playback
To select fixtures which are controlled by a particular playback use the Select If function.
To select fixtures used in a playback, press Select If then the playback button. (If the console does not have a Select If button, press Fixture then Select If. The Fixture button is at the top left of the numeric keypad and may be labelled Channel on older consoles.)
You can also use Select If with the @ and Through buttons and the numeric keypad to select fixtures set to a particular intensity.
Select If @ 5: select fixtures set to intensity 50%
Select If @ Through 5: select fixtures with intensity 0 -- 50%
Select If @ 5 Through: select fixtures with intensity 50% -- Full
Select If @ 5 Through 7: select fixtures with intensity between 50% and 70%
Select If @ @: select fixtures with intensity above 0.
Intensity levels may be input as 0-9 or 00-99 depending on the User Setting Channel Levels Set In.
Stepping through selected fixtures one at a time
If you have selected a range of fixtures, or a group, the console has functions to step through the selected fixtures one at a time. This can make it easier to program a range of fixtures because you don't have to select each one manually.
This mode uses the All/HiLight/Fix +1/Fix -1 buttons.
- Select a range of fixtures or a group.
- The Fix +1 and Fix -1 buttons will select the fixtures in the range one at a time (in the order you selected them). Buttons are labelled Prev and Next on some consoles.
- The All button will select all fixtures in the programmer (everything which has been selected since Clear was last pressed).
- The HiLight function can be used to highlight the output of the selected fixture (make it brighter onstage), see the next section.
Highlighting the Selected Fixture with Prev/Next
When stepping through a fixture selection using Fix +1/Fix -1, you can highlight the selected fixture on stage. This makes it very easy to see which fixture you are controlling. The other fixtures in the selection go to a dimmed "lowlight" level.
Press HiLight to enable highlight mode. Press HiLight again to disable. When you are in highlight mode, the highlighted attribute is overridden and any changes you make to it are not stored in the programmer (so if the highlight uses intensity, you cannot change the intensity of the fixture).
You can change the levels used for Highlight/Lowlight by pressing
then pressing HiLight, Store Highlight State orStore Lowlight State.
Turn Off Unselected Fixtures (Remainder Dim)
To turn off all unselected fixtures use the Remainder Dim function by pressing Rem Dim (Avo+All). The zero intensity is placed in the programmer and will be recorded into any cue. This is useful when removing fixtures from cues.