Cue Timing
The console allows a wide variety of timing functions for each cue.
Fade Times and Fixture Overlap
When programming a cue, you can set a delay, fade in and fade out time for each attribute of each fixture, or globally for the cue. Shapes in the cue will also be affected, depending on the fade mode.
If you enter times more than 60 seconds, Titan will automatically split the time into minutes and seconds, for example enter 115 to set 1:15 (1 min 15 seconds). Entering more digits will set hours, minutes, seconds.
You can delay the fade times between fixtures in a cue so that the cue is applied sequentially to each fixture. This is called Fixture Overlap and can create "peel off" or "roll" style effects.
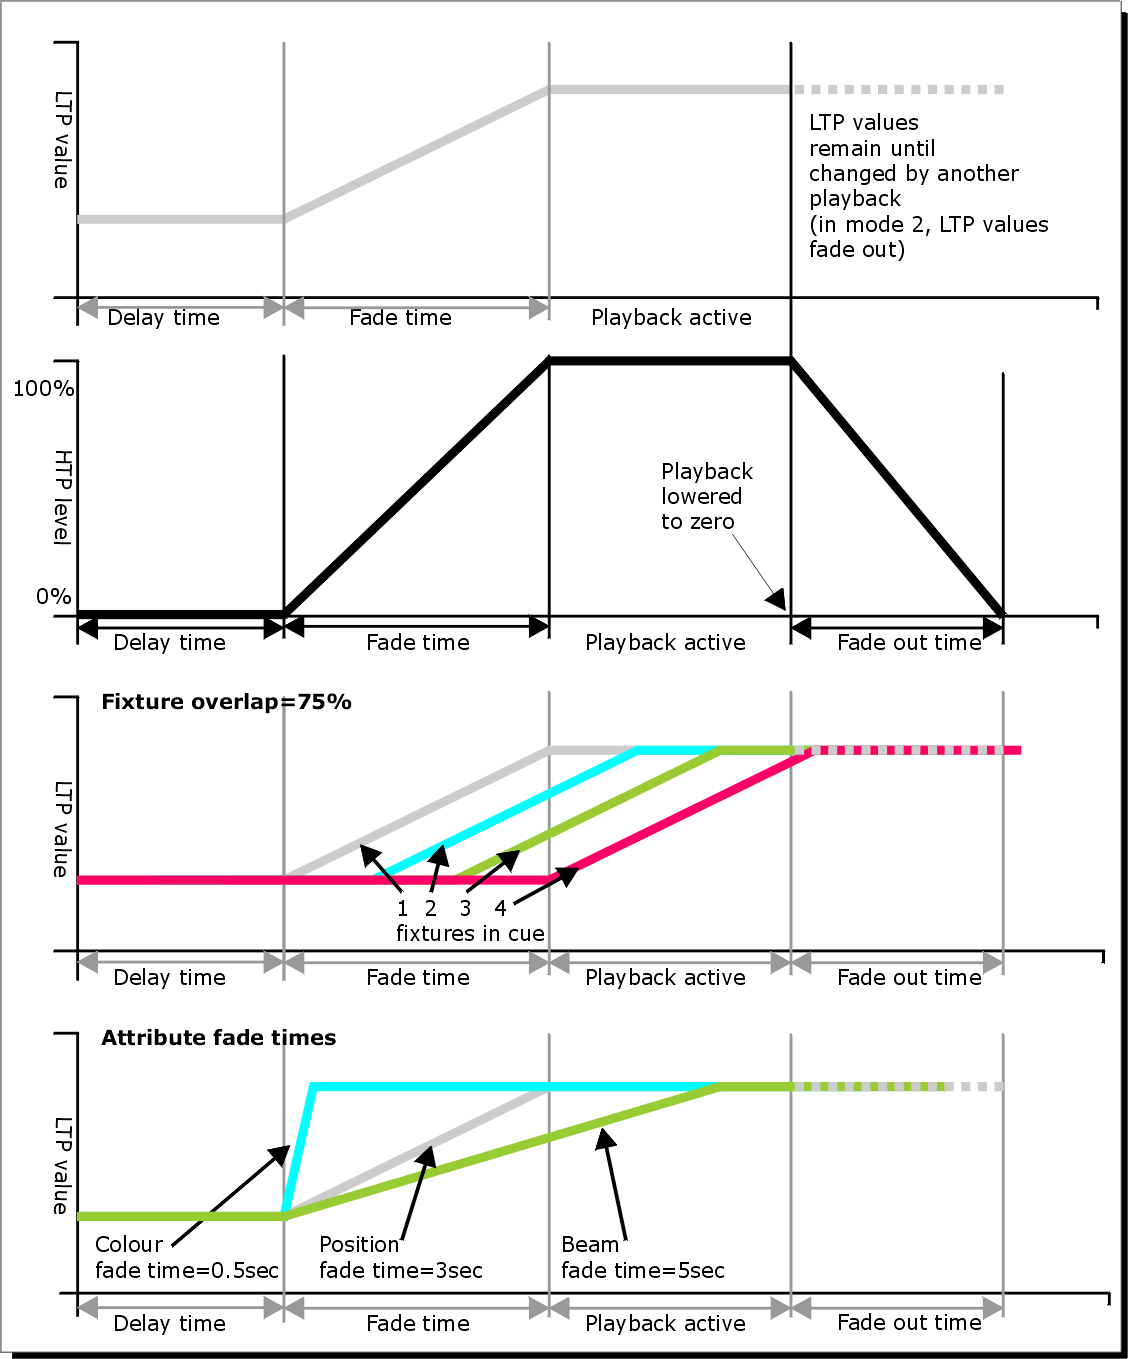
In the graphic below, the top diagram shows how the LTP channels change when used with delay, fade and fade out times. The second diagram shows how the HTP channels change. The third and fourth diagrams show what happens to the LTP channels when fixture overlap and attribute fade are used.
All times which you have set while programming the fixtures/dimmers will be recorded when you save the cue.
You can also edit times of a cue you have already saved like this:
Press Edit Times at the top level menu
Press the Select button of the cue
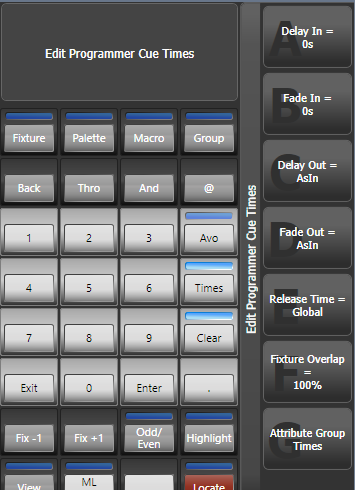
Press Fade Mode x to set the cue mode. This sets how the times are used, see below.
Press Delay time to set the delay before the cue starts, Fade time to set the fade-in time of the cue, and Fade out time to set the fade-out time of the cue.
Type the new time (in seconds) using the numeric keypad and press Enter to save it.
Press Fixture Overlap to change the overlap, then enter 0 - 100 on the keypad.
100% means all fixtures fade together.
0% means that the first fixture will finish its fade before the next one starts.
50% means that the 2nd fixture will start fading when the first one is half way through its fade.The order of the fixtures is set by the order you selected them (but you can change this, see Changing Fixture Order).
Press Exit to get out of Edit Times mode.
You can also set independent times for the IPCGBES attribute groups, and for each individual attribute, (see Setting Attribute Fade Times for a Cue for details of this).
You can quickly set times from the keypad using the Time button, e.g. Time 5 And 2 sets 5 sec fade in and 2 sec fade out. (The Time button is the button previously labelled Set on Titan Mobile and Sapphire Touch, and Next Time on Tiger Touch and Pearl Expert).
Fade Modes
The times you enter are affected by the cue mode which is set using the Fade Mode option. This option can also be set from playback Options, Fader:
- Mode 0 - Channels will fade in as set by the fade time. The Fade Out time is ignored. If times are set to zero, the HTP channels fade in with the 0-100% position of the playback fader and the LTP channels will snap.
- Mode 1 - Channels fade in as set by the fade time. HTP channels fade out as set by the fade out times (LTP channels remain as set in the cue). If times are set to zero, the HTP levels will fade in and out with the fader and the LTP channels will snap when the cue is fired.
- Mode 2 - Channels will fade in as set by the fade time. The Fade Out time is ignored. However, the fade will stop when the fader position is reached, so if the fader is set to 50%, the attributes will stop half way to their programmed position. You can reverse the fade back to the original position by moving the fader back. If times are set to zero, both HTP and LTP channels are controlled by the fader position.
In this mode LTP channels revert to their previous settings when the cue is deactivated.
Mode 2 is useful when used with a pan/tilt cue for manually tracking a spot across a stage or down a catwalk using the fader position, or for colour mixing using RGB fixtures.
- Mode 3 - Crossfade cue. All channels, including intensity channels, will fade to the settings in the new cue. All other cues fade out and all other active playbacks become inactive; if you need to re-fire a playback, take the fader to zero and put it up again.
If the cue includes shapes, then the shape will change with fade times. The changes will be timed for a Mode 1 cue and controlled by the fader position for a Mode 2 cue. This allows you to create a shape which gets bigger or faster as you push up the fader.
Changing Fixture Order
You can change the order of the fixtures stored in a cue. Normally this is set to the order in which you selected the fixtures when the cue was created, or the order stored in the group if you selected a group, but you might want to change this (for example to pair up fixtures so they move together when using Fixture Overlap).
- Press Edit Times at the top level menu
- Press the Select button of the cue to be changed
- Press Fixture Order
- Set the sequence number to start from by pressing Step Number
- If you want the sequence number to increase automatically, set Autoincrement to On. If you want some fixtures to have the same sequence number, set it to Off.
- Touch the Select buttons of the fixture(s) you want to place in that
position in the sequence. The sequence number is shown in green in the top right
hand corner of the fixture select touch buttons.
- Press Exit to finish.
You can set several fixtures to have the same sequence number. This means, for example, when used with Fixture Overlap they will all do the same thing at the same time.
You can remove a fixture from the sequence by turning off
Autoincrement and pressing the fixture button twice. The fixture sequence will show X. Touch the button again to put it back in the sequence.
Setting Attribute Fade Times for a Cue
You can set individual fade times for each attribute group (such as Position). If you set a time, it overrides the normal times.
To set an attribute group fade time:
- Press Edit Times at the top level menu
- Press the Select button of the cue to be changed
- Press the Attribute Bank button (IPCGBES buttons, or attribute keys on the right hand side on older consoles) for the attribute you want to change
- Press Delay = to set delay time or Fade = to set fade time
- Type the new time using the numeric keypad and press Enter to save it, or press Use Global to delete the attribute times and go back to the normal times.
- Press Enter to save the changes.
You can take this even further and set individual fade times for each fixture. When you select the cue to be changed, you will see that all the fixtures in the cue are selected. To set attribute times for only certain fixtures, change the fixture selection using the fixture buttons.
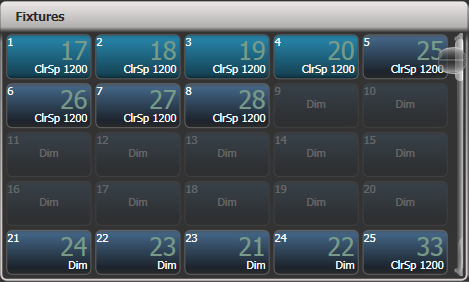
The Cue View window will display when editing cue timings to help you see what you are editing. You can touch fixtures or attributes in the grid to select which items are going to be edited.
Press the All button to select all fixtures in the cue.
When you are in the Set Attribute Times menu you can only select fixtures which are in the cue you are editing.
Editing Times in the Programmer
You can check and edit the times which are set in the programmer before saving a cue. You can also set times into the programmer and merge them into cues as a quick way of updating times, just like you would with attribute values.
Press the Time button to access this menu.
On Titan Mobile and Sapphire Touch, the Time button is the key above Clear (previously labelled Set). On Pearl Expert and Tiger Touch it is the key previously labelled Next Time.
The menu allows you to set cue times, or times for all attributes of a fixture, attribute groups or individual attributes.
Using the Time button there are various quick shortcuts to setting times.
- Time 5 = 5 sec fade in
- CUE 3 Time 5 = 5 sec fade in on connected playback's cue 3
- Time FIXTURE 5 = 5 sec fade in for all attributes of selected fixtures
- Time FIXTURE G 5 = 5 sec fade in for gobo attribute group of selected fixtures
- Time FIXTURE \@B 5 = 5 sec fade in for attribute connected to wheel B on selected fixtures
- 5 @ 3 = 5 sec fade in, 3 sec delay
- 5 AND 2 = 5 sec fade in, 2 sec fade out
- 1 THRO 10 = times spread across fixtures according to selection order
Individual attribute times can also be set from the wheels, using the Wheels softkey option on the root menu.
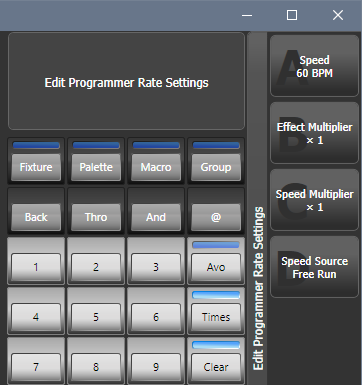
Using the Options button while showing the times allows you to set the Speed, Effect Multiplier, Speed Multiplier and speed source in the programmer. Speed and Speed Multiplier would only do anything if you create a chase and would have no effect in a cue.