Creating Palettes
Which Attributes are Stored in Palettes
Although each palette entry could store all attributes of a fixture, it's easier to operate the console if you create some palettes which only set positions, some for colour, some for gobo and so on. The console helps you with this by providing separate windows for Colour palettes, Position palettes, and Gobo/Beam palettes.
When you store a palette, it will only contain what's in the programmer (the attributes you have changed since you last pressed Clear). For example to create a colour palette you would just set the colour, and not change any other attribute. You can also make palettes which contain effects such as shapes and pixel mapping. If fade or delay times are programmed for fixtures or attributes, these will also be stored in the palette, and you can also create palettes which contain only time information.
If the programmer contains more than one attribute, you can set a mask to restrict which fixture attributes will be stored in the palette.
Palette information may be Global, Shared or Normal:
- Global palettes work on any type of fixture
- Shared palettes apply the same value to all fixtures of the same type - *for example when setting colours, the "Red" palette would set the same colour values for "Red" to all MAC 2000 fixtures*
- Normal palettes are used when each fixture requires its own value - *for example when programming positions, each fixture will have a different setting*
It is possible, by merging information into palettes, to create a palette which contains global, shared and normal attributes.
Available attributes for Global palettes are Dimmer, Pan, Tilt and Colour. When creating a global palette for a colour mixing fixture, both CMY and RGB attributes are calculated and a special "dynamic" value is added to colour wheel channels, the console will attempt to match the closest fixed colour wheel colour to the selected mix colour.
There is a User Setting "Minimum Palette Mode" which can force the console to record palettes in Shared or Normal mode.
Storing a Palette
Video covering recording palettes in Titan
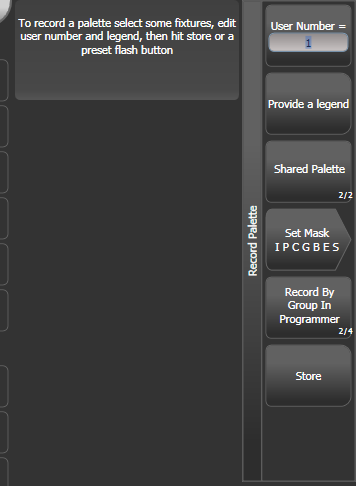
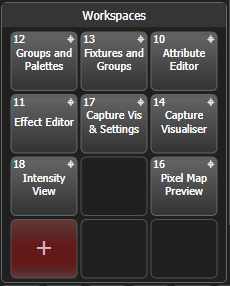
This is how you save a palette value to one of the palette windows:. If the palette windows are not shown then press the Groups and Palettes workspace button.
Press Clear to clear the programmer
Select the fixtures for which you want to store palette values
Using the attribute buttons and wheels, set the attributes you want in the palette entry
You can store any or all attributes of a fixture in each palette entry
- Press then Palette (or Palette then Record Palette)
Using Quick Record you can skip this step and the palette mask is set automatically to match the window.
If you wish, set the palette mask - this sets which attributes will be recorded in the palette. Select attributes using the Attribute Bank buttons - anything lit up will be saved. Set Mask and Record by softkeys also control the Mask (see below).
Touch a button in one of the palette windows to store the palette (if you touch a used button you will be given further options). Or enter a palette number and press Store
- If you want to record to a physical button, press thenPalette. All buttons where you can store the palette will then flash, press one to store.
The console will automatically set the palette as Global, Shared or Normal (by checking if the values to be stored are the same across all fixtures of the same type). You can override the setting by pressing softkey C. See below for more details of how this automatic choice works.
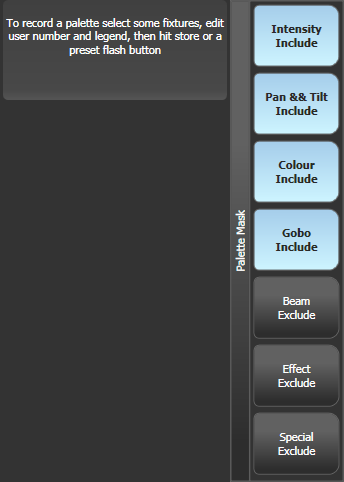
- Set Mask allows you to specify which attribute groups will be included in the palette. You can also use the grey Attribute Bank buttons on the right hand edge of the console to set the mask.
An attribute group is included when the softkey is inverted (like
the Colour group in the picture) and when the LED is lit on the
Attribute Bank button. If you use <strong>[Quick Record](#quick-record)</strong>
the mask is automatically set by the workspace window you
save the palette in - Positions only includes P, Colours only C and
Beams includes IGBES. If you use the <Keys.HardKey>Record</Keys.HardKey> button then you need
to set the mask manually.
- Press the Attribute Options button to toggle each mask group between Include and Exclude.
- Record By... allows you to control how the mask is used when saving the palette. The options are: - Channel in programmer records only channels which are in the programmer (ones which you have changed) - Group in programmer records all channels in any attribute group which has one or more channels in the programmer. *For example if Cyan is in the programmer, all colour channel settings will be recorded even if not in the programmer.* - Group in mask records everything included by the mask set on the attribute buttons - Mixed records by attribute group for Position and Colour but by channel for all other controls.
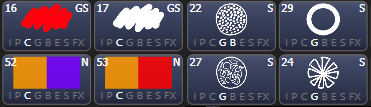
The console will automatically create a legend for your palette (unless the User Setting Auto Legend is set to Off). For colour palettes a coloured icon is used to show the selected colour. If the palette contains fixtures set to different colours, a coloured bar will be shown for each. For CITP (media server) palettes, the media thumbnail will be used. For other attributes the last adjusted function value will be used for the legend, except for pan and tilt which will use a default legend.
You can also manually set a legend for the palette while you are saving it using Provide a legend. See Setting Legends for Palettes.
If you select a Palette button which is already used, the console offers you options to Cancel, Replace, Merge or Quick Merge the existing palette.
- Replace will erase the palette and save only the latest changes you have made
- Merge will combine your changes with the palette
- Quick Merge will merge only the attributes which are currently stored in the palette - the button shows you which attributes.
This allows you to add settings for additional types of fixtures to a shared palette or to update the existing fixture settings. Pressing the palette button again will automatically merge using Quick Merge.
The console will select Global mode if the programmer contains the same values for all selected fixtures and one or more of the attributes is suitable for Global. If the values are the same but none of the attributes are suitable for Global the console will select Shared. If some attributes are suitable and some aren't, the console will record the suitable ones as Global and the others as Shared. If the values are different the console will select Normal. You can prevent the console from using Global and/or Shared modes using the Minimum Palette Mode option in the Palettes tab of User Settings.
Nested Palettes
Palettes can contain references from other palettes. For example an odd/even colour palette could be created using two other colour palettes as the masters. If you wanted to change the colours, changing the master colour palettes would also change the odd/even colours.
The Record/Don't Record Nested Palettes option in the Record Palette menu sets whether nested palettes are recorded (default) or whether the attribute values are recorded instead.
When palettes are used in cues, you can disable the nested palettes using the playback option Fire/Don't Fire Nested Palettes. If set to Don't Fire, the nested palettes are treated as the fixed values they held at the time the cue was recorded and won't change if the nested palette is updated.
Quick Record
The palette windows allow you to quickly record a new palette. Just touch the button where you want to record - the button will turn red with a + sign. At this point you can enter a legend for the new palette or change mask settings. A second press on the button will save the palette.
When using Quick Record, the palette mask is automatically set to match the window - the Position window only stores P, the Colours window only C, and the Gobos and Beams window stores IGBES. This does not happen if you use the button.
Quick record also works for groups and workspaces.
If you want to load a show from a Pearl Expert onto another Titan console, use the Groups and Palettes workspace window to access the fixtures/palettes on the blue/grey preset buttons on the Pearl. See Compatibility Windows for Pearl Expert Shows for more details.
Setting Legends for Palettes
You can enter a legend for each palette to tell you what it is. Titan will automatically create helpful legends when you create the palette.
Press Set Legend at the top level menu
Press the palette button for the palette you want to legend
Type the legend on the keyboard
Press Enter when you have finished
On touch buttons, the palette number is shown top left. The IPCGBES attribute groups contained in the palette are displayed below your legend, so for example Position palettes will show a P, colour palettes a C and so on. In the top right corner is shown G for Global, N for Normal or S for Shared palette.

You can create a picture legend for your palette which could for example represent the colour or gobo it will create. After pressing Set Legend and the palette button, press Picture. The picture editor will open.
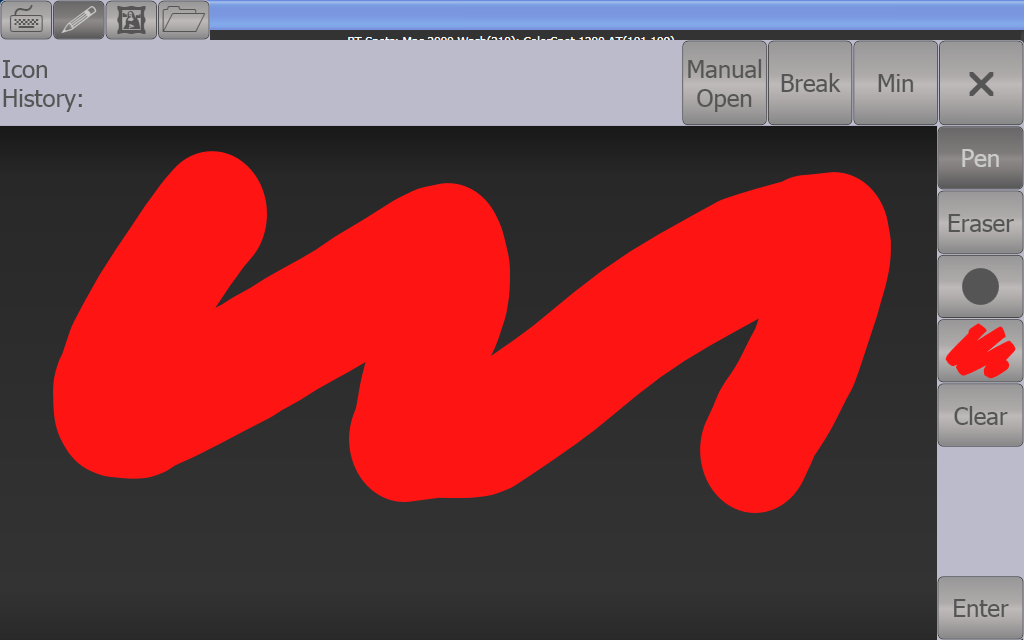
The tab buttons on the top left allow you to select Keyboard entry (legend reverts to text), Draw, Icon Library, or Load File. On the right you can choose Pen or Eraser, set the pen/eraser size, set the colour (white in the above picture), clear the whole picture, and Enter the legend. The Min button top left reduces the editor to a smaller size.
If you select Library you can choose a picture from a wide range of pre-programmed pictures. The pictures are sorted into various folders which are listed on the left.
![]()
Creating an Effects Palette (Shape or Pixel Mapper)
Speed up your programming by creating some palettes which apply shapes or pixel mapping effects. You can't save a key frame shape to a palette.
For an effects palette to be useful, it needs to contain only effect settings (for example, for a pan/tilt circle you want it to move the fixtures around their current set position, not to change the position as well). To achieve this you can either use the FX mask when saving the palette, or you can just remember not to set any other values when programming.
- Press Clear, select some fixtures and Locate them
If you need to move them so you can see what's happening, you can do that too
- Press Shapes and Effects, Shape Generator and choose a shape to start
See Shape Generator for more information about shapes
Alter the parameters of the shape as you require
Press then Palette
You cannot use Quick Record to store shape/FX palettes
If you moved the fixtures in step 1, press Set Mask and exclude everything except FX
Press a palette button to store the shape palette
You can't use an effects palette as a Quick Palette (when you recall a palette with no fixtures selected). You must have some fixtures selected when you recall an effects palette.
Creating a Time Palette
You can create palettes which contain only time information. These can be used to set cue times and fixture attribute times without needing to set times manually. Using a time palette also means that you can go back and change the times once in the palette, and the changes will automatically apply to all cues which use the palette.
- Press Clear, select some fixtures and Locate them
If you need to move them so you can see what's happening, you can do that too
- Press Time
*May be labelled Set on Mobile/Sapphire/Quartz, and
Next Time on Expert/Tiger*Change Fade time to 2 sec. This sets the global fade time into the programmer.
Press then Palette
If you moved the fixtures in step 1, press Set Mask and exclude everything except Time
Press a palette button to store the Time palette