Shape Generator
A shape is simply an automatic sequence of values which modify a particular attribute of a fixture. A circle shape, for example, applied to the pan and tilt attributes, would cause the fixture to move its beam in a circular pattern around its current position. You can set the size of the circle and the speed of the circle movement.
In addition to position shapes, there are a large number of other shapes available in Titan. The shapes are defined for a particular attribute such as colour, dimmer, focus and so on.
A further category of shapes is the Block Shape. This type of shape blocks out other shapes, preventing them from running. For example, if some fixtures are running a Circle shape, and then a playback is fired which has a Block Pan/Tilt shape on some of the fixtures, those fixtures will stop running the circle shape. This can be very useful to modify playbacks at show time when used with the playback priority feature.
When you use a shape with more than one fixture, you can choose to either apply the shape identically to all the fixtures, or offset them so that the shape runs along the fixtures creating "wave" or "ballyhoo" type effects. This is called the Phase of the shape.
Creating a Shape
When you create a shape, it will be applied to all selected fixtures.
Select the fixtures the shape is to be applied to
At the main menu press Shapes and Effects then Shape Generator
Press Create to start a new shape
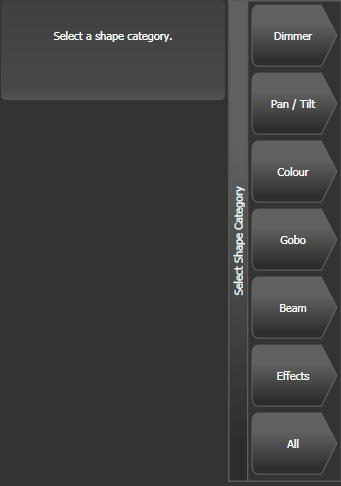
Press a softkey to select the attribute type to use in the shape or press All for a full list
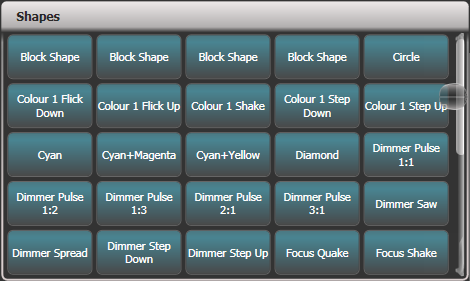
Press a softkey to select a shape, or touch the desired shape in the Shapes window. You can type a search word on the keyboard to search for a particular shape.
The shape will be applied to all selected fixtures
- If you open the Shapes window, it will remain open for instant selection of shapes (you don't need to select Shape Generator). The window will only show shapes which are possible on the selected fixtures. Pressing attribute buttons will filter the Shapes window to show only shapes for that attribute. Press the Dimmer attribute button to show all shapes.
Shapes are based on the current settings of the fixture, so a position circle would move around the current pan-tilt position of the fixture.
You can change the base value of a shape (e.g. the centre of a circle) by changing the attributes using the wheels in the usual way. You can reduce the Size to zero (see next section) to help you see what the base value actually is.
You can run more than one shape at a time by repeating the above procedure. You can run several shapes on one fixture and the output will combine in interesting ways.
Press Shapes and Effects, Shape Generator then Edit to show what shapes are running.
If you apply the same shape to two different groups of fixtures, the shape will appear twice on the shape list. You can edit the two shapes separately to give different directions, speeds etc (see later)
If the selected fixture has sub-fixtures (cells) then you will be given the option to run the shape on the main fixture, keeping all cells identical, or spread across the sub-fixtures/cells. The options are:
- Run on Super Fixtures - cells are ignored, fixture operates as one block
- Run on Sub Fixtures (Linear) - the cells are used in numerical order
- Run on Sub Fixtures (Group) - the layout of the cells is used as programmed in the Layout Editor for the group
Each shape is designed to work on a particular attribute. Obviously if the fixtures don't have the attribute, you will not see any effect if you use the shape.
Each shape has a default size and speed setting (defined in the shape file).
When using a Rainbow colour shape, to get the full range of colours you need to set the CMY or RGB attributes to 50%.
Changing Size and Speed of a Shape
It is easy to change the size and speed of a shape after it has first been created. If the display above the wheels is showing Spread and Offset rather than Size/Speed, press Adjust Speed, Size and Spread.

Control the speed of the shape using the left hand wheel
Control the size of the shape using the middle wheel (right hand wheel on Pearl Expert)
The size and speed is shown above the wheels on the display
Other things to know about size and speed of shapes:
If you have more than one shape running, the controls operate on the most recent one. You can edit the parameters of any shape that's running using the Edit Shape function, see Editing a Shape in a Cue Using Include.
The minimum size is zero. This will "hide" the shape, and the fixture will resume its previous settings. The shape is, however, still active.
Once a shape is saved in a playback, you can use the playback fader or a separate Speed or Size master to control the speed and size.
Changing the Spread of a Shape Across Multiple Fixtures
Shapes get more interesting (and look more impressive) when you apply them to multiple fixtures. You can control how a shape is spread across several fixtures. You can also control Phase, which is a different way of selecting the same thing.
The sequence of the shape across the fixtures is controlled by the order in which you selected the fixtures when you created the shape. You can edit the order by selecting Fixture Order in the Shape Edit menu.
If the right hand wheel isn't showing Spread, press Adjust Speed, Size and Spread
Control the Spread of the shape using the right hand wheel, or to set in terms of Phase, press Adjust Spread, Phase and Offset and use the middle wheel (right hand wheel on Pearl Expert).
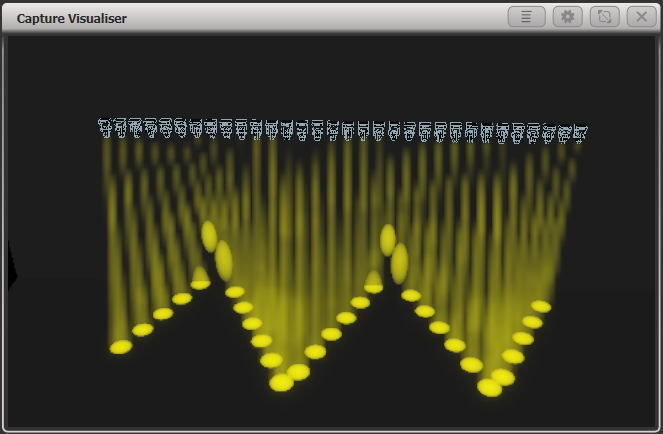
Spread = 12 (Phase = 30 degrees):

Spread = 6 (Phase = 60 degrees):
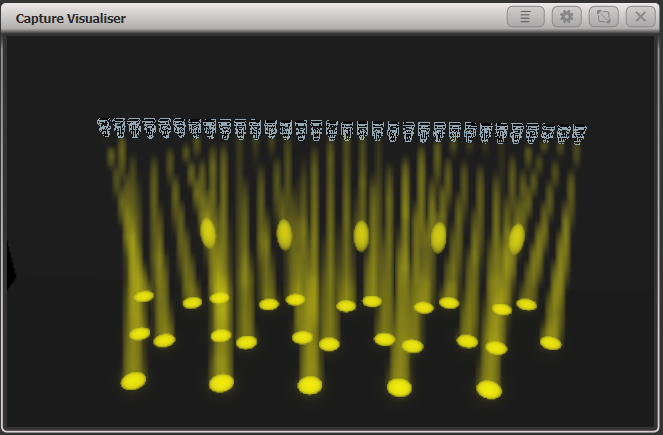
Spread = 2 (Phase = 180 degrees):
In Phase mode, the display above the wheel shows the phase in degrees. For example, 180 degrees repeats every 2 fixtures, 90 degrees repeats every 4 fixtures, 60 degrees repeats every 6 fixtures, and so on.
The Offset function allows you to set the starting phase of the shape, when more than one shape is running. For example, if you were running a Cyan shape and a Magenta shape to create a mix of colours, you would probably want to start them with Cyan at full and Magenta at zero to give the full range of colours. In this case you would set one of the shapes to have a Phase Offset of 180 degrees. Without the phase offset, both shapes would reach full at the same time.
Shape Direction
The Direction softkey opens a menu allowing you to set a direction for the shape. If you have defined a 2D layout for the group this allows you to have shapes that visibly move in particular directions.
You can keep the shape direction menu open using the Menu Latch button, to allow you to try different options and see the effects.
Beat and Cycles
The Adjust Beat and Cycles option lets you set on the wheels how the programmed speed will trigger the shape, and how many times the shape will run.
Beats
The Beats option defaults to Beats=1 which makes the shape run at normal speed. Higher numbers will divide the count, for example
Beats=4 will make the shape run at quarter of the speed. This is really useful to synchronise different types of shapes which are running together.Clicking the middle of the wheel roller image on screen or pressing @A for Wheel A allows you to type in a number for the Beats parameter, and also shows two further options for Beats: Match to Spread sets the beat count to be the same as the current Spread setting for the shape. This is useful when using dimmer shapes with movement shapes as it will make each fixture turn on for a full cycle of the movement shape. The
Custom option resets the Value option to the last entered value.Cycles
The cycles option sets how many times the shape will run. By default this is set to infinity (∞) which means the shape will continue to run until you stop it. If you set a fixed number, the shape will stop by itself after that number of cycles.
You can type in a number instead of using the wheels by clicking the middle of the wheel roller image on screen or pressing @B for Wheel B. If you are typing in a number you can enter part cycles, for example 1.5.
Using Shapes in Cues
When you save a shape into a cue, you can set the playback fader to control the size and/or speed of the shape in playback options to give you more options at show time; you can also control the size and speed from separate Size Master and Speed Master faders.
You can use shapes in a cue list, see Shape Tracking in Cue Lists on how the shapes will behave as you go from cue to cue.
You can also adjust parameters of the shape at playback time using the
Select Shape menu, which is on the Edit menu of the Shape Generator menu.Storing Shapes in Palettes
You can create palettes containing shapes. This is really useful to quickly call back shapes pre-configured with different spread and speed settings. See Creating an Effects Palette (Shape or Pixel Mapper).