Arena
The Arena has five main control areas:
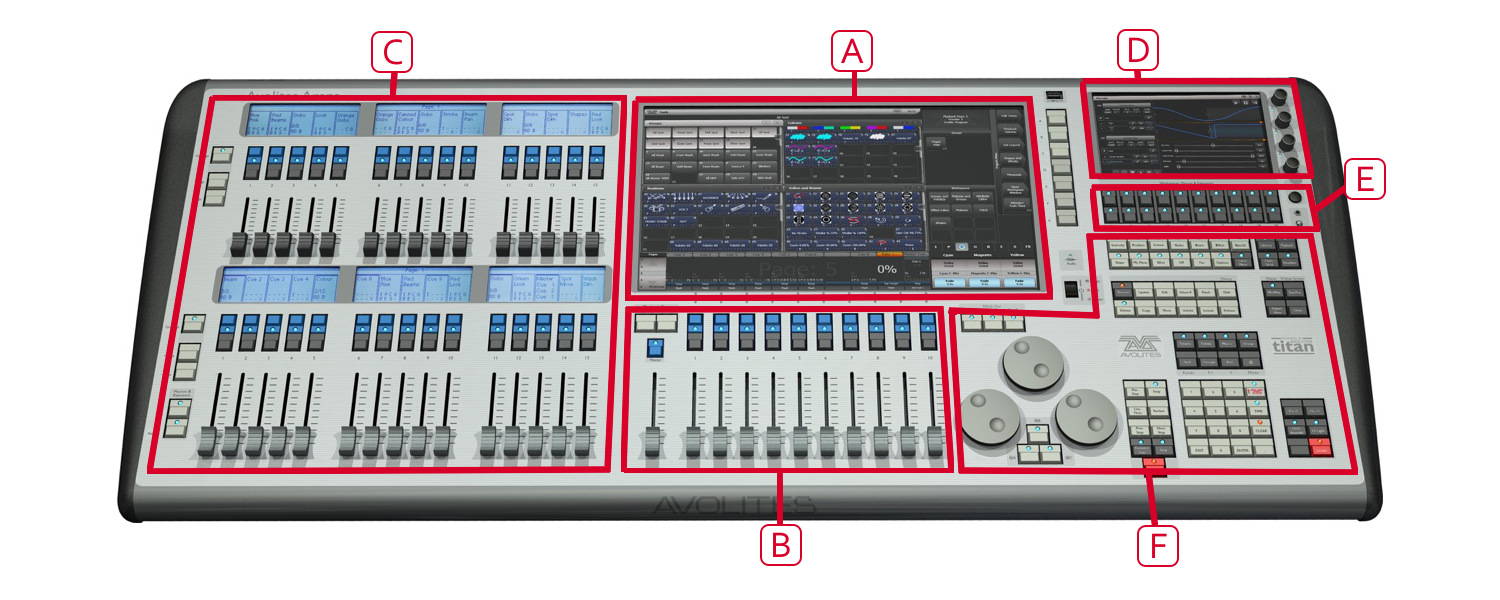
A The Touch screen contains fixture, palette and group select buttons. It also shows legends for the playback faders and shows the current menu page and softkey buttons on the top right of the screen.
B The Playback faders select and control cues and programs.
C The additional playback faders provide further positions for storing cues, programs, fixtures and other elements.
D The Mini screen gives you another touch screen and additional masters or playbacks using four rotary encoders.
E The macro buttons store playbacks or frequently used sequences of keypresses which can be replayed with a single button press.
F The Programming and setup controls configure and program the console
The Main Controls
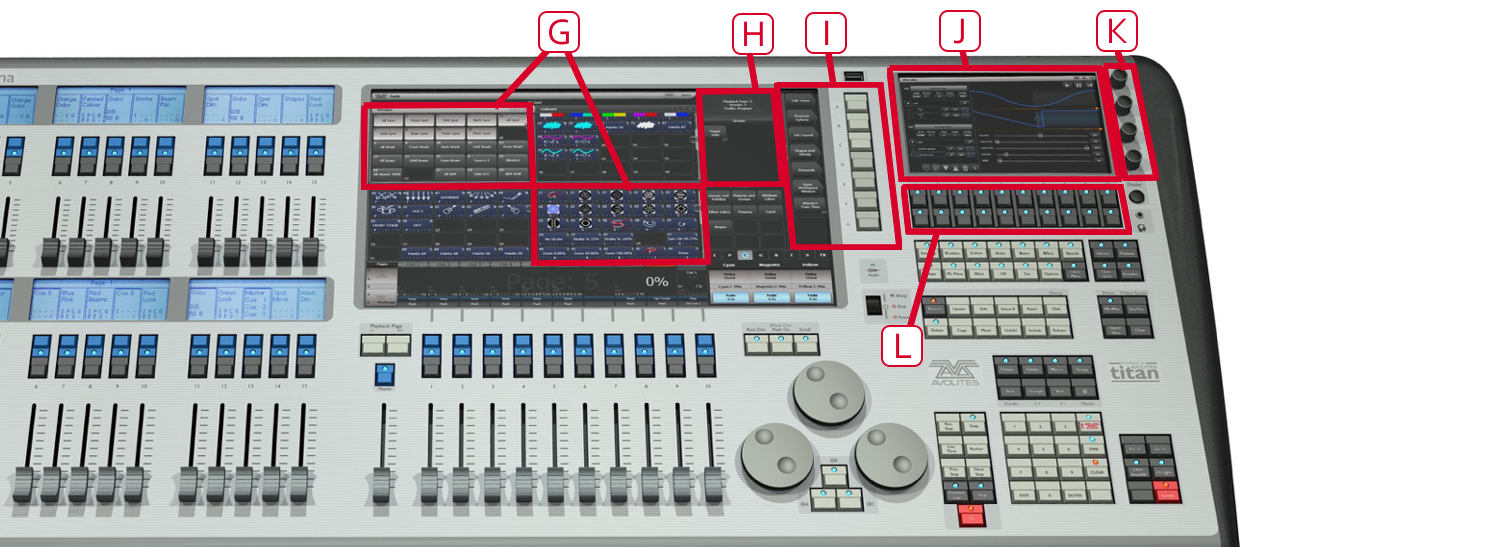
G The Workspace windows on the touch screen contain touch buttons for fixtures, palettes, groups, playbacks, macros and more. You can also set fixture attributes and show information windows.
H The System display and menu area of the touch screen is the nerve centre of the console and shows you what is going on. This part of the display shows various screens of information depending on what you are currently doing.
I The Menu Softkeys (labelled A -- G) are used to select control options. The display next to the buttons shows what each one will do. The options for each key change depending on what the console is doing. Softkey commands are shown in the manual like this: Edit Times
J The Mini screen displays additional workspace windows.
K The four rotary encoders act like normal handles and can be allocated as masters or playbacks. Pressing the encoder is like pressing the blue button on a handle.
L The Macro Buttons store playbacks such as strobe cues or frequently used sequences of keypresses which can be replayed with a single button press.
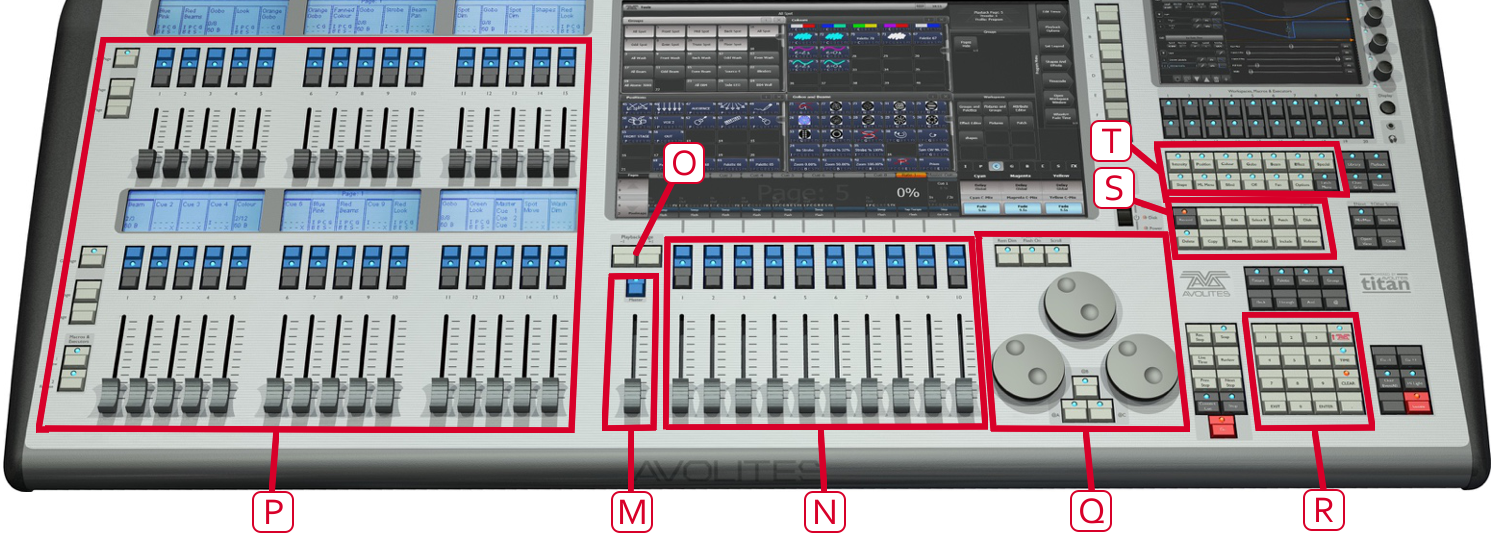
M The Master fader can be used to control the overall output of the console (though it is disabled by default).
N The Playback faders are used to store and play back cues or chases.
O The Page Select buttons let you change to a different page of playbacks. The touch screen above the faders shows information about each playback.
P The Additional playback faders in two banks of 15 allow you to store more cues and chases, or store palettes, groups, or fixtures. Each bank of 15 has separate page select buttons and displays above the faders show what they are.
Q The Control wheels are used to set control values (attributes) for the fixtures, and to set chase speeds and fades. The touch screen above the wheels shows information about the attributes being controlled. Press the Window Scroll Button to switch the wheels into scroll mode -- this is used to move a selection box around the screen when editing.
R The Numeric keypad and other control buttons are used to enter values and change controls on the console.
S The Function buttons are used to carry out functions such as storing cues, copying, saving to disk, etc. These buttons have lights on to indicate when they are active.
T The Attribute select buttons are used to select which attributes of a fixture (e.g. colour, gobo, pan, focus) are going to be controlled using the Control wheels. The buttons have lights on to show you which attributes are active. In the bottom right corner of the console is the Locate button which sets fixtures to a known start condition while programming.
The Back Panel

U USB and reset buttons for panel reset and internal UPS battery disconnect.
V Network connections, monitor output, SMPTE input and audio input.
W DMX outputs and MIDI in/out.
Desk lamp sockets.
All the connections required for the console are found on the back panel. There are 8 DMX outputs on 5-pin XLR, MIDI in/out/thru on 5-pin DIN, two desk lamp sockets, four Ethernet sockets from the internal Ethernet switch, an opticalCON Duo optical terminal for fibre network, a DVI connector for external monitor, three USB sockets, SMPTE input, audio input on 1/4 inch jack and remote trigger terminal on 1/4 inch jack.
The Panel reset switch may be pressed to restart the front panel electronics if something odd happens with the switches and faders. The main processor will continue running but the DMX output will be interrupted until the restart is completed.
The UPS battery disconnect switch cuts off the power to the console when it is running on UPS, in the unlikely event of a complete lock up that can't be recovered by holding down the power switch.
Using the battery disconnect switch will also power down the inbuilt network switch (TNS). Be aware of this if you are running from a backup console connected via the network switch.
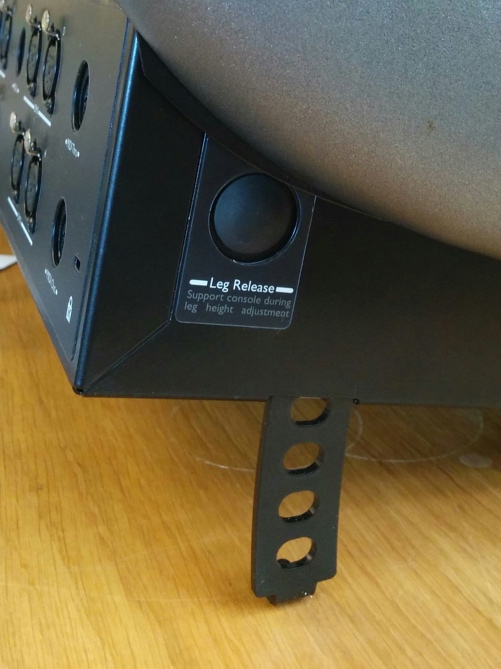
The Arena console has adjustable legs to angle the console for easier operation. Lift the rear of the console and press the Leg Release button at each side to set the leg to the desired height. Make sure you support the rear of the console when adjusting the height.