Quartz

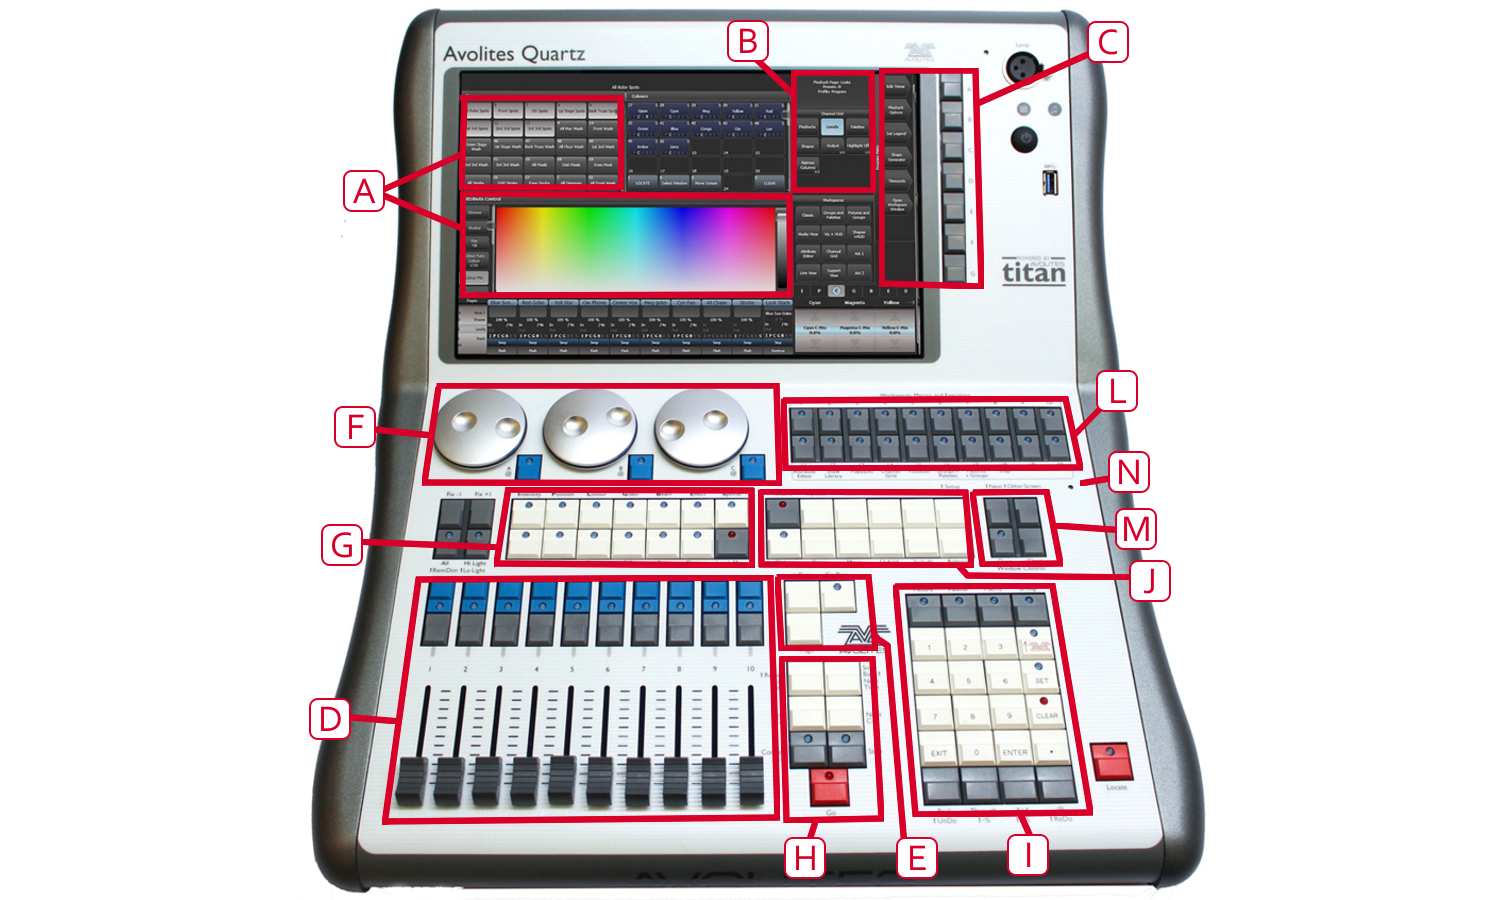
A The Workspace windows on the touch screen contain touch buttons for fixtures, palettes, groups, playbacks, macros and more. You can also set fixture attributes and show information windows.
B The System display and menu area of the touch screen is the nerve centre of the console and shows you what is going on. This part of the display shows various screens of information depending on what you are currently doing.
C The Menu Softkeys (labelled A - G) are used to select control options. The display next to the buttons shows what each one will do. The options for each key change depending on what the console is doing. Softkey commands are shown in the manual like this: Edit Times
D The Playback faders are used to store and play back cues or chases.
E The Page Select buttons let you change to a different page of playbacks. The bottom of the screen shows information about each playback.
F The Attribute Control wheels are used to set control values (attributes) for the fixtures, and to set chase speeds and fades. The bottom right corner of the screen shows information about the attributes being controlled.
G The Attribute select buttons are used to select which attributes of a fixture (e.g. colour, gobo, position) are going to be controlled using the Control wheels. The buttons have lights on to show you which attributes are active. Attribute functions such as Fan and Shapes are also controlled here.
H The Chase and Cue List control buttons allow you to start and stop chases and cue lists, and move about in the list.
I The Numeric keypad and other control buttons are used to enter values and change controls on the system.
J The Function buttons are used to carry out functions such as storing cues, copying, saving to disk, etc.
L The Workspaces, Macros and Executers buttons are programmable buttons which can be used to store workspaces (screen layouts), button macros or cues.
M The Workspace Window select buttons are used to set which windows are shown on the screen.
N Near the power switch there is a small hole in the front panel. This is the Panel Reset Switch which may be pressed using the end of a paper clip or other pointy thing to restart the front panel electronics if something odd happens with the switches and faders. The main processor will continue running but the DMX output will be interrupted until the restart is completed.
Connections panel

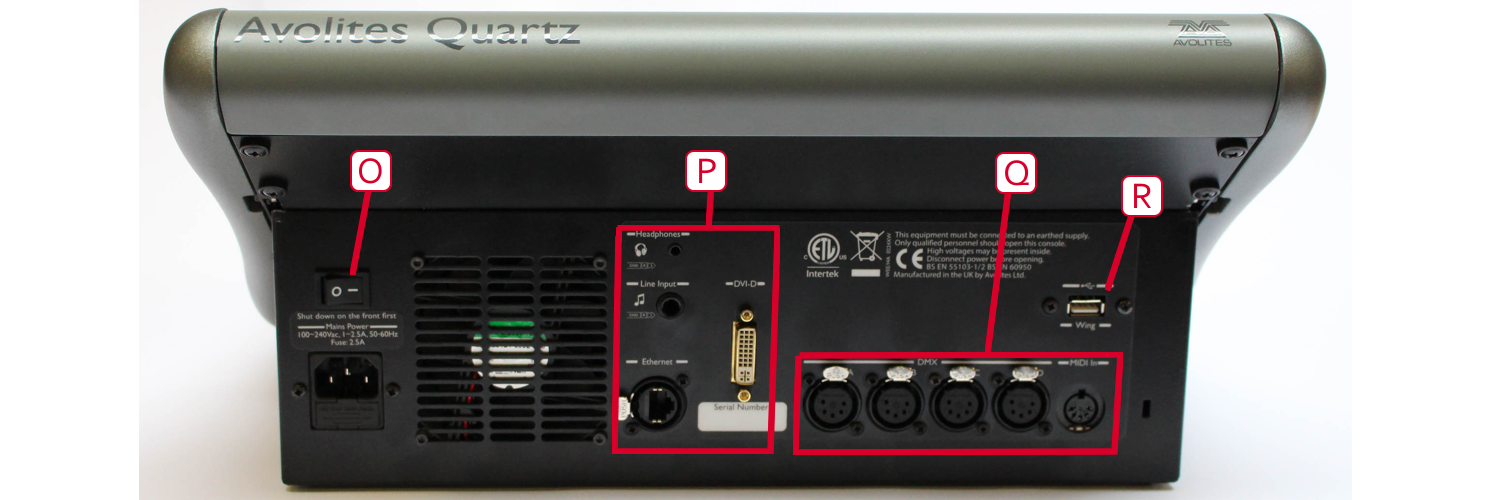
All the connections are on the rear panel. Most are self-explanatory.
O The power switch on the rear panel is an isolator for the power supply and should not be used to turn the console off. Use the switch on the front panel to turn the console on and off, this will make sure the software shuts down properly.
P In the centre of the panel are connections for network, external DVI monitor, and audio line in for triggering.
Q To the right of the panel are four DMX outputs on XLR, and MIDI input.
R The rear USB connector may be used to connect a wing or an external touch screen.