Diamond 9

The Diamond 9 has the following main control areas. There are two models, the D9-330 as shown and the compact D9-215 which has two main touchscreens and fewer playback faders:
A The three main Touch screens (two on D9-215) contain fixture, palette and group select buttons. At the bottom of the right-hand screen, the current wheel assignments are shown along with legends for the 15 Macro Keys. At the top and bottom of the left-hand screen(s), handle legends for the main faders and encoders are shown.
B The Playback faders and Rotary playback faders select and control cues, cue lists and chases, and other configurable functions. (D9-215 only has the right hand set of faders).
C The System Prompt and Menu Softkeys have their own touchscreen.
D The Programming and setup controls configure and program the console, within which the editor touchscreen shows and sets fixture attributes and the macro/executor buttons are playback buttons allowing storage of cues or chases, frequent key sequences, screen layouts or groups. To the left of these controls are the cue list playback controls and the Scene Master T-bar.
E Three Layer screens are provided for monitoring video feeds via NDI, or for additional workspace window touch screens.
Touch screen controls
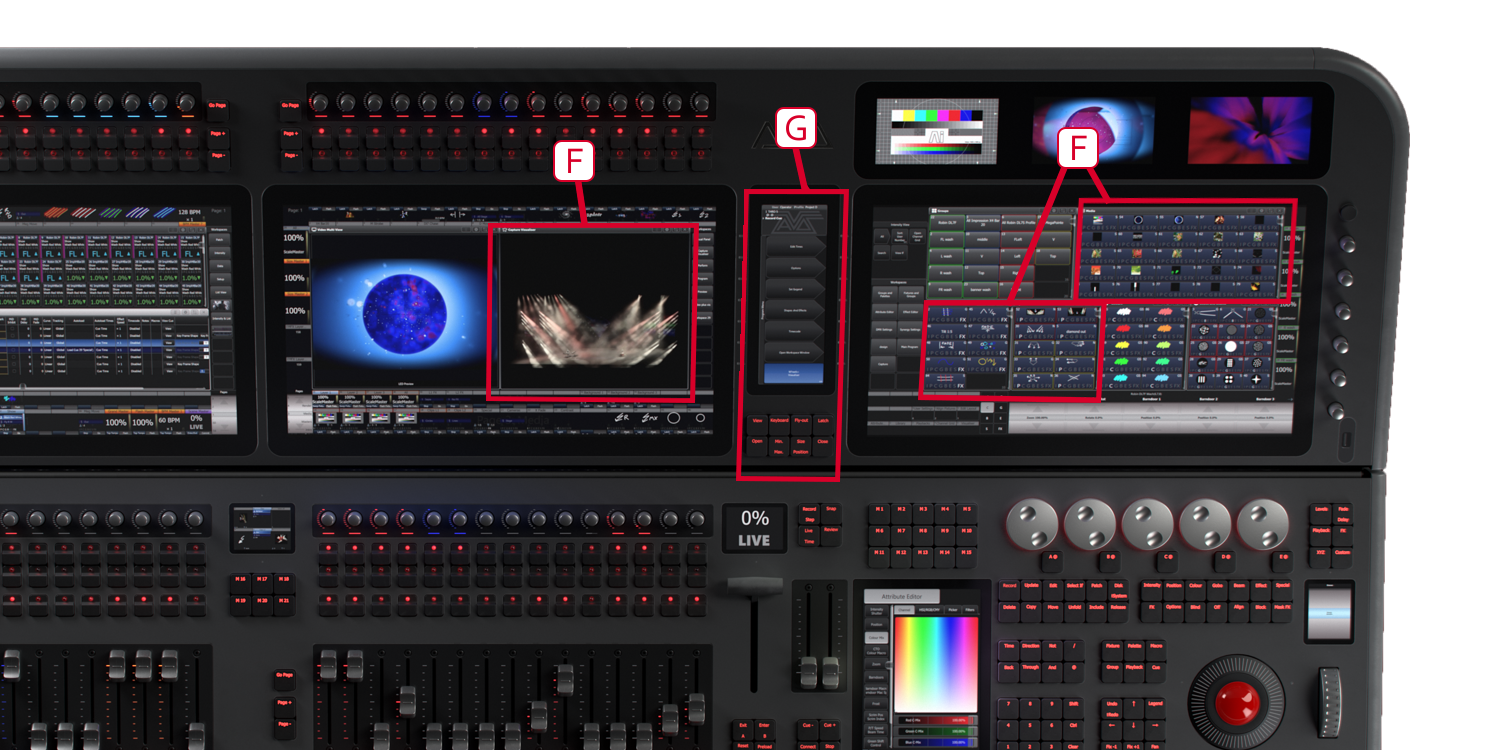
F The Workspace windows on the touch screens contain a user-configurable layout of touch buttons for fixtures, palettes, groups, playbacks, macros and more. You can also show the integrated Capture visualiser, video feed monitors or a range of information screens such as intensity levels or DMX output levels.
G The System Prompt and Menu Softkeys screen is the nerve centre of the console and shows you what is going on. This display contains touch buttons for the main menu which change depending on what the console is doing. Softkey commands are shown in the manual like this: Edit Times
Playbacks
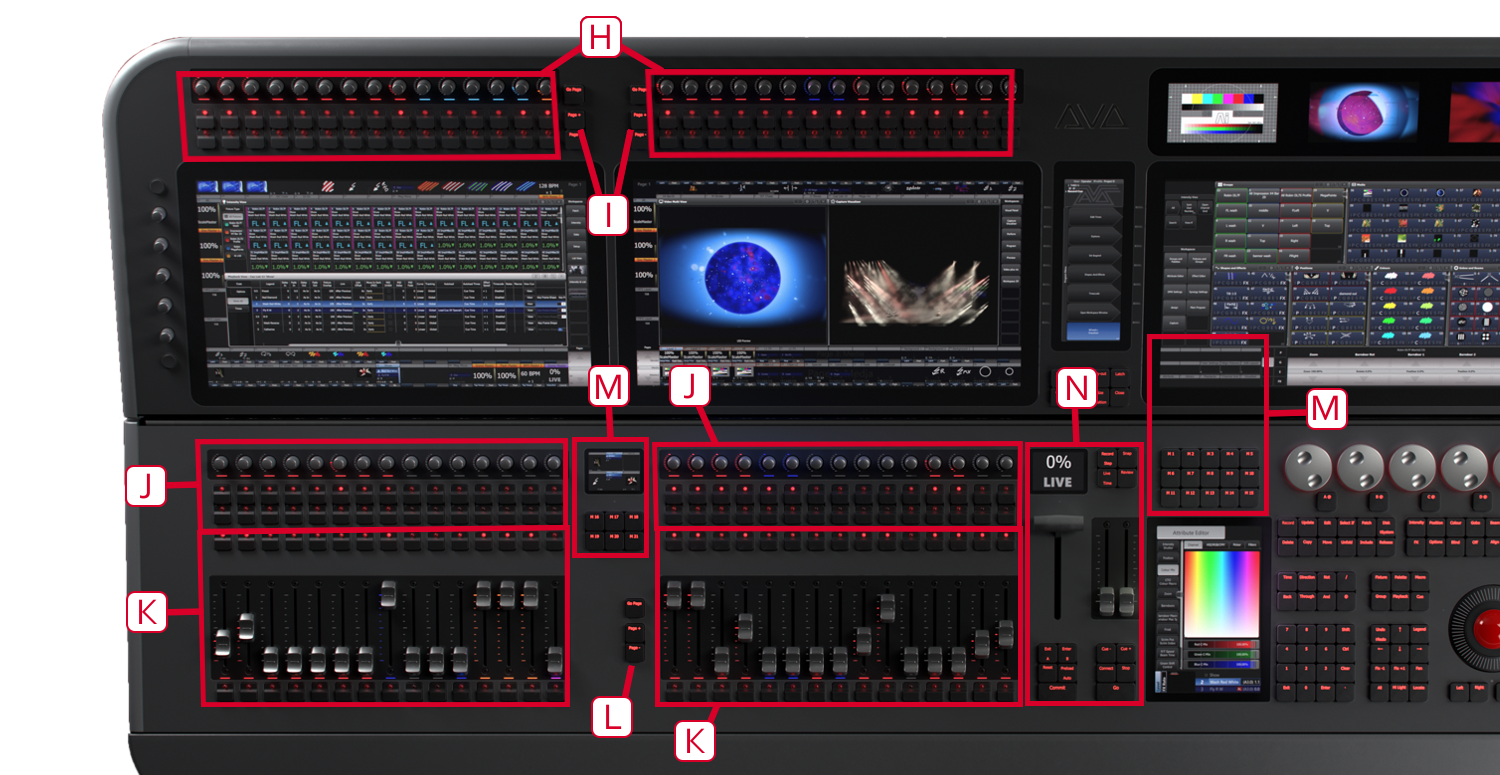
H The Rotary Faders at the top can be used to store a range of program functions including cues, chases, and fixture groups. The rotary faders have a level indicator around them which is shown in a user-configurable colour (halo colour). The touch screen below the faders shows legends indicating their function. There are additional rotary faders down the sides of the left and right touchscreens.
I The Page Select buttons in the centre of the faders let you change the left or right fader banks to a different page.
J Two more sets of Rotary Faders are provided above the Playback Faders.
K The motorised Playback faders are the main place to store and play back cues or chases but can also be assigned a range of other functions. Each fader has a level indicator which can be set to a user-configurable halo colour. The touch screen above the faders shows information about each playback.
L The Page Select buttons let you change the left or right fader banks to a different page of playbacks (for both the playback faders and the lower rotary faders).
M The Macro Buttons store playbacks or frequently used sequences of keypresses which can be replayed with a single button press. The display immediately above the buttons shows legends for the buttons. There is a smaller bank of 6 buttons between the playback faders with their own legend screen.
N The Playback controls are used to control the playback of cue lists and include a T-bar with display for the Scene Master function and a motorised fader pair in the Sequence Control Section to control the connected playback/master.
Programming controls
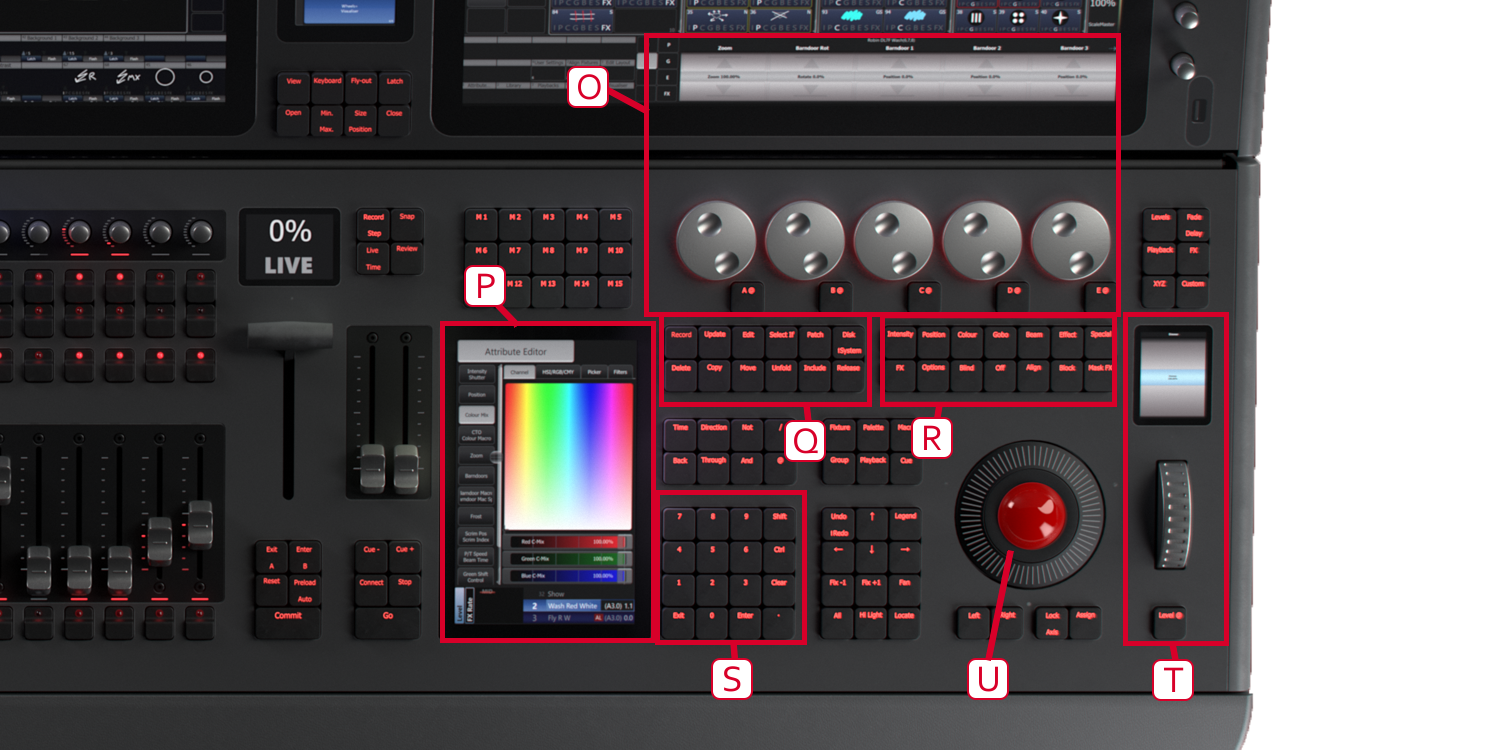
O The five Control wheels are used to set control values (attributes) for the fixtures, and to set chase speeds and fades. The touch screen above the wheels shows information about the attributes being controlled. The buttons to the right of the wheels switch them to other functions such as fade timing, shape control or visualiser control.
P The dedicated Editor Touchscreen shows the Attribute Editor window giving a different way to select attributes such as colours and gobos.
Q The Function buttons are used to carry out functions such as storing cues, copying, patching, saving to disk, etc.
R The Attribute Buttons are used to select which attributes of a fixture (e.g. colour, gobo, pan, focus) are going to be controlled using the Control wheels. The buttons light up to show you which attributes are active.
S The Numeric keypad and other control buttons are used to enter values and change controls on the console.
T The dedicated Intensity Wheel and display controls intensity of selected fixtures.
U The trackball controls pan and tilt of fixtures, and can also be used to control a mouse pointer for the screens.
Front edge of the console
Under the armrest at the front of the console is the Power Switch, a USB socket for connecting USB drives, and a pull-out drawer with an illuminated Keyboard for entering legends.
The Back Panel
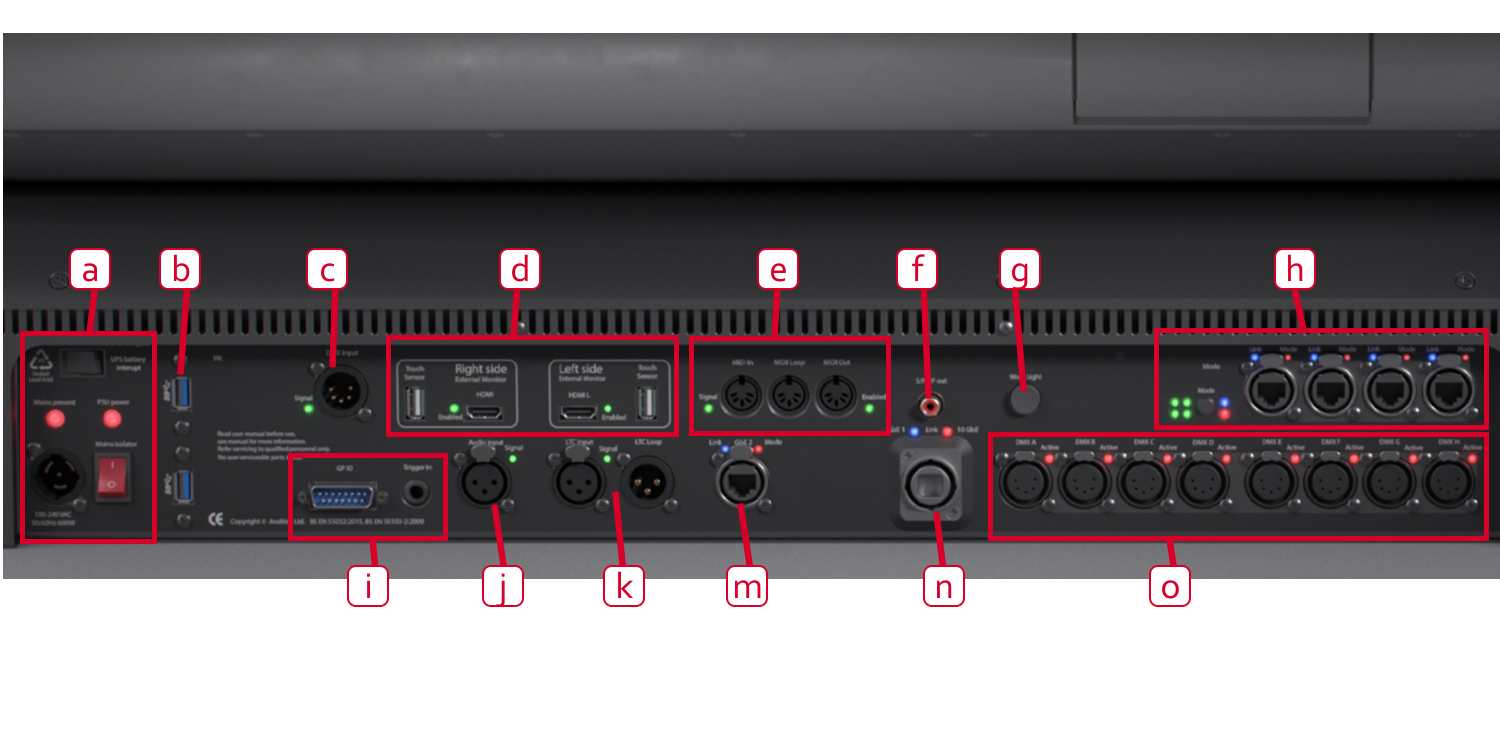
a Mains power input (PowerCON TRUE1), mains isolator and UPS interrupt switch. Do not power the console off using this mains isolator switch, use the power switch at the front of the console.
b Additional USB sockets for general purpose use.
c DMX input for triggering.
d Outputs for two additional screens - HDMI and USB for touch screen.
e MIDI in, thru and out.
f Digital S/PDIF audio output.
g Work light switch. The console has integrated LED lighting around the connections panel.
h Four gigabit etherCON network connections from the internal Luminex network switch.
i GPIO trigger connection (D-connector and separate jack connector).
j Audio input for sound triggering.
k LTC Linear Timecode in and loop connections.
m Additional gigabit etherCON network connection.
n 10Gb quad opticalCON terminal.
o Eight DMX512 outputs.