Operating Synergy
Once Titan and the Ai server(s) are linked up, you can start controlling Ai from the console.
Uploading Content with the Media browser
The Media Browser allows you to upload media content directly to the Ai server from the Titan console. You can also create new media banks on the server. Media content will be automatically transcoded to the AiM codec as required by the Ai system. This is very handy when you are handed a last-minute media file at the front of house position.
As with other windows, the media browser window is opened from the Workspace Window select buttons (double press the Open/View button to show).
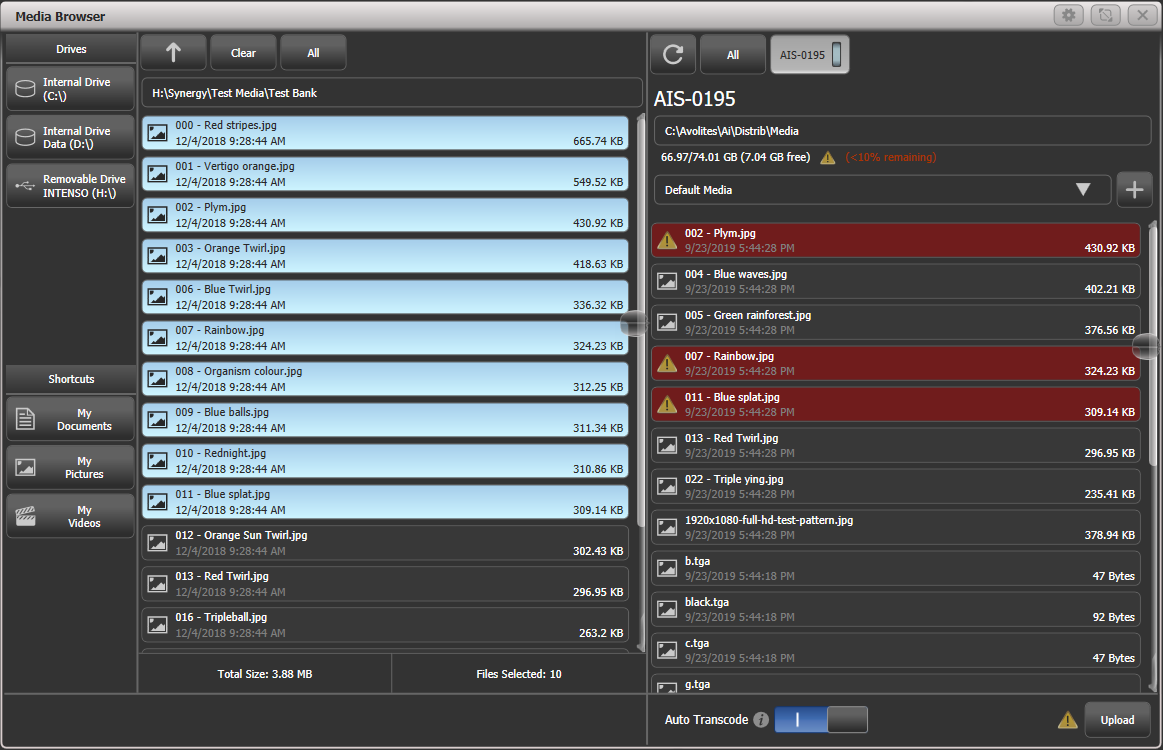
On the left hand side of the window, local disks available on the console are listed. If you plug in a USB drive it will be shown here. Shortcuts to commonly used folders are also provided.
In the second column, the files/media clips available on the selected local disk are shown. You can navigate into folders and use the up arrow at the top to go back up a folder level.
On the right of the window, the media banks on the Ai server are shown. Clicking on the bank name will drop down the list of media clips loaded in the bank. Click the + button at the side of the bank name to add a new bank. At the top of this column, the available disk space and the path on the Ai server where the media is being stored is shown.
To copy media files to the Ai server, select the files you want to transfer in the middle window, then click on the bank you want to transfer them to on the server.
If the Ai server already has files on it with the same names as files you have selected for transfer, the files will be highlighted in red in the Ai server window as a warning.
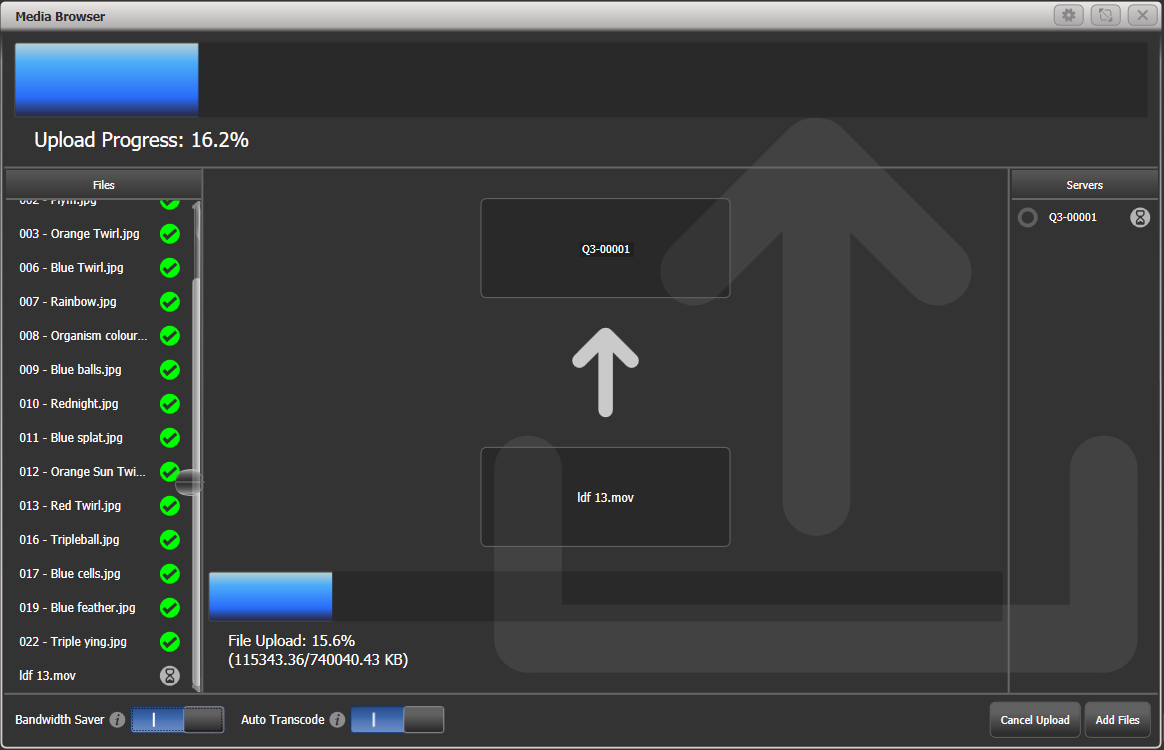
Synergy will attempt to transfer the files as fast as it can and will show you a progress dialog. This may slow down the network; if this will be a bad thing, turn on the "Bandwidth Saver" switch at the bottom of the window to throttle the file transfer and leave capacity on the network for other traffic (obviously this will slow down the file transfer).
You can also turn off the automatic transcoding to AiM codec, but normally we would recommend that this option is left on. Once the files are uploaded, any requiring transcoding are added to a queue in Ai. You can see the progress of the transcoding by viewing the clips in the Attribute Editor, see below.
Media Viewer
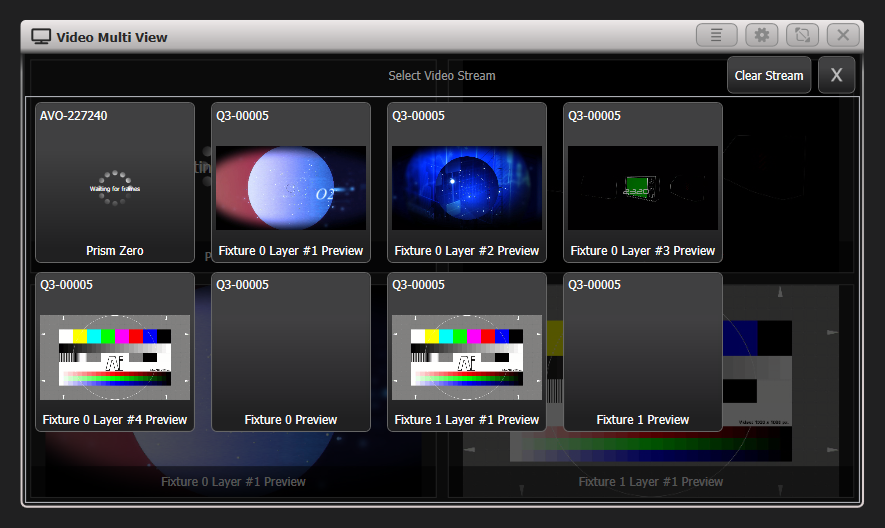
The Video Multi View window allows you to view any of the layers being produced by the Ai server, or any of the combined surface outputs. In addition you can view any other NDI streams available on the network, so for example at a broadcast event the broadcaster could feed you the program output or individual cameras to check lighting levels.
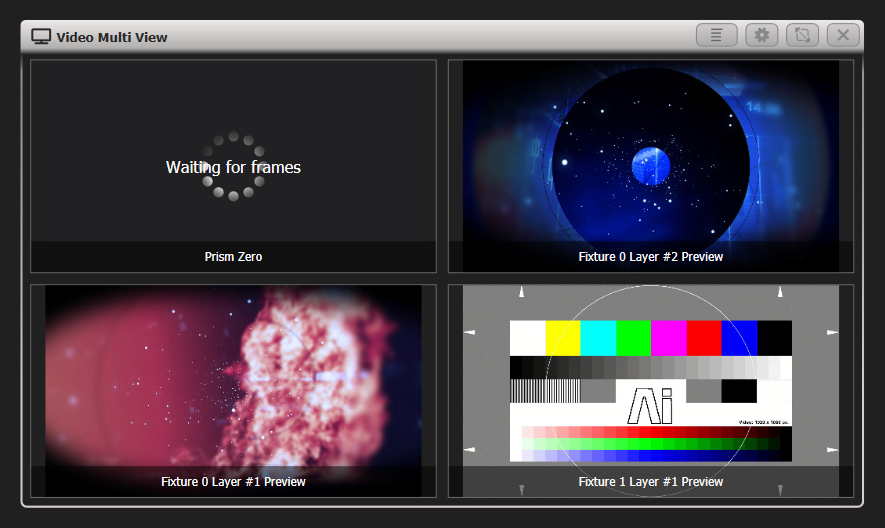
To add a stream, click on a view in the window (blank views show a plus symbol). A dialog will pop up showing you all available streams on the network - either direct views of the layers, or a view of the output screen with the layers combined.
The context button Change Layout gives you various possible layouts of multiple screens. The Titles Shown button toggles to show or hide the stream titles at the bottom of the views.

You must have the "Automatic NDI preview" option enabled for the Ai server in the Synergy Settings window for this to work.
The NDI streams used for video preview can use a lot of network bandwidth which limits how many streams you can receive at one time. The data rate varies depending on the detail/movement in the video but a rough guide is:
| Format | Data Rate |
|---|---|
| 1920x1080p30 | 120Mbps |
| 1920x1080p60 | 200Mbps |
| 3840x2160p30 | 280Mbps |
| 3840x2160p60 | 480Mbps |
Attribute Editor for Controlling Ai Layers
Once you have selected one or more Ai layers to control from the Synergy Fixtures window, the Attribute Editor lets you play back and manipulate media on those layers (you can also use the wheels and Attribute Bank buttons).
The most important attributes are Intensity, which set the output level of each layer, and Media Selection which lets you choose the Bank and Clip to play. But you can also control all other functions of Ai such as adding FX and colour.
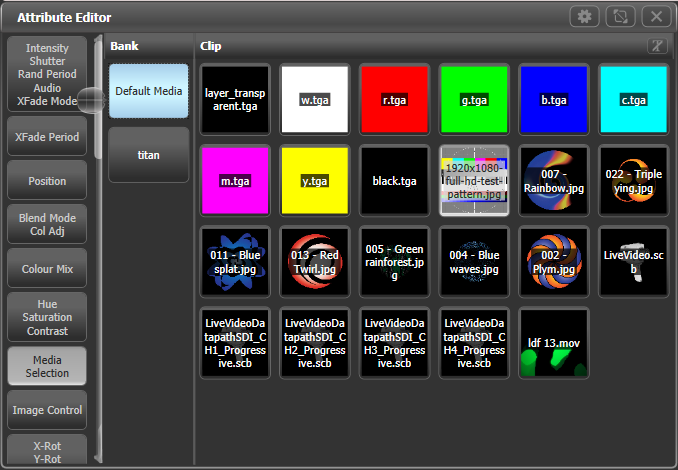
In the Media selection window, in the Clip tab, if you click on the T button (top right) or the caption at the top of the tab, this will toggle the clip name display on and off. This can be useful for long names which obscure the picture; on the other hand if you have lots of clips which look similar, the name display can be useful.
Some of the attributes, such as FX Select, have a large number of options which initially are shown in a vertical column of buttons requiring a lot of scrolling to see all the buttons. If you click in the header above the buttons, the column will expand to fill the window, making selection easier.
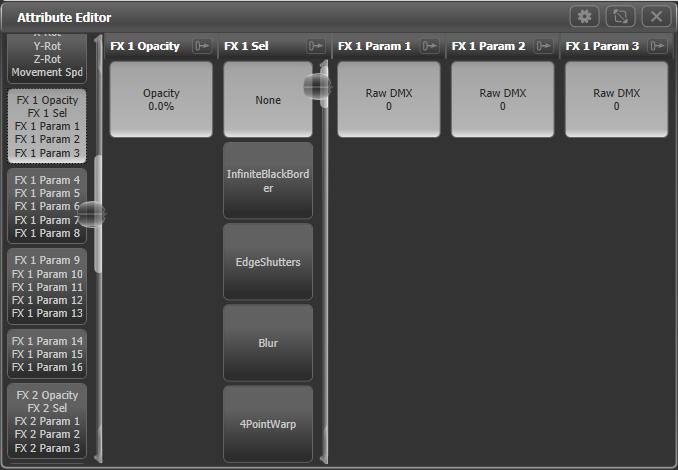
In the FX attributes, the effects names are pulled live from the Ai server. This means the names you are shown will always match what's on the server. It's also good for generative plugins where you define the FX names.
If you select layers then press Locate, the layer intensity will be set to full but all media and FX will be cleared. This is useful to get a layer back to a known state, but you don't get any output. To get some output you will need to then select a media clip.
The Clip selection window also shows you the progress of clips being transcoded by the Ai server.
| Currently being transcoded | In the queue awaiting transcoding | Transcoding failed |
|---|---|---|
 |  |  |
You can create palettes to control Ai, just like with any other fixture. So colour, zoom, position and so on can be stored in a palette and used to quickly modify the appearance of the media. Palette fade times will also operate as you would expect.
Lightmap: Pixel Mapping Ai Media Content
Often you might want to output video content to lighting fixtures patched on the console (for example if you have LED screens with fixtures around or in between them). The pixel mapper can directly play back media clips from the Ai server. These can be sourced from individual layers or from surfaces (combined layer outputs). The surface outputs do not need to be connected to a physical output on the Ai server.
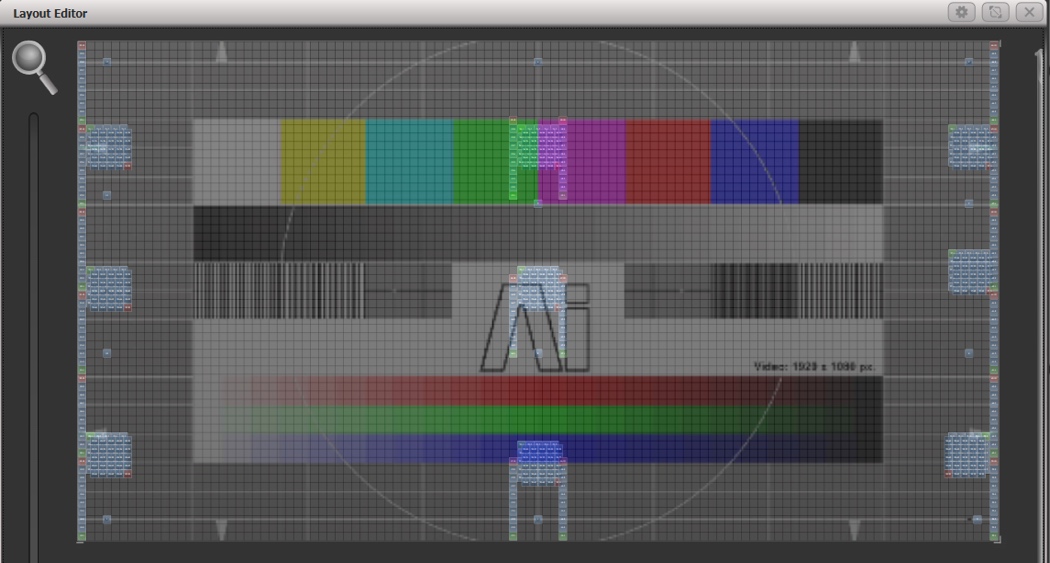
Use the Layout Editor to tell the console where the fixtures are positioned in the physical space so it can map the correct part of the video to each fixture, which is described in the next section.
- Using Attribute Editor, start a media clip playing on the surface you want to use.
- Select Shapes and Effects, then Pixel Mapper.
- Select a group of fixtures to play back on.
- Add an effect using the + button.
- Select Ai feed using the Ai button.
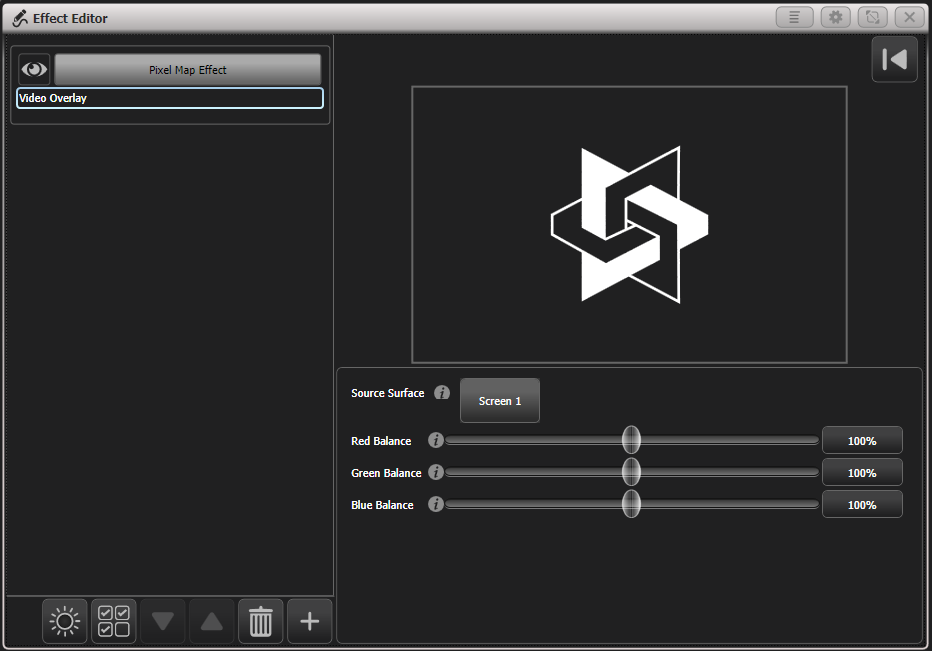
- Select the surface you want to take the media from using the Source Surface option. You can also adjust the colour balance using the Red/Green/Blue sliders.
The media clip selected in step 1 should now be playing back over the fixtures you selected. The pixel map effect is now linked to the Ai surface so you can change the clip which is playing using Attribute Editor or from programmed cues and you will see the change on the fixture outputs.
![]()
Layout editor with Ai server
The basic operation of the Layout Editor is described in Fixture Order and Fixture Layout in Groups.
The layout editor has some additional functions in the Media Options context menu which are useful when setting up fixture layouts for use with media content.
Show Video Overlay
Select any layer or surface to be overlaid on the fixture layout grid to help you see where fixtures need to be positioned.
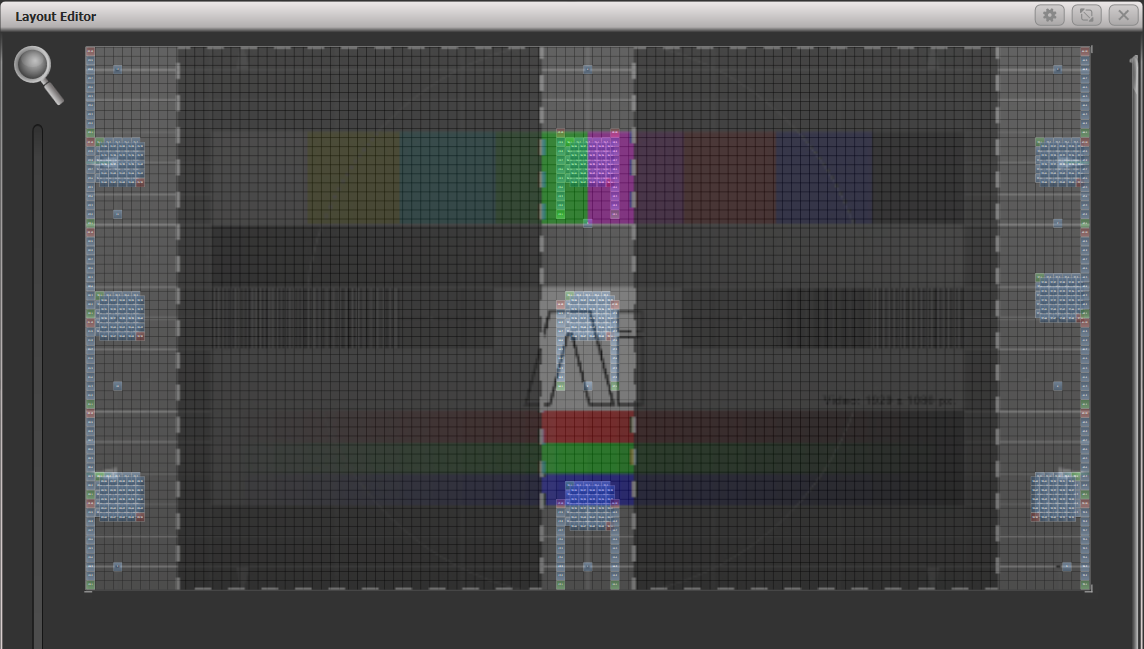
Sample Region Overlay
If the AI output has sample regions defined, for example when areas of LED screen are interspersed with fixtures, this option displays the sample regions overlaid on the layout grid.
Position Overlay
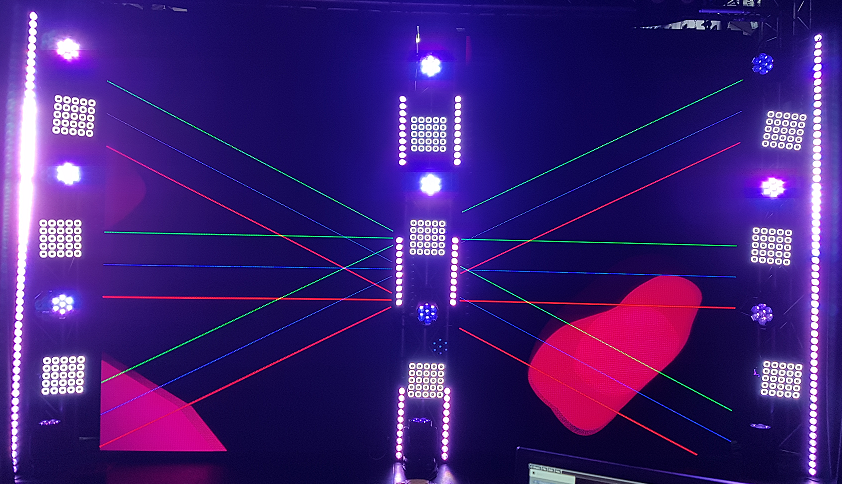
With this option turned on, when you select a fixture in the layout editor, cross-hairs will be displayed on the actual Ai output. This helps you to accurately position the fixture in the layout editor to match where it is in real life.
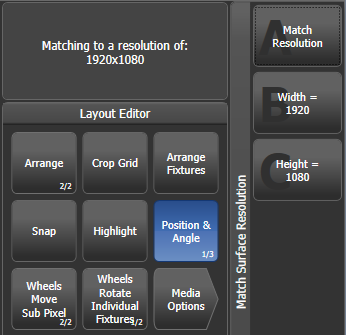
Match Surface Resolution
Allows you to match the layout grid to the resolution or aspect ratio of a surface. When you click this, you will be shown a list of the Ai surfaces available. Select one of these and softkeys will be shown for Width and Height, set to the canvas resolution of the surface. You will not normally want to set the layout grid to match the video pixels 1:1 as fixture pixels are usually much larger than video pixels. But if you change the Width or Height, the other value will be automatically set to preserve the aspect ratio of the surface, so this function is useful to change the grid while keeping the correct ratio.
You can also scale fixtures in the Layout Editor to reflect real life size, as the default cell layout from the fixture's personality might not match other fixtures. Toggle the Position and Angle context menu button until it shows Fixture Scale. If a multi-celled fixture is scaled down to minimum size, the cells will disappear and it will act as a single cell.
Phase control of Key Frame Shapes from Ai
You can control the phase of Key Frame Shapes using the intensity of a video layer from Ai. This allows you to create some weird and wonderful effects as you can make the lights do pretty much anything in response to the video signal. The phase is controlled from 0-360 degrees as the video intensity where the fixture is located goes from 0-100%.
Once your Key Frame Shape is created, go to the Phase Master option at the bottom of the shape options window and select the Ai screen you want to use as the video source.

Special function bank/clip numbers
When selecting banks and clips in the attribute editor, some bank numbers have a special function which allows you to access other screens and layers on the Ai server. This is sometimes useful to obtain other media sources such as live camera feeds without having to process them onto a new screen.
| Bank/Clip | Function |
|---|---|
| Bank 240 - 255 | Selects a Surface/Screen Fixture from 1-16 |
| Clip 0 - 200 | Selects layer number 1-201 on that surface. |
| Clip 255 | Selects the surface output (the composite of all layers) |