Running and Editing Timelines
Running a timeline to timecode
The HTP (intensity) of fixtures in the timeline is controlled by the fader level of the handle. The console will automatically fire the timeline playback to full when timecode is received within the range of the timeline settings.
You can disable the automatic activation, or set it to fire at zero intensity, using the option Activate in Range. If you disable automatic activation, you must manually fire the timeline by pushing up the playback fader, otherwise no triggers will operate.
- Ensure the timecode link button (bottom left of the timeline view) is set to Linked.
- Start the timecode source. (You will need to push up the timeline fader if you have disabled the Activate in Range option described above).
- The triggers in the timeline will fire when the timecode reaches their programmed times.
On consoles with motorised faders and on virtual faders, the playback faders will move as programmed in the triggers.
If you are using internal timecode you can set the timecode to run automatically when you raise the fader, and/or to stop when you lower the fader. See Timeline Options - Fader.
You can set the timeline to loop (when using internal timecode), see Timeline Options - Timecode.
If you start the timecode at a point part way through the timeline, any active triggers will fire, but the state of LTP attributes on fixtures might be different because previous triggers have not fired in the usual sequence - this might result in a different look to what you programmed. You can use the Timeline Options - Release settings to help make this more predictable.
Testing a timeline
You can test a timeline without running the timecode source by setting the timecode link button to Unlinked. You can then use the Play/Pause/Rewind buttons in the Timeline View window to run the timeline sequence. This can be useful when you don't have control of the timecode source.
Timeline Editing
Selecting triggers
To edit a trigger, you need to select it. There are several different ways to do this.
- Tap on a playback block to select all the trigger points within the block. You will see selection handles appear. Tap again on a selected playback block to step through the trigger points within the block.

Tap on more triggers to add them to the selection.
Draw a selection marquee box over the trigger points you want to select. Only the trigger points enclosed by the selection box will be selected, so if you want to select all points in a block they all need to be inside the box. This is a quick way to select one trigger point without having to "multi-tap" on a block.
To clear all selection use the context menu button Clear Trigger Selection or tap in an empty area of the Timeline View.
Using arrow buttons to move trigger selection
The left/right arrow buttons for the track will move your selection to the previous trigger point or the next trigger point.
- Left arrow - moves selection to the previous trigger point on the track.
- Right arrow - moves selection to the next trigger point on the track.
If nothing is selected, the right arrow will select the first trigger on the track and the left arrow will select the last.
Using the wheels to edit triggers
When you have one or more trigger points selected, the wheels control the timecode time, target level and fade time of those triggers (some types of trigger do not have all these parameters).
- Wheel A sets the timecode time
- Wheel B sets the target level
- Wheel C sets the fade time
You can change multiple triggers at the same time by selecting them all and using the wheels.
Using the overview bar
The Overview Bar at the bottom of the Timeline View gives you a miniature view of all the events in the track.
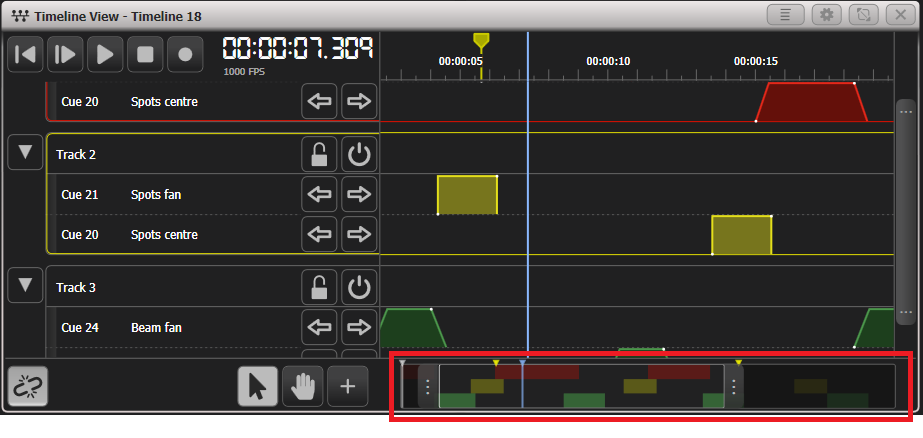
The handles at the left and right of the Overview Bar set the start and end points of the main view above. This gives you an easy way to zoom in on a particular area.
When you are zoomed in you can drag on the zoomed area in the bar to move the main view (the same as using the Hand tool and dragging on the main view).
The edit cursor is shown in grey.
The current live time is shown in blue.
Copying and moving playbacks in a Timeline
You can move playback blocks to a different time or a different track in the Timeline View:
- Press Move.
- Select the playback block(s) you want to move, by tapping on it or drawing a marquee selection box.
- Tap in the Timeline View at the time and track where you want to move the selected playbacks - the relative timing of the triggers will be kept.
- You can move individual triggers within the same track by selecting them then using Wheel A to move them to the desired time.
You can also copy playback blocks within the Timeline View. Copied playbacks will be a reference (linked copy) of the original, unless you change this using the softkey option Create New Playbacks.
- Press Copy.
- Tap on the playback block to copy, or draw a marquee selection box over the playbacks to be copied
- Choose whether you want to have referenced/linked copies, using the softkey options Create New Playbacks and Use Referenced Playbacks.
- Tap in the Timeline View at the time and track where you want to copy the selected playback(s).
Deleting playbacks in a Timeline
You can delete playback blocks by pressing Delete then tapping on the block you want to delete, or drawing a marquee selection box over the triggers to be deleted.
You can also delete tracks or delete playback rows from tracks using the Delete button.
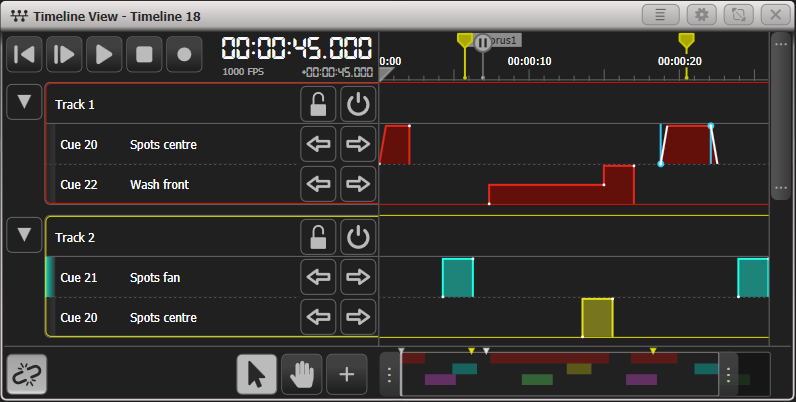
Setting track legends and halo colours on tracks
To help you identify different tracks, you can set halo colours. This colour outlines the track and also sets the colours of the trigger blocks which makes them easier to see in the overview bar.
If a halo colour is set for a playback, that colour will be used in the Timeline View as shown in Track 2 in the picture below. You can set the playback halo colour from the Timeline View by tapping on the playback row in step 2.
- Press Set Legend at the top level main menu.
- Tap on the Track legend or the playback row in the Timeline View.
- Change Legend to set the track legend or press Halo.
- Select a halo colour from the colour picker.
- You can remove a halo colour by pressing Remove Halo at step 4.
- You can also set legends on markers using the Set Legend button.
- You can set a halo colour for a Wait for Go trigger by tapping on it at step 2.
Snap options
Using the context menu option Snap Options you can configure whether new triggers will snap to existing objects when you enter them by clicking on the Timeline View. The snap options are:
- Snap To Triggers
- Snap To Markers
- Snap To Cursor
Collapsing track view
If you have a lot of tracks, you can collapse them to a smaller height to show more tracks on the screen, by clicking the arrow button to the left of the track name.
There are two levels of collapse:
- On the first click the arrow button moves to 45 degrees, any triggers which don't overlap with another playback are shown on a single row. Triggers which would overlap are shown in separate rows. This lets you see more tracks but is still easy to edit.
- On the second click the arrow becomes horizontal and all of the triggers are combined into a single row whether they overlap or not.
Table view
You can show a table version of the Timeline using the Open Table View context button. This shows details for each trigger in time order, in the same format as a cue list. Buttons down the left hand side allow you to filter which tracks are shown in the list. You can have the Table View and the Timeline View open at the same time.

- You can edit any of the settings, except the trigger Action type, by clicking on the grid and using the softkey options to change the settings.
- You can add new triggers using the + button.
- You can delete triggers by pressing Delete then the table row you want to delete.