Timeline Options
Timelines have a number of options which set how they operate. Press Options (or the Options softkey on the top level menu) then the select button for the timeline you wish to edit. The default setting is shown in bold.
Handle Tab
All options are the same as for a cue, see Options.
Times Tab
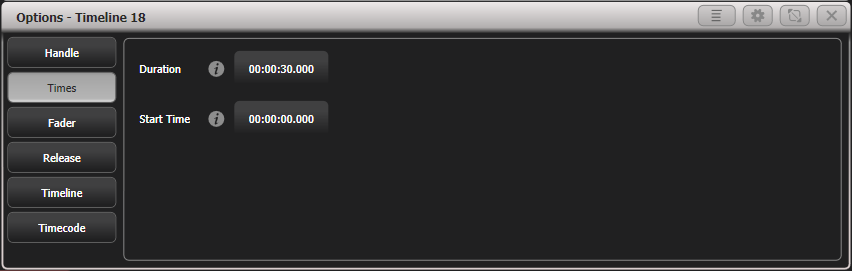
These options let you set the duration and start time of the timeline. These set the loop points when you are using the Loop function or are used to fire the timeline automatically when the timecode is in the correct range. They can also be used to set limits on the timeline so you can be sure nothing will happen if you get sent some wayward timecode.
Fader Tab
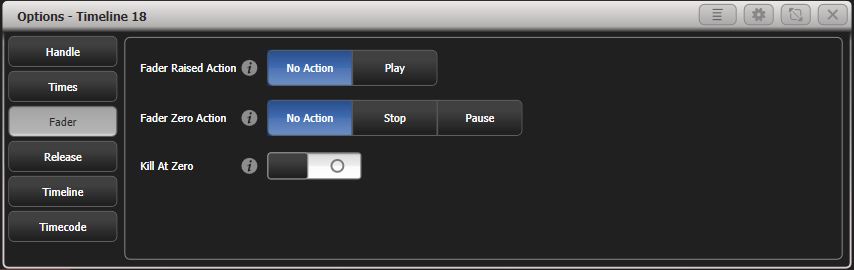
Sets what happens to an internal timecode source when the playback fader containing the timeline is raised or zeroed. If an external timecode source is being used then this option has no effect.
| Option | Action |
|---|---|
| Fader Raised Action | No Action: The internal timecode source is not changed. Play: The internal timecode source is started. |
| Fader Zero Action | No Action: The internal timecode source is not changed. Stop: The internal timecode source is stopped. Pause: The internal timecode source is paused at the current time. |
| Kill At Zero | Off: Timeline will remain active when the timeline fader is zeroed. On: Timeline will be killed when the timeline fader is zeroed. |
This option is useful for creating a complicated one-shot effect for busking. Create the effect as a timeline using internal timecode and set these options to Play/Stop - you can fire your effect just by raising the fader and when you lower the fader to zero the effect will reset. Timecode must also be unlinked to create a one-shot effect.
Release Tab
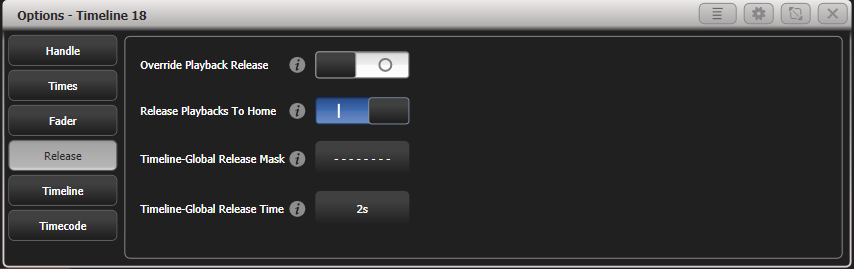
Sets what happens to LTP attributes in playbacks which are killed by the timeline. This can be useful to make the output more predictable when you are skipping around the timeline, otherwise you can get confusing LTP values persisting from previous playbacks.
| Option | Action |
|---|---|
| Override Playback Release | Off: The playback's own release settings are used. On: The Timeline-Global release settings override the playback settings. |
| Release Playbacks to Home | Off: LTP attributes are left when when killing playbacks. On: Attributes will return to home if no previous LTP values are set. |
| Timeline-Global Release Mask | Sets the Global Release Mask for playbacks triggered by the timeline (default no attributes released). Overrides your normal Global Release mask for items triggered by timeline - a warning is shown in the system prompt. |
| Timeline-Global Release Time | Sets the Global Release Time for playbacks triggered by the timeline (default 2 seconds). Overrides your normal Global Release time for items triggered by timeline. |
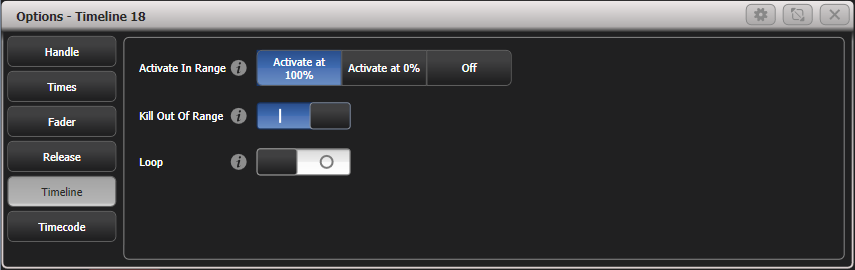
Timeline Tab
| Option | Action |
|---|---|
| Activate In Range | Activate at 100%: Timeline will be fired automatically at 100% level when timecode comes within the Start/End time range. Activate at 0%: Will be fired automatically but at 0% level (zero intensity) Off: Timeline will not be activated until manually fired. |
| Kill Out Of Range | Off: Timeline will remain active when the timecode goes outside the Start/End time range. On: Timeline will be killed when the timecode goes outside the Start/End time range. |
| Loop | Off: Internal timecode source does not loop when it reaches End Time On: Internal timecode source will loop back to Start Time when it reaches End Time. |
- The Loop option only operates when timecode is set to an internal timecode source.
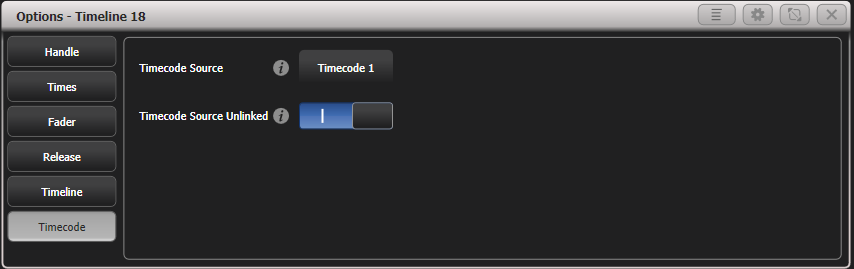
Timecode Tab
| Option | Action |
|---|---|
| Timecode Source | Sets the timecode source for the Timeline from 1-4 (see Running a Cue List to Timecode) |
| Timecode Source Unlinked | This is the same as the Link button in the timeline view - see Local timecode controls |
Time options
You can also set some options from the Edit Times menu - press Time (or the Edit Times softkey on the top level menu) then the select button for the timeline you wish to edit.
Set Offset
If the timecode you are using has a large offset or you have been given cue timings that don't match up with the timecode source, you can set an offset to make the cues match up instead of having to change all the timings. You can also enter small offsets of a few frames if the lighting cues are not quite synchronised properly.
- In the Edit Times menu press Set Offset.
- Using the Nudge Amount softkey enter a time amount to change the offset by.
- Press the Add or Subtract softkeys to change the current offset by the amount you set.
- The current offset time is shown in the prompt area while you are setting it.
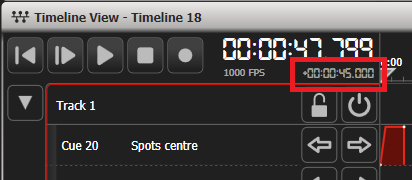
Once an offset has been set it is shown below the main timecode display in the Timeline View. In the picture below a small offset of 45 seconds is set.
Start Time & Duration
These options are a different way of setting the Duration / Start Time options in the Options - Times tab.